I came to Beefheart via a compilation cassette, or mixtape, in modern parlance, that a pal made for me, when we were both at secondary school. Thanks Edwin Wright, wherever you are (last spotted in Ely!).
Edwin put just one Beefheart track on said tape: ‘Pachuco Cadaver’, from TMR. I loved it, right from the get go. But for quite a long time I had no idea who it was.
Ah, the memories…
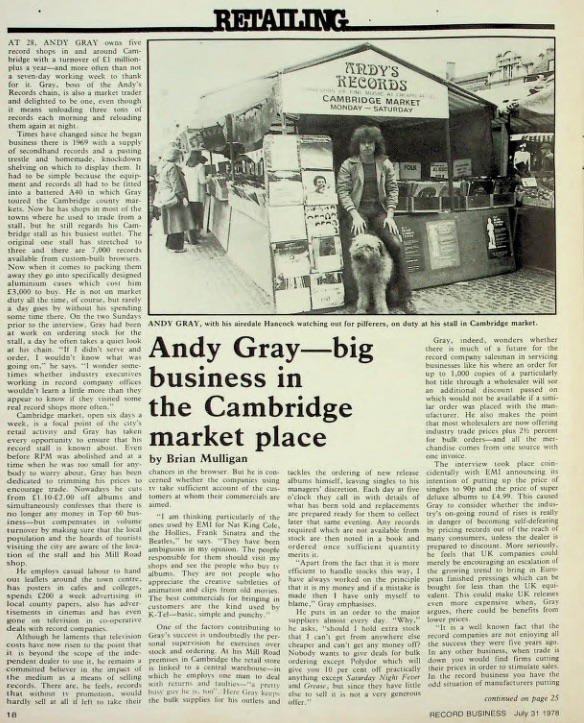
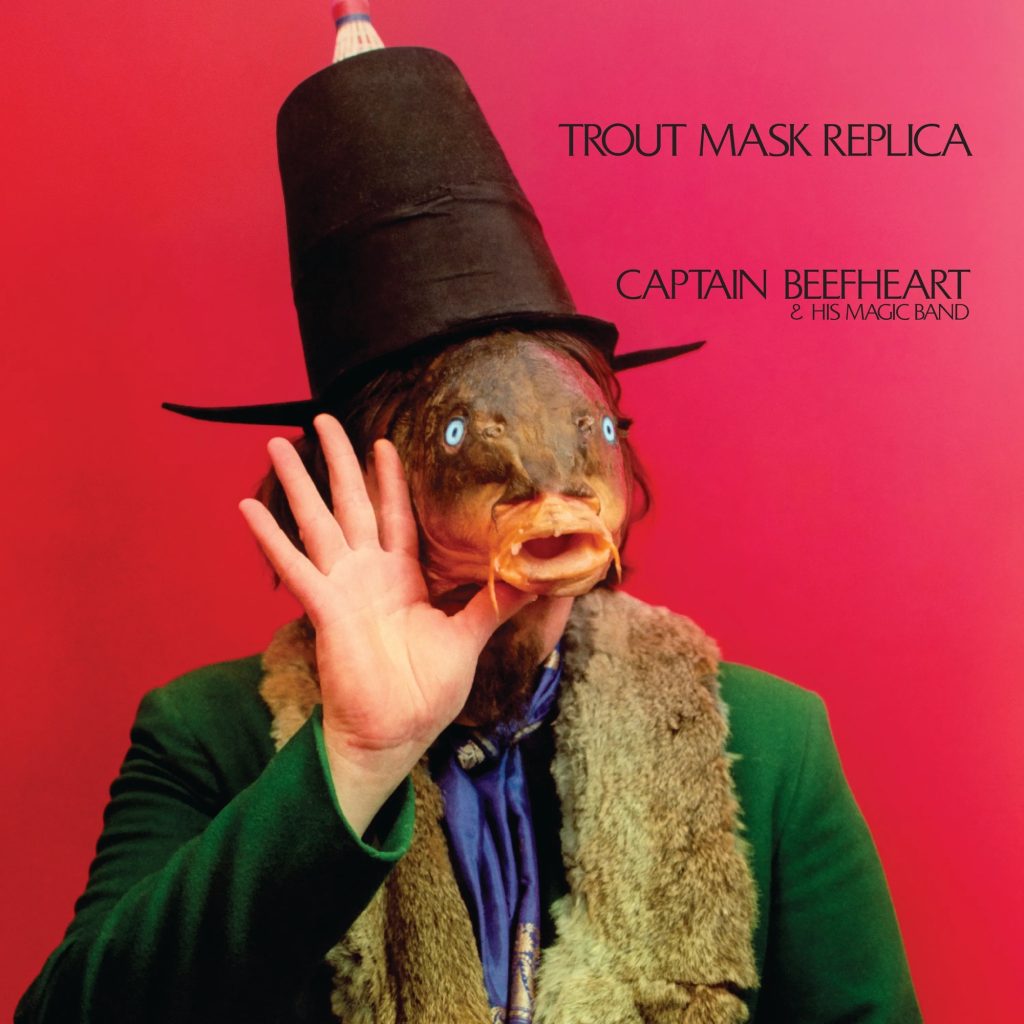
At the time – early/mid teens – I was starting to go into Cambridge on my own. My favourite destinations were record shops: Andy’s Records, Parrot Records, Garon. It was at a branch of Andy’s that I finally bought this:
And, lo and behold, within the labyrinth of musical madness herein, I found ‘Pachuco Cadaver’. Hallelujah!
I’ll always be chuffed that, for me, my route into the heart of Beefheart‘s musical genius was – like the music itself – immediate, and visceral. I knew it was unusual. But far from finding it grating, I adored it. Right from the outset.
For years after discovering this stuff, I’d hear about folk ‘finally getting it’, along with the oft-repeated – and ludicrously wide of the mark – myth that Beefheart taught the entire band how to play, and so on.
Many years later I saw John ‘Drumbo’ French, fronting a band keeping Beefheart’s musical legacy alive, at The Junction, in Cambridge (UK). I also interviewed him, whilst I was working for Drummer magazine. The gig was pretty poorly attended. And Drummer chose not to run the Drumbo piece. A sad reflection that Beefheart remains firmly on the outside.
This has been a lot of work. But it’s coming out pretty nicely. Far from perfect. But a massive learning process. I’ve discovered numerous things I would do better next time. But that’s part of the fun; learning on the job.
I made a little support, from off-cuts, and put a coat of teak oil on. These oils and go shed really make the good ‘pop’, as they say across the pond.
Teak oiled.
Should I shellac this? The shellac I currently have will darken it. Not sure I want that?
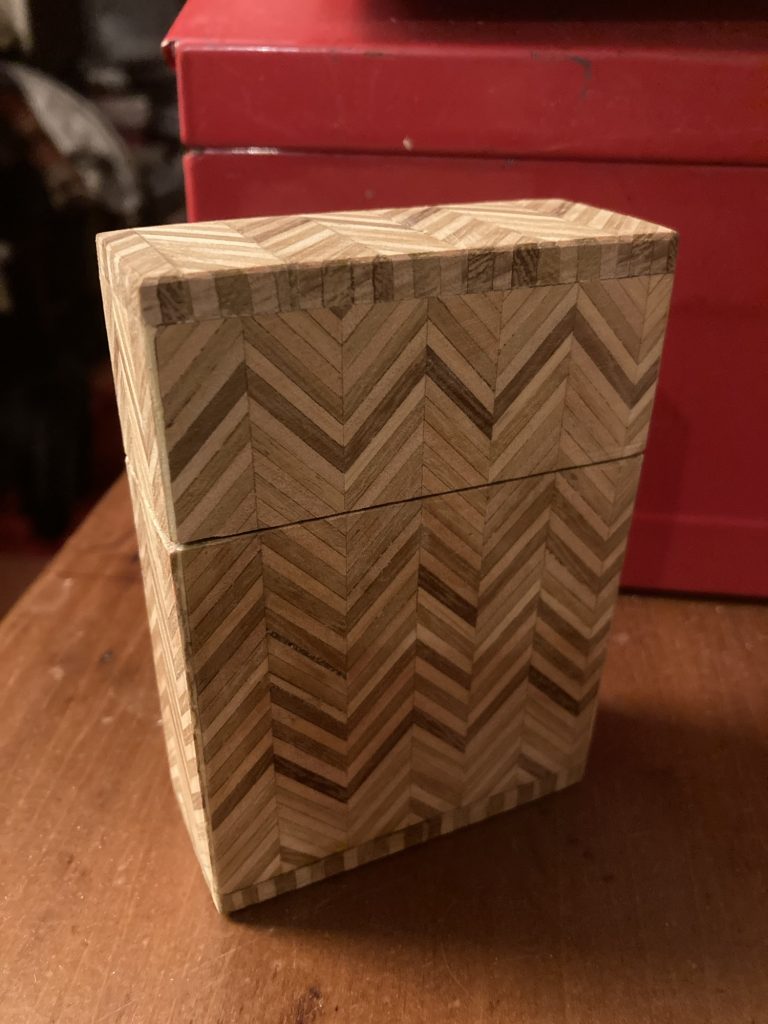
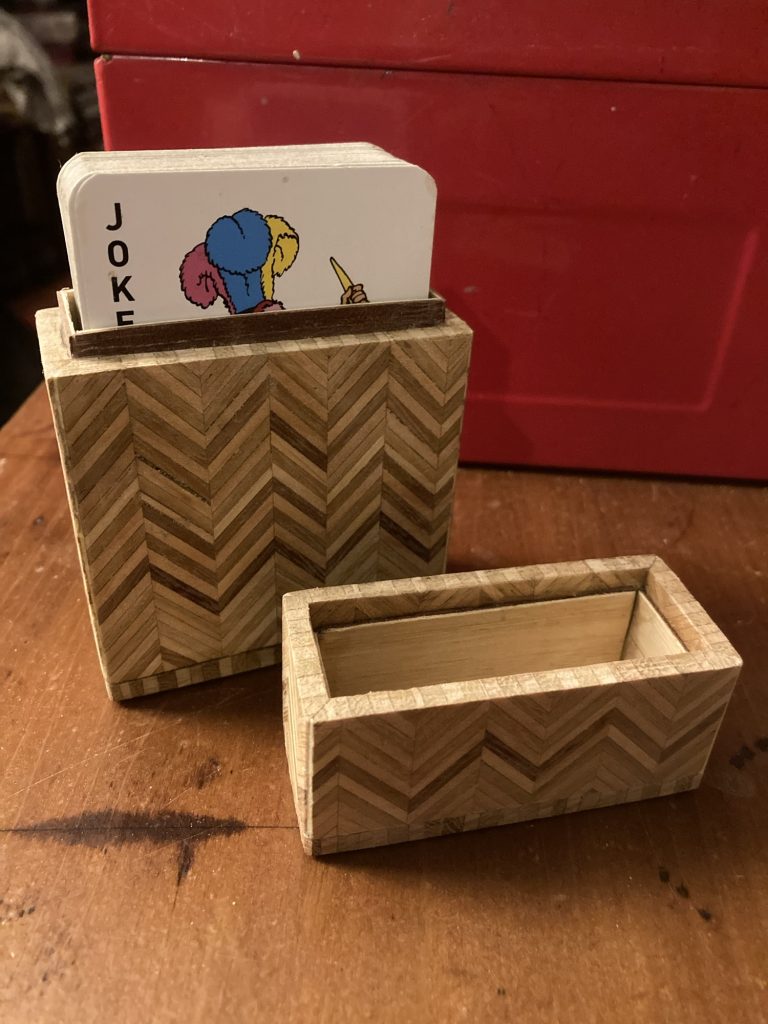
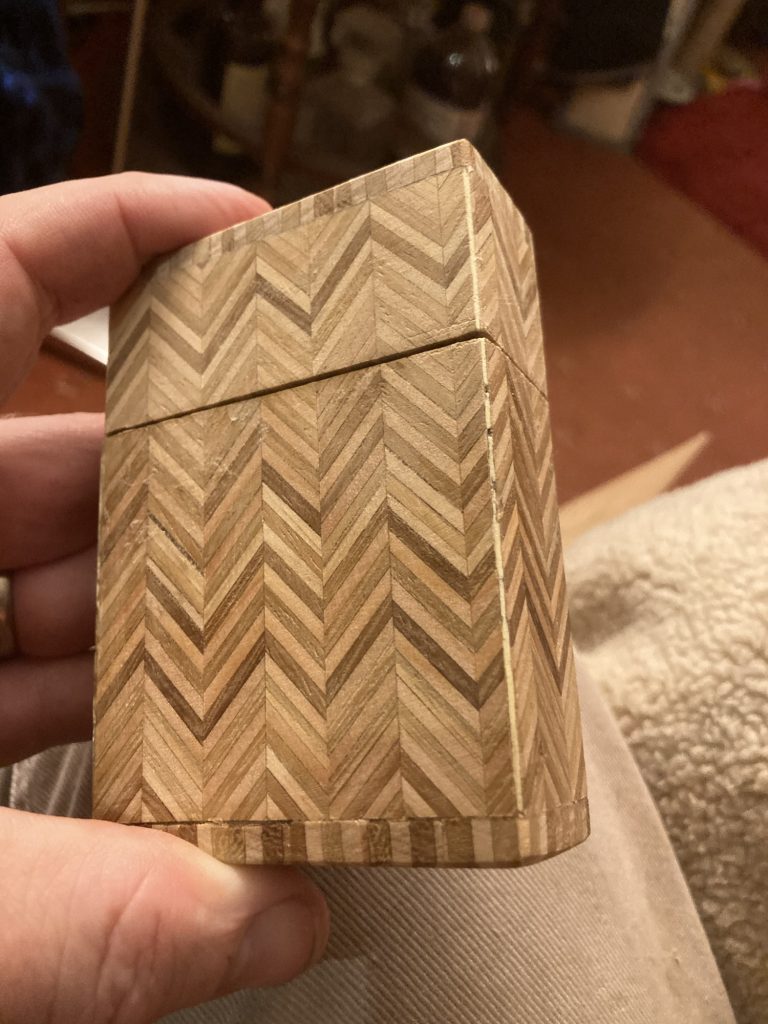
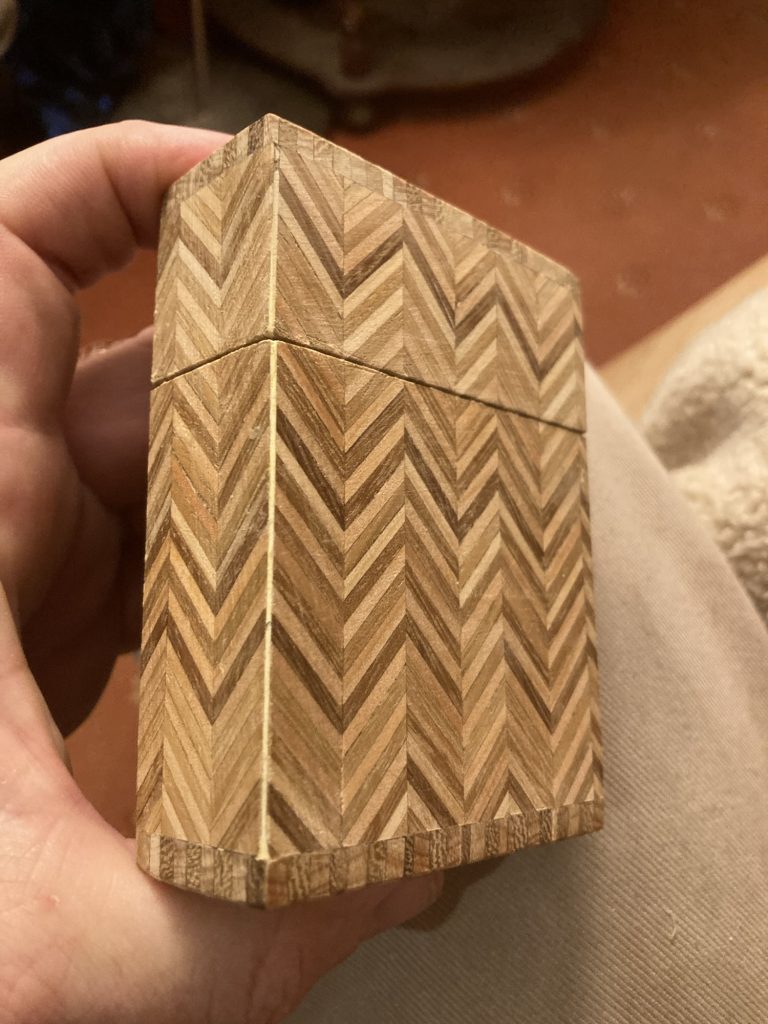
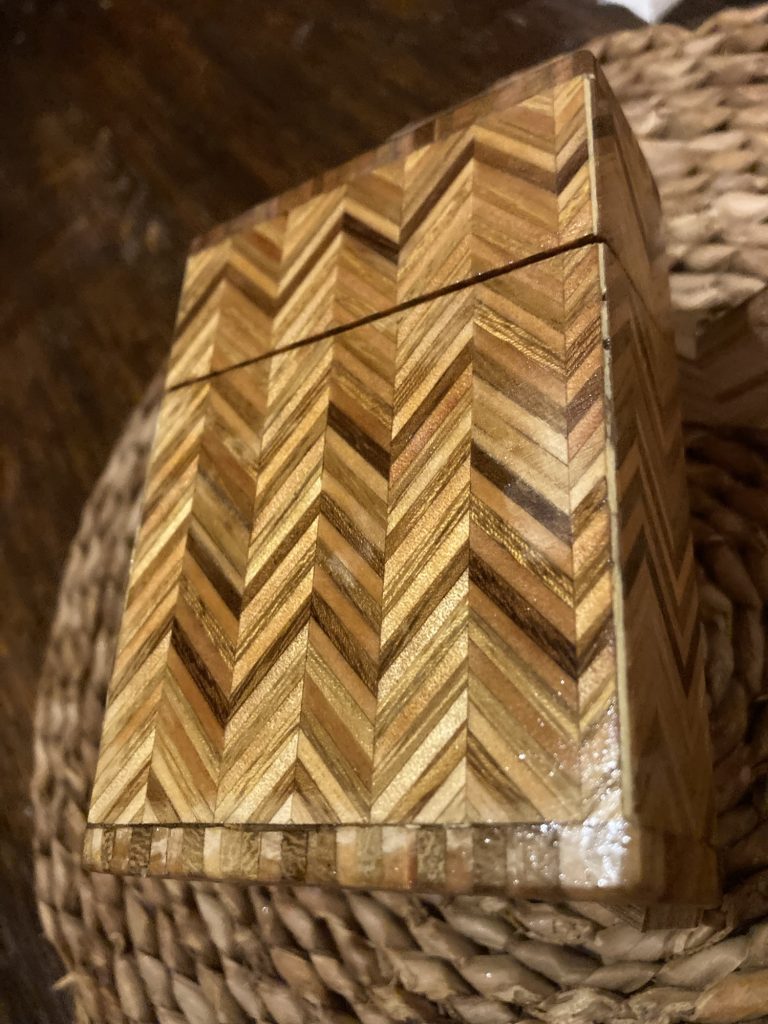
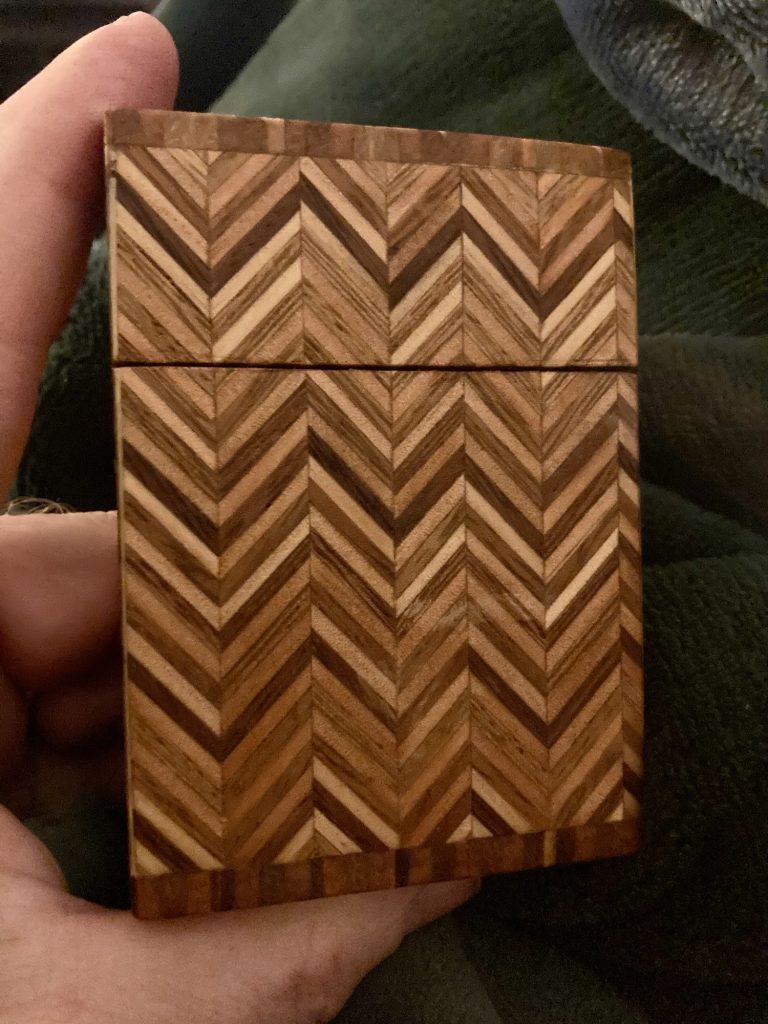
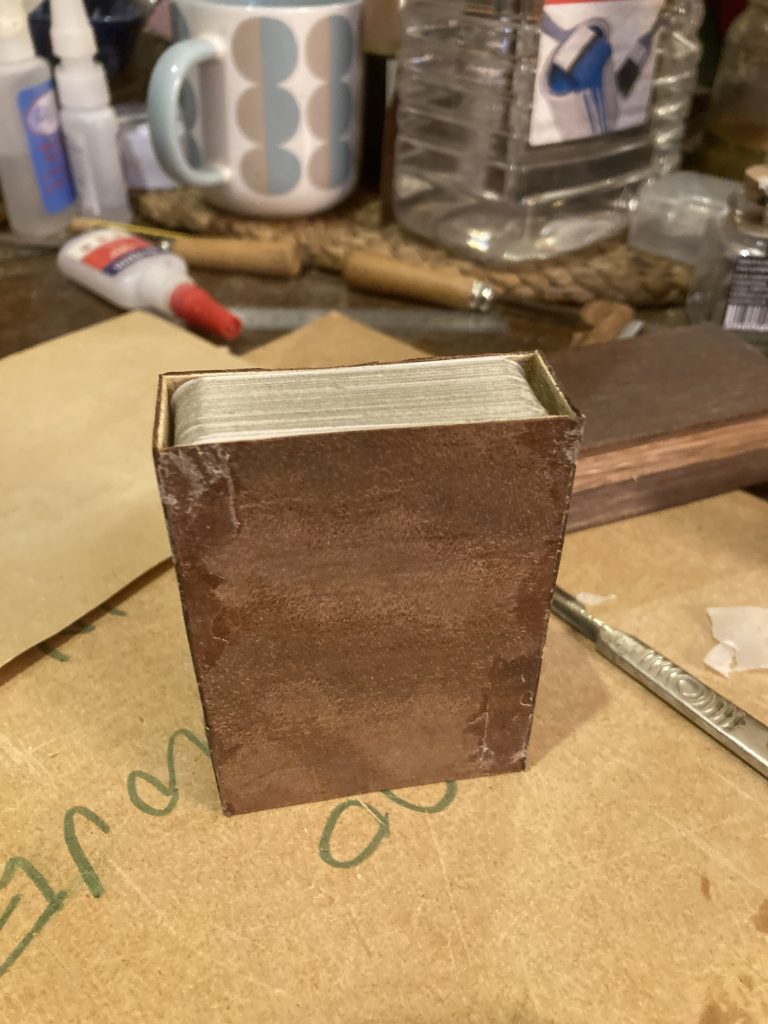
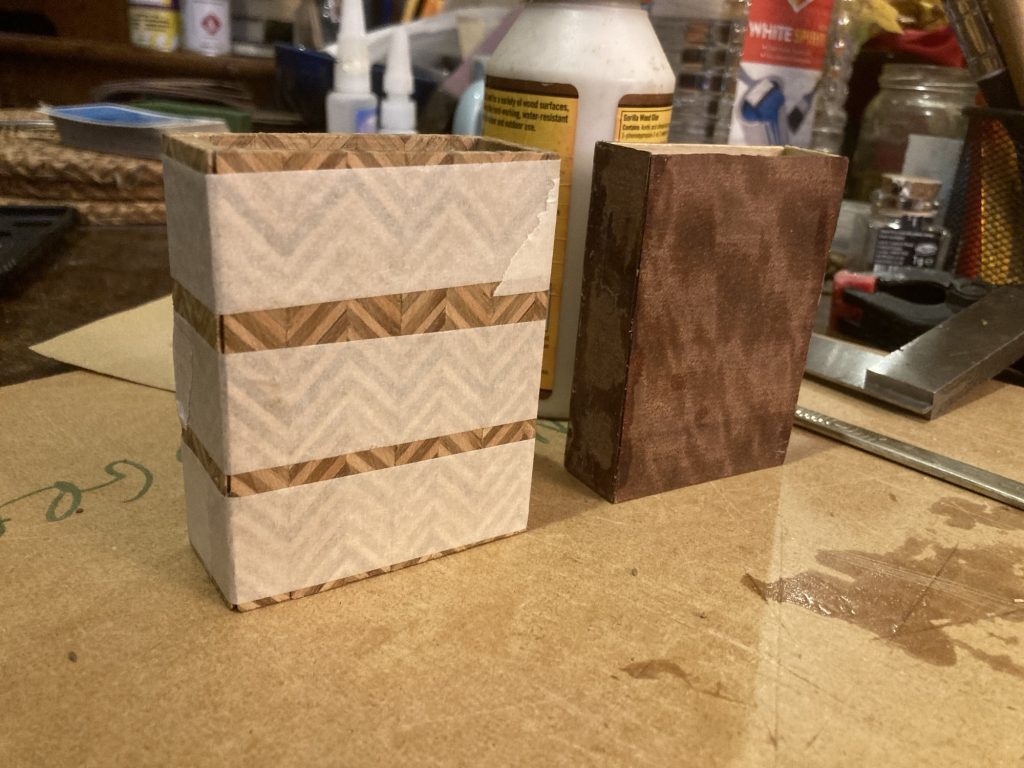
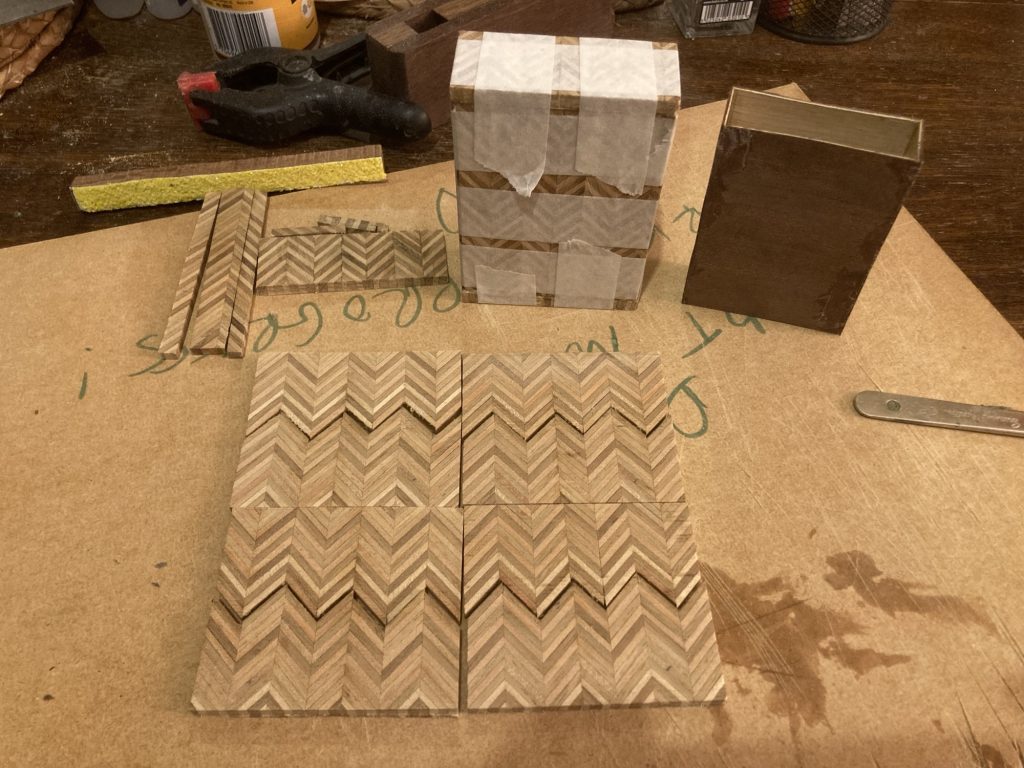
I decided to make a case for playing cards with this herringbone veneer. Here it is, above and below, at the end of the day, today.
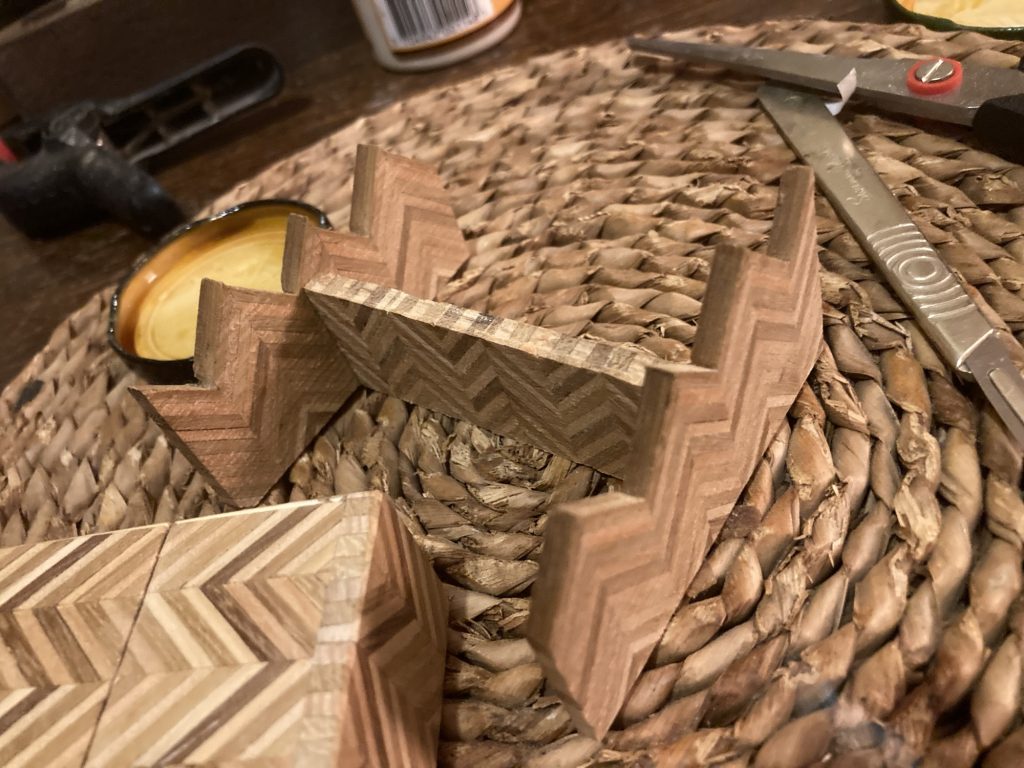
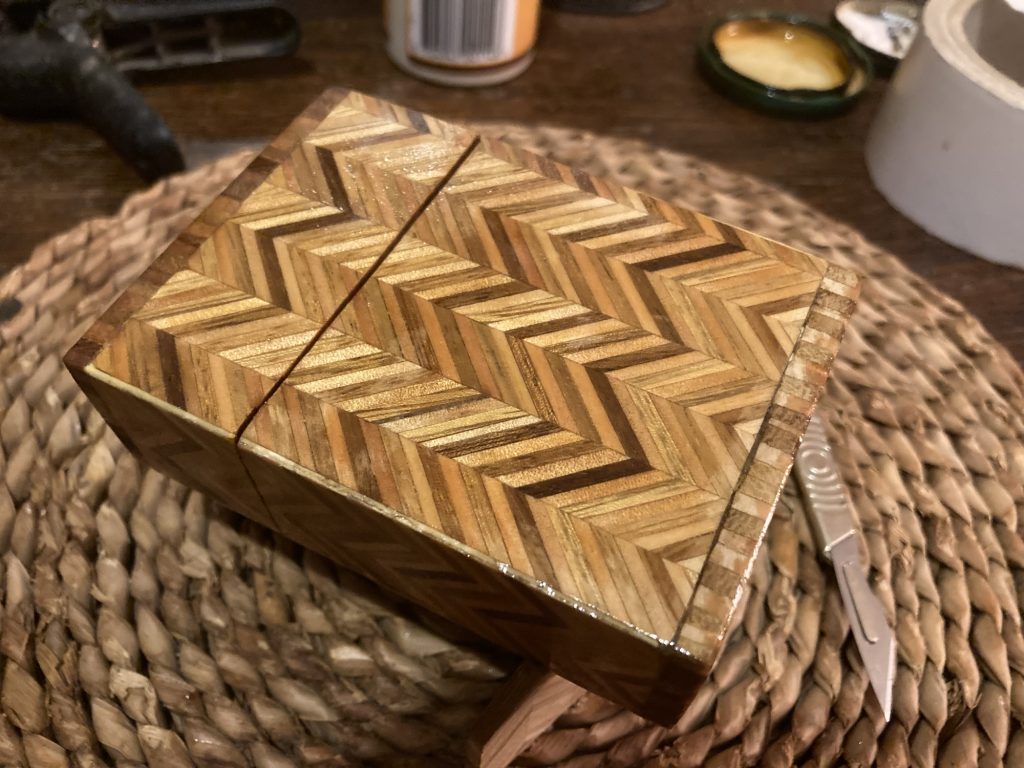
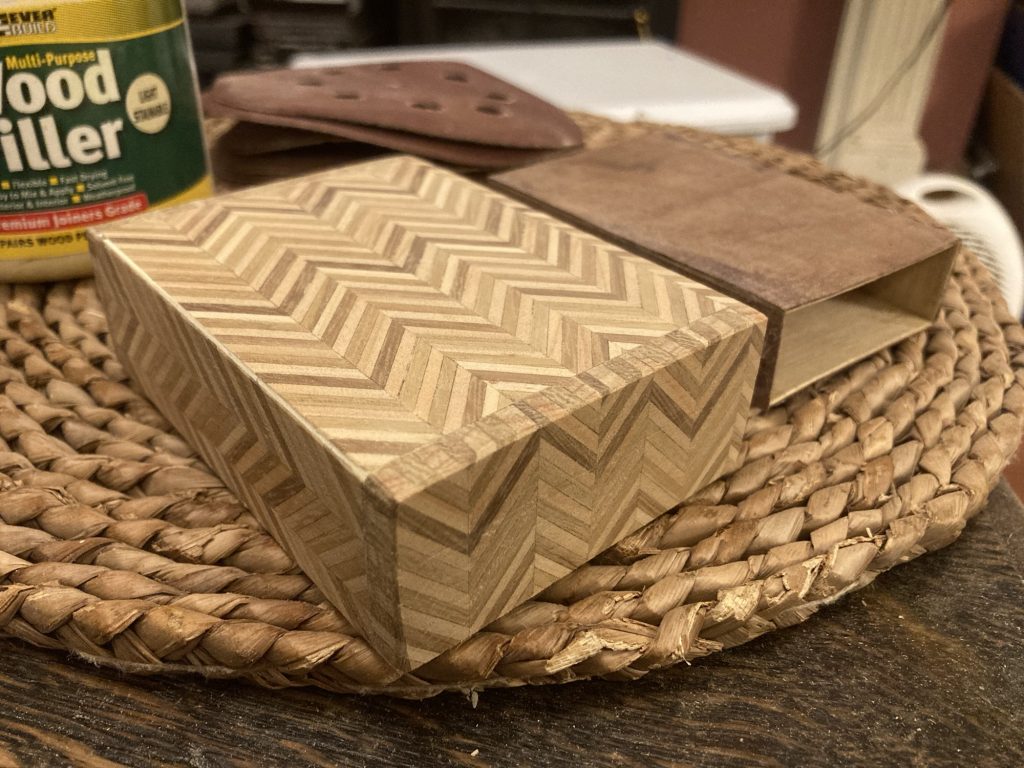
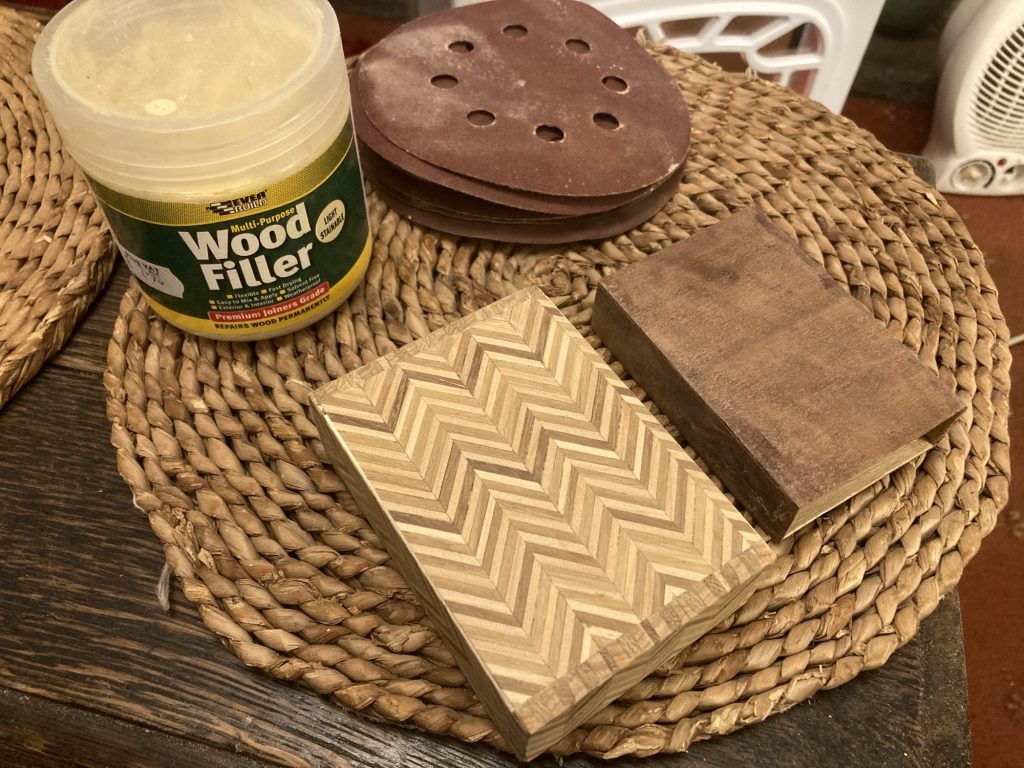
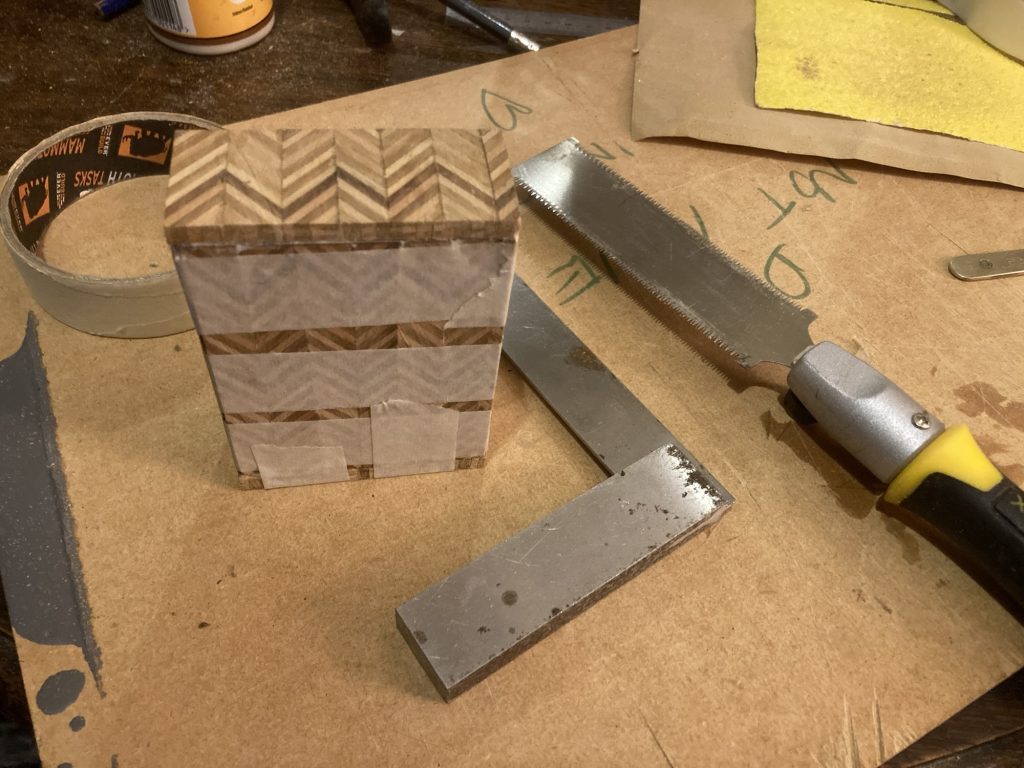
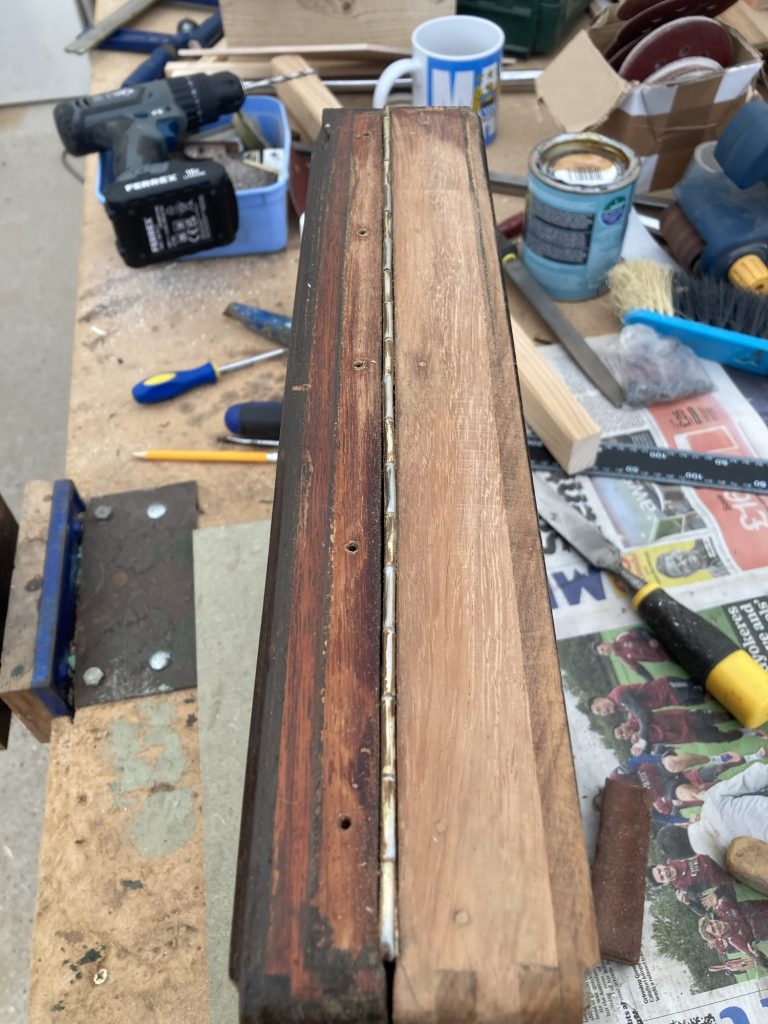
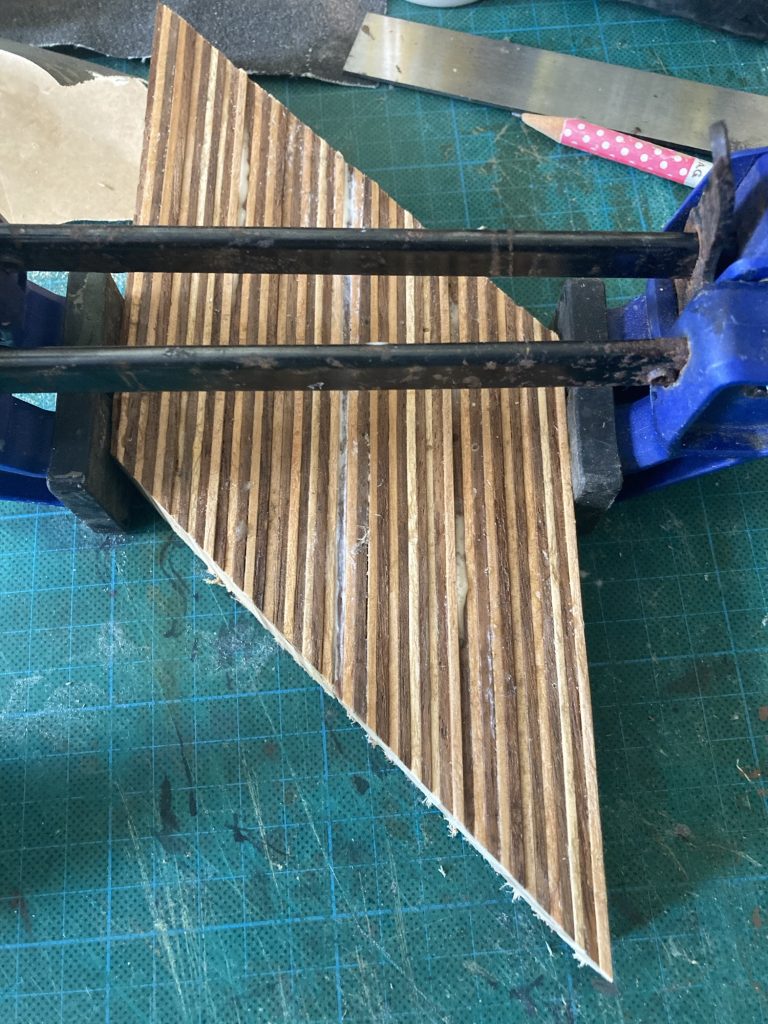
I did a bit of filling and sanding, where there were gaps. Cutting 45° angles, or bevels, into the panels, was very tricky. If I could’ve done that better, I’d not have needed to do so much filling. I’ll try and do better if I do the same sort of thing again.
There’s an inner sleeve – the thinner, darker, smaller part – and the thicker outer case.
Adding the filler…
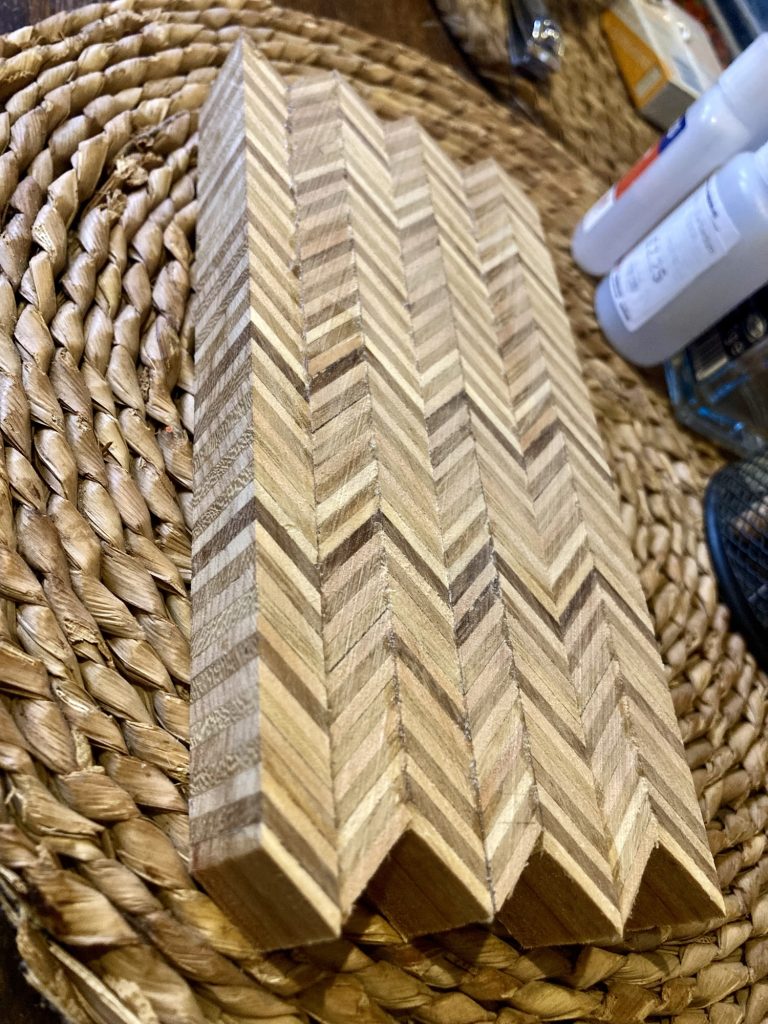
These leftovers might make an interesting box?
What can I make with the leftovers?
I’ll do more herringbone veneer soon. On a much larger scale; for guitars/drums. Meanwhile, this wee experimental project has been both frustrating and fun. And a very valuable learning experience.
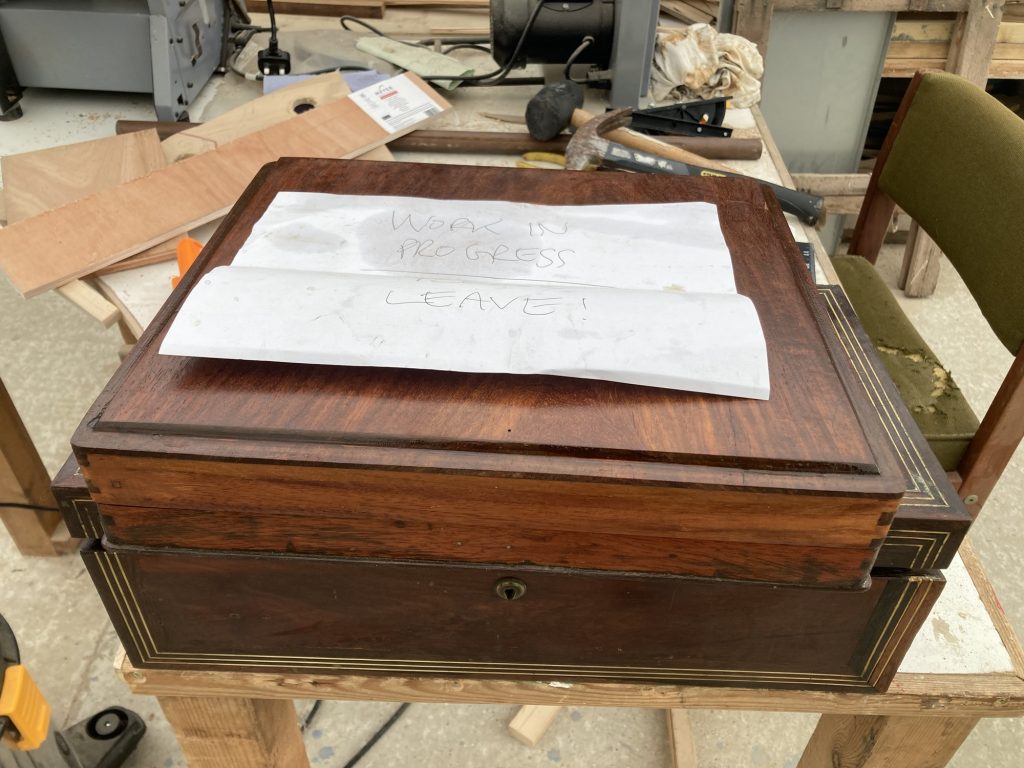
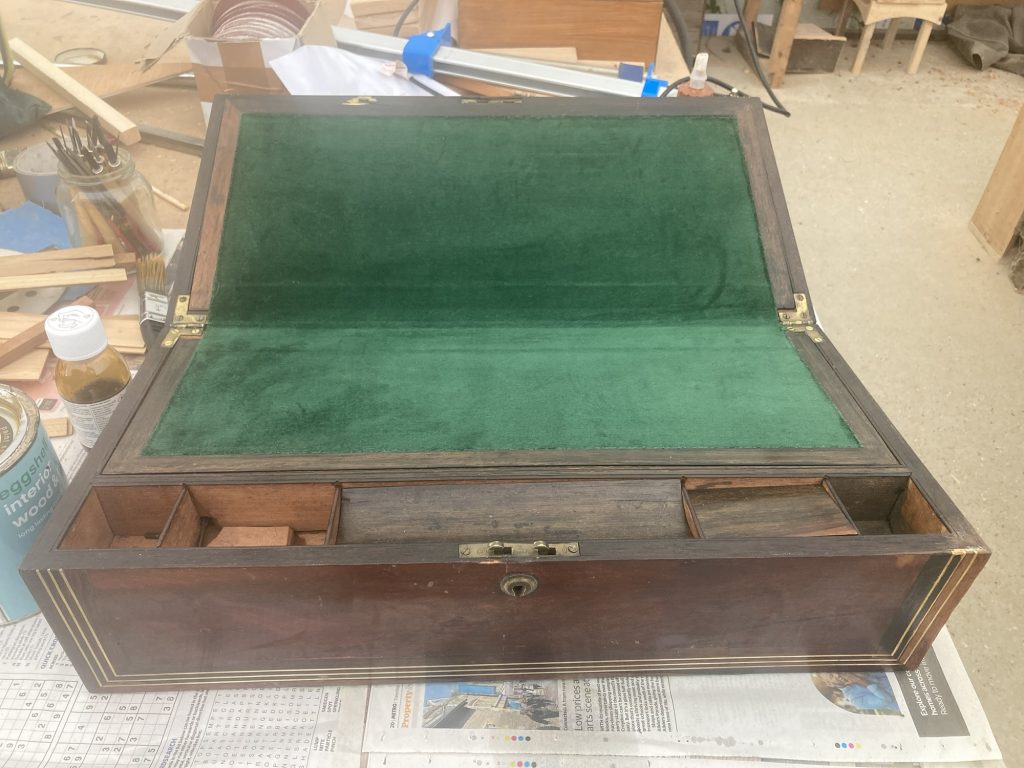
I’m currently working on two little projects for Teresa. One is the final fettling of the writing desk that was rescued from the local dump. The other is one of my earliest woodworker projects at our current home address. Both are pictured, WIP, above.
Before.After.Context.Ta-dah!
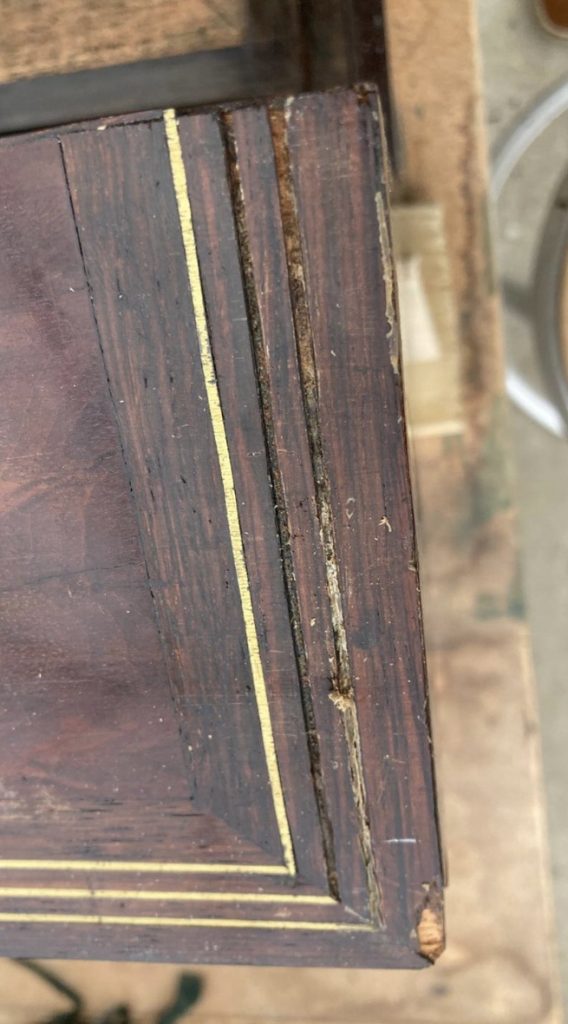
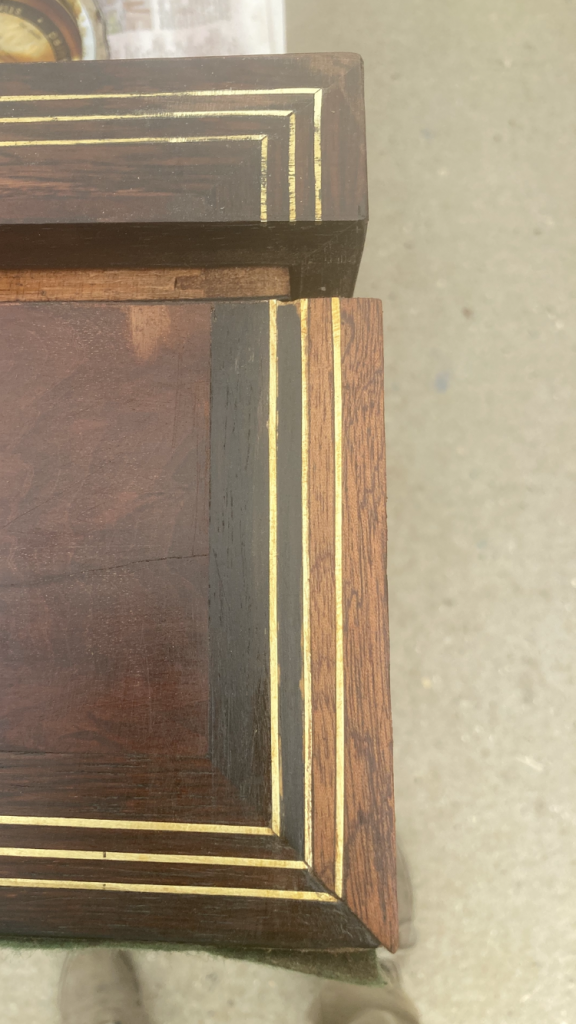
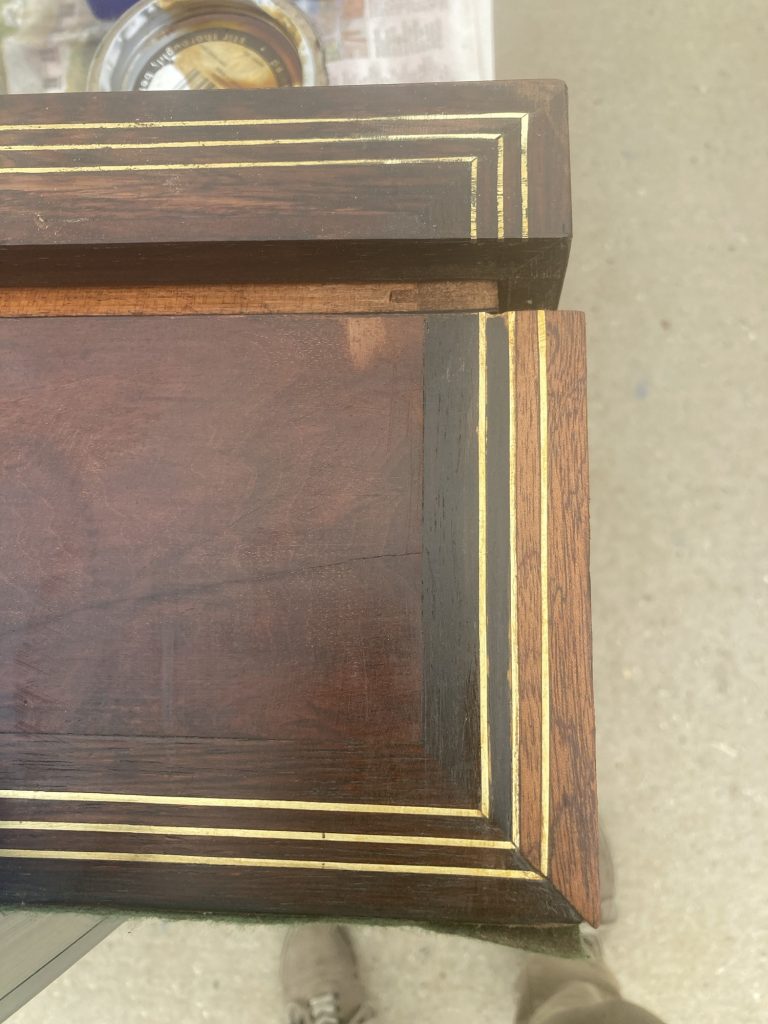
The writing bureau has required numerous fixes. Above is a bit of that work: replacing missing brass strips, and fixing broken veneers. Also added new green velvet to the writing surface.
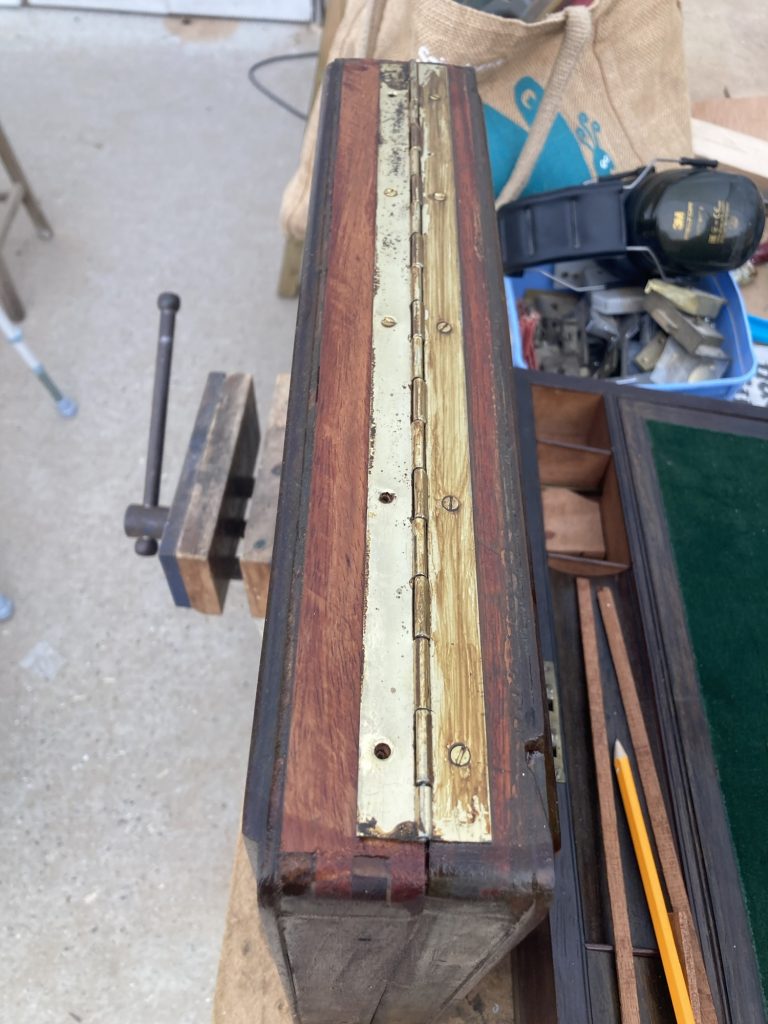
Moving the hinge…Much better.Filling holes.
The sewing/box, above, is made from the rosewood table and chairs I got, many moons ago, either via Freecycle or Facebook Marketplace/Gumtree, or whatever.
Originally the piano-hinge was on the outer rear, and looked plain ugly. So I moved it to a more discreet position.
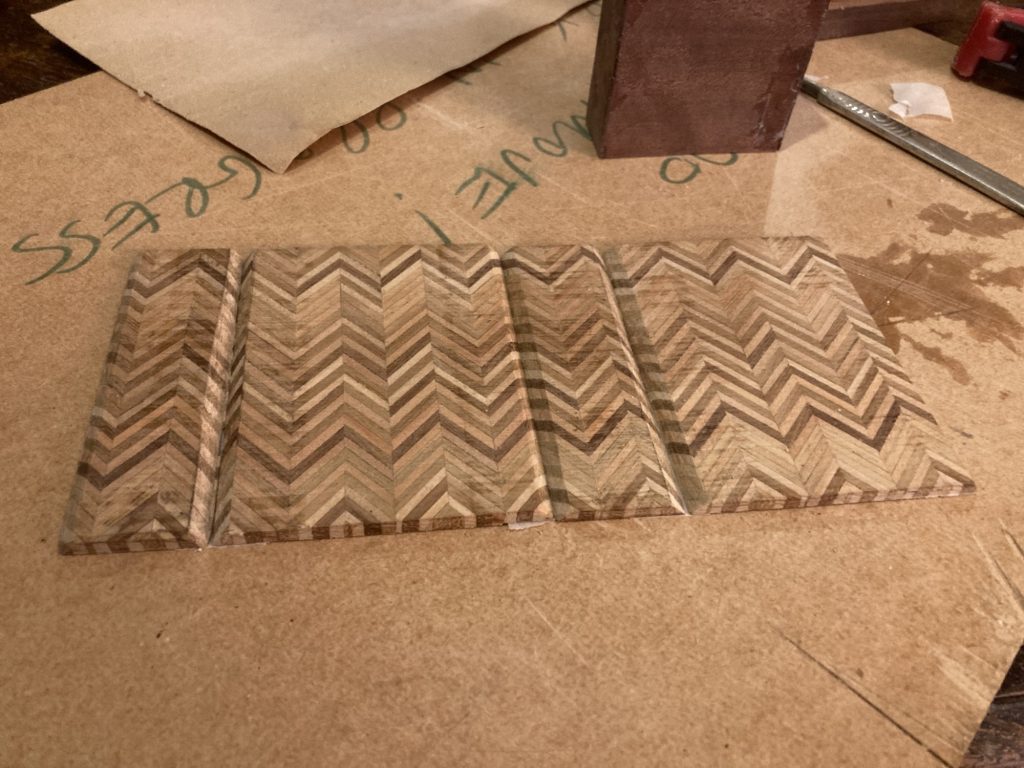
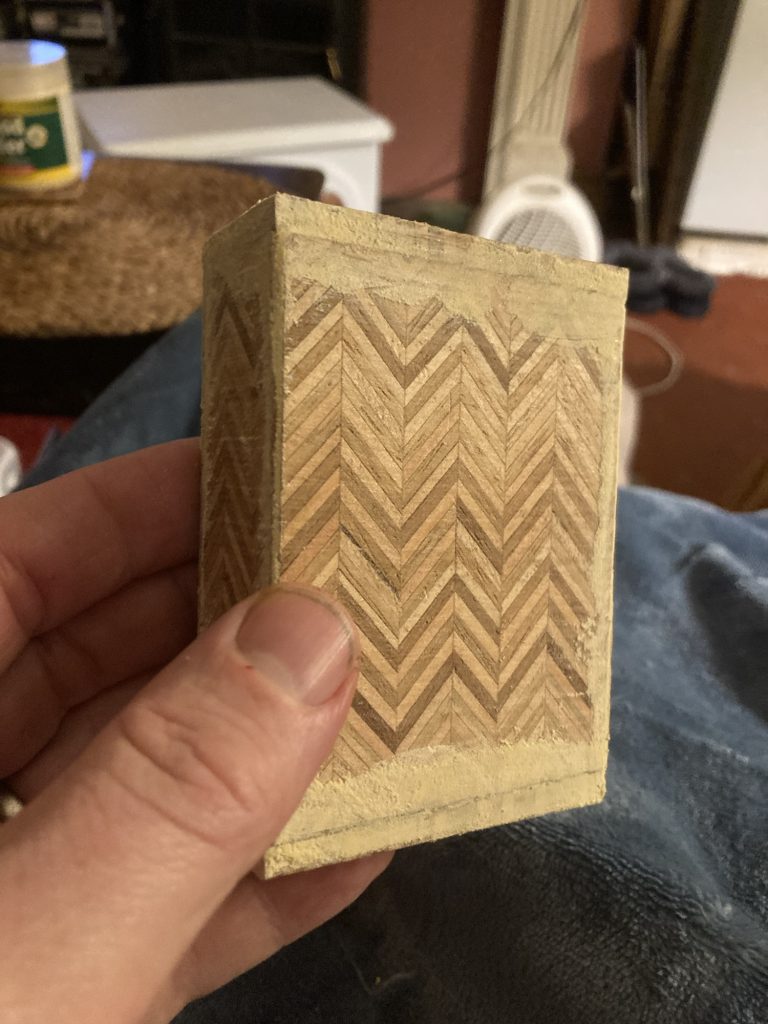
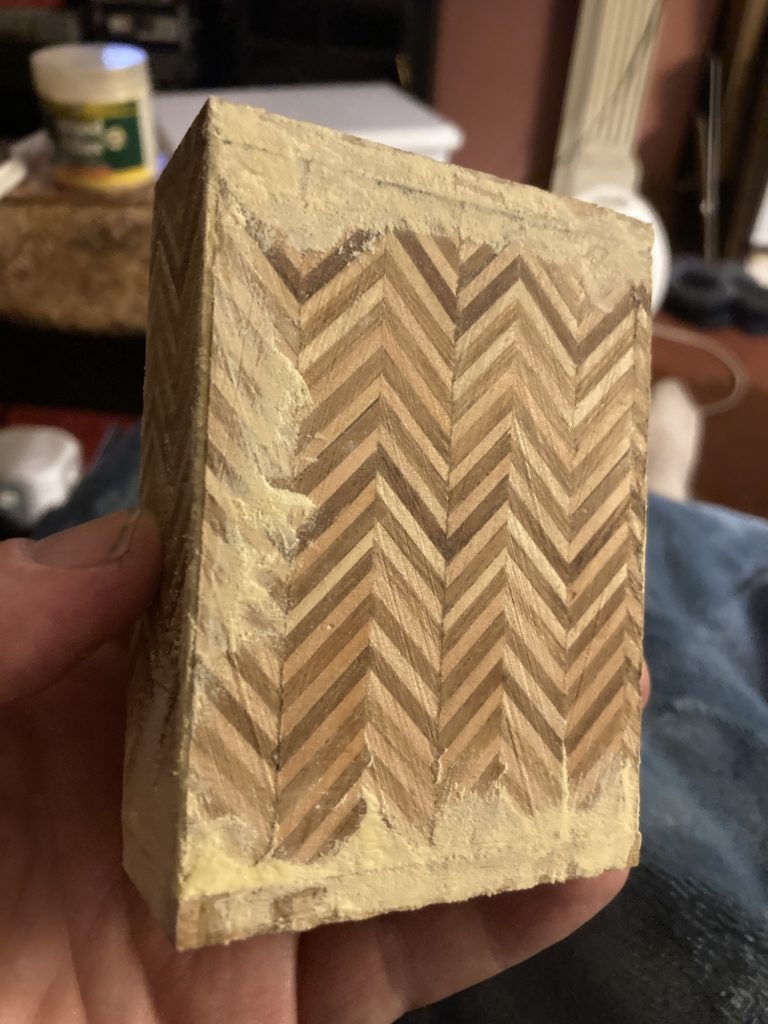
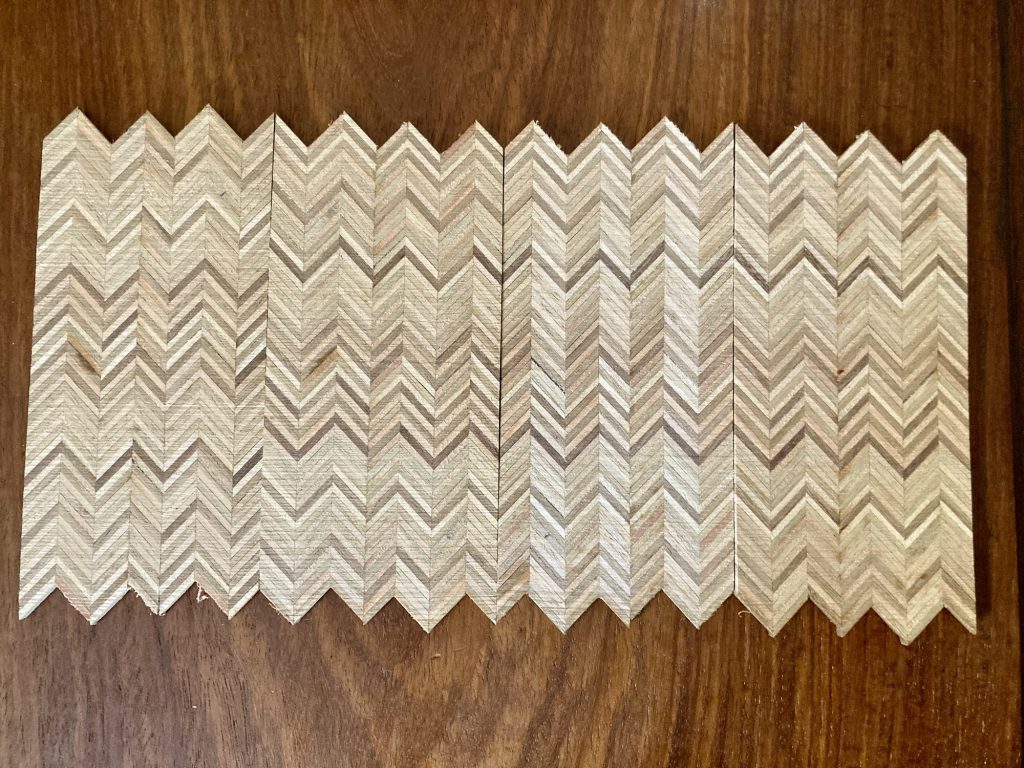
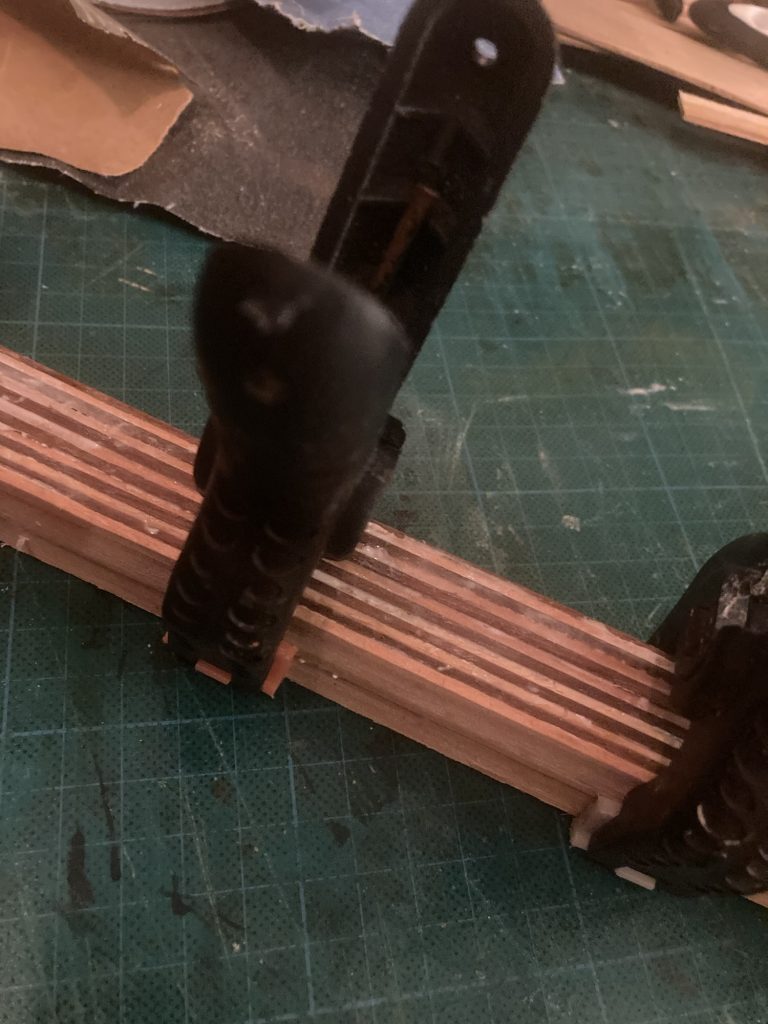
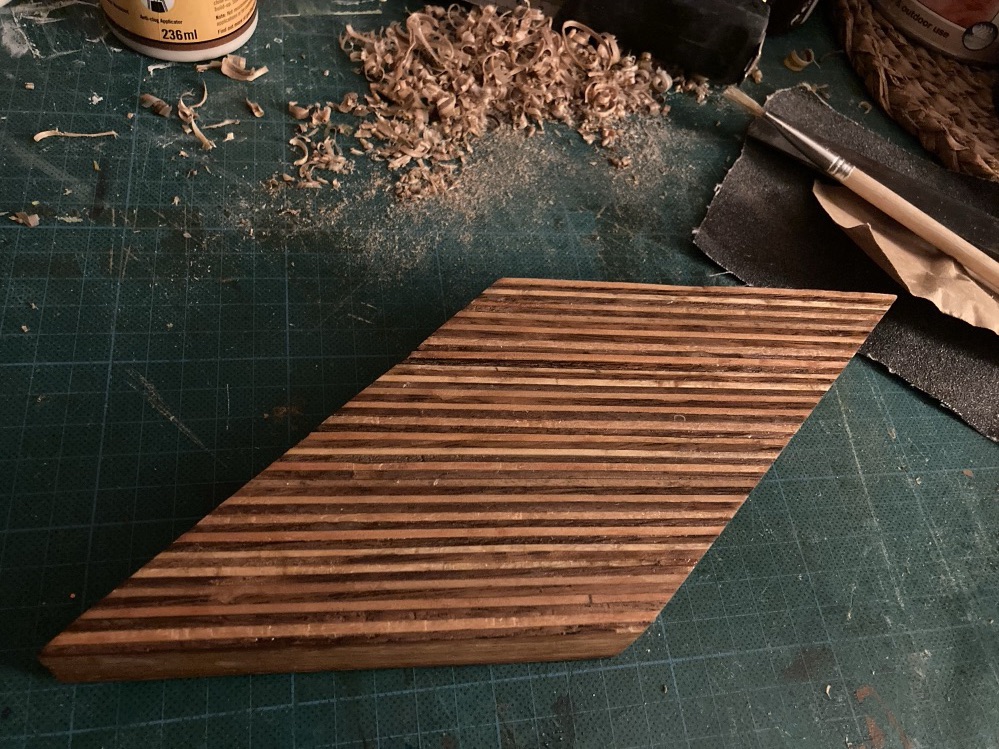
I’ve been wanting to make up my own herringbone ply veneers for many years. I finally got around to trying the idea out.
This first attempt is made from two lots of scrap-wood timber: one dark, one light, ripped into thin strips on the table saw at Shedders & Fixers, and glued up as a long strip.
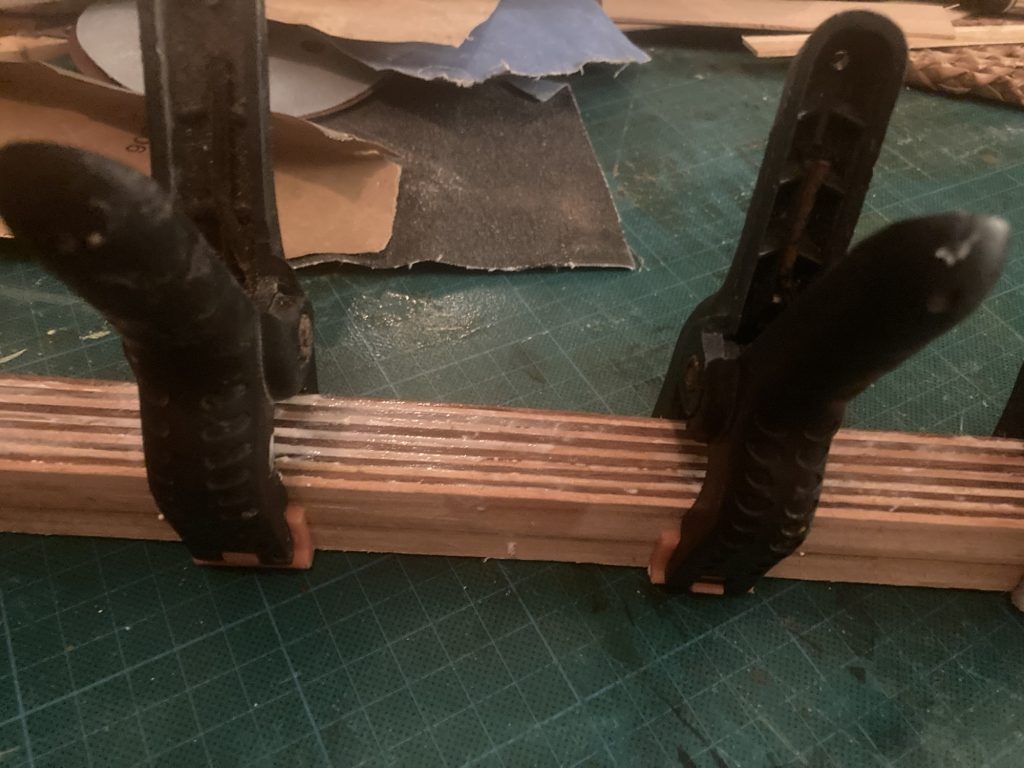
This first strip is 12 plys thick. I glued them on a slight slant. I neatened up the ends, cut across at the same slanted angle, midway, and then glued the block again. Giving a new slanted block 24 plys thick. Repeat, for 48 plys.
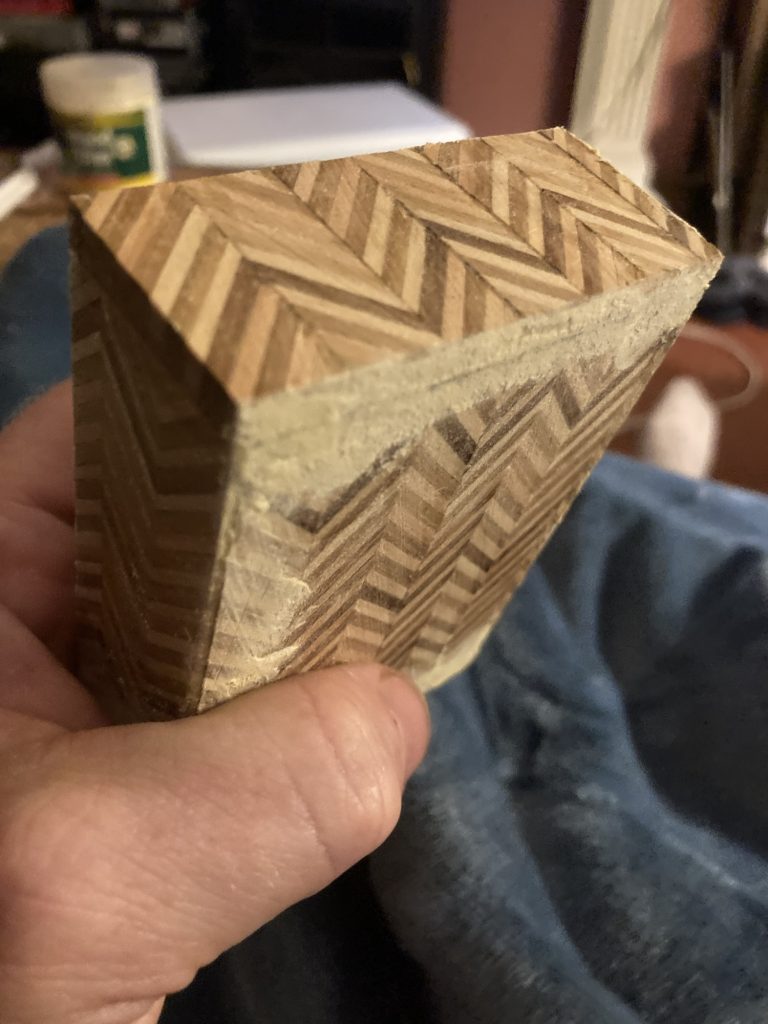
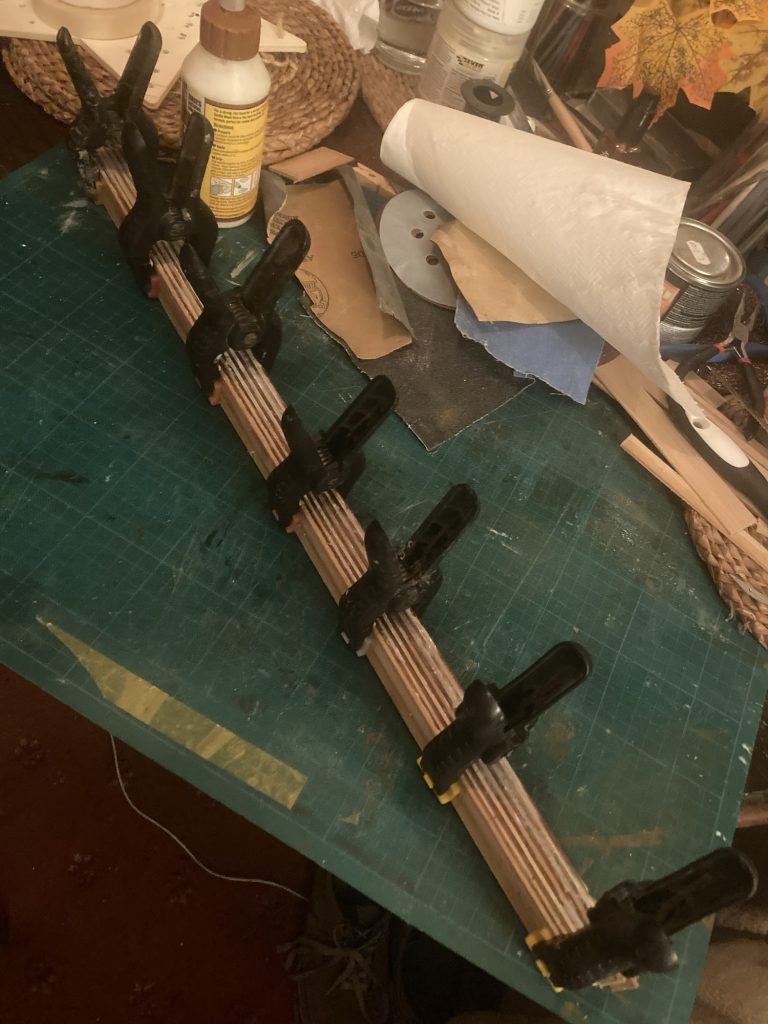
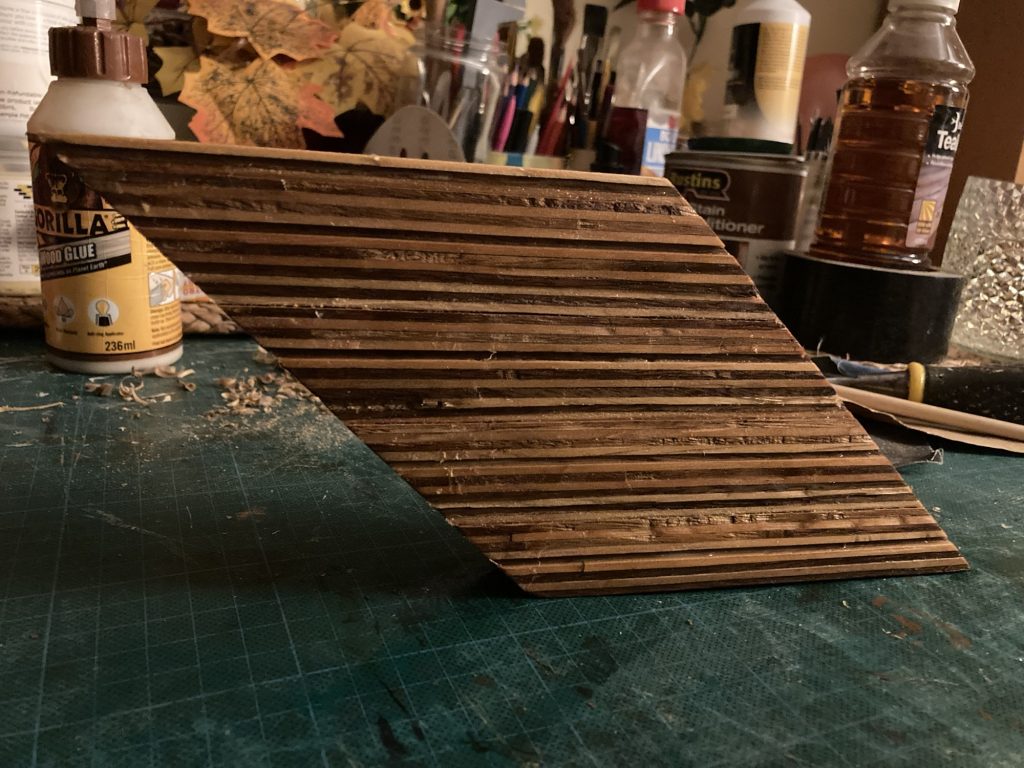
The next step is to slice the resulting block into strips. I ended up with seven. One is ever so slightly thinner than the others. I put that on the left, as can be seen below.
The final step is cutting the resulting block into sheets of veneer. Again, I did this at S&F, on their bandsaw. I owe Mick O’Brien thanks, for showing me how to successfully do this.
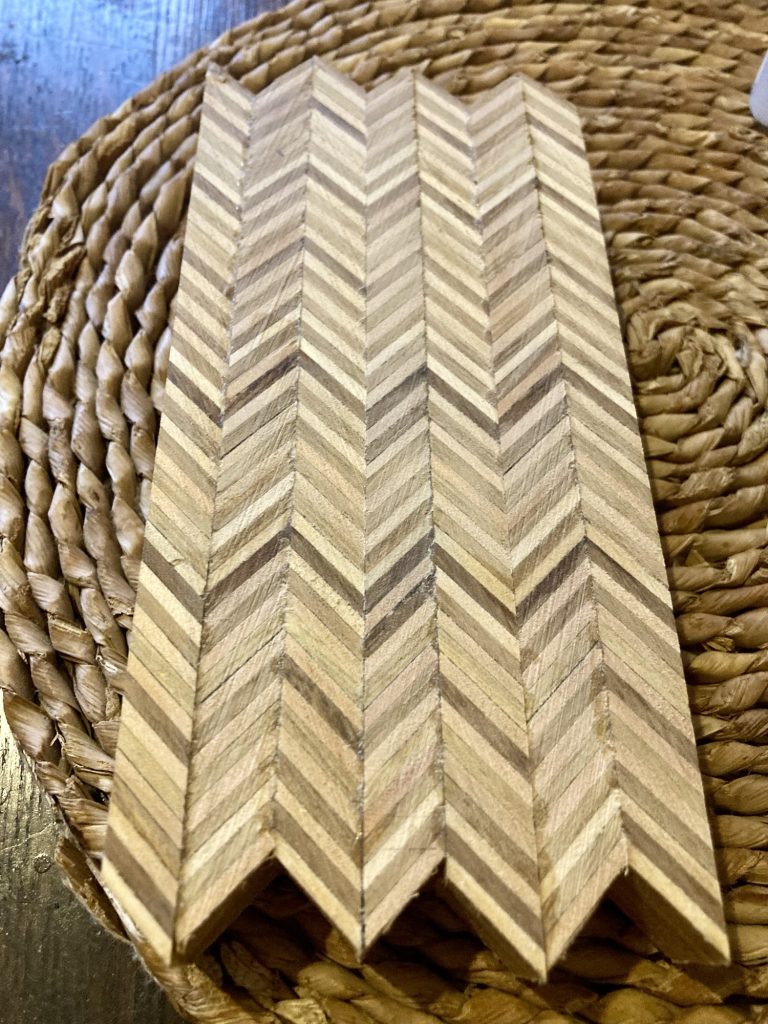
For a project like a drum wrap, or a guitar, I’ll need a heck of a lot more. But for this first attempt – as much about learning how to do it, as anything else – a small amount is fine.
Might make a little box for carrying playing cards in, with what this has yielded.
Trump did incite insurrection, on 6th, Jan. The Panorama clip is a questionable edit. But Trump’s part in the attempted coup, and his pardoning of countless convicted criminals involved in those events, are far worse.
Trump lies and bullshits all the time. When is he going to be called to account for the torrent of misinformation and b*llsh*t that flows out of his mouth, and from his administration, constantly?
The BBC is a part of The Commons, a ‘public good’. As such it should and very often does strive for balance and impartiality. In a media landscape dominated by outlets pumping out the agendas of the super-rich, it should be treasured and protected.
Instead, the Tories, in particular (but also, nowadays, the beyond appalling Farage), have been constantly undermining it. As have the vast swathes of billionaire owned media.
The accusation of ‘too much left bias’ from the BBC is risible. For many years now the Tories have been placing more and more of their donors and cronies in managerial positions (people like Richard Sharp and Tim Davie).
And the rank and file of much ‘factual’/news coverage TV, and even many talking heads/presenters, have been predominantly more right wing…
Tim Davie, Tory stooge.
Right-Wing/Conservatives @ BBC:
Tim Davie
Richard Sharp
Andrew Neil
Jeremy Paxman
Laura Kuenssberg
Nick Robinson
Matthew Parris
Michael Portillo
Fiona Bruce
Jeremy Clarkson
Jeremy Vine, no (known) affiliation
 but as an Anglican, likely Con?
Other Political Affiliations:
David Attenborough, ‘left-wing liberal’
 (no known party affiliation)
Ian Hislop, no (known) affiliation
Steven Fry, formerly Labour
Melvyn Bragg, Labour
Ed Balls, Labour
Bamber Gascogne, Lib-Dem
  (got to go back a ways for any Libs!)
Ok, not a scientific study… but this ‘off the top of my head straw poll’ would indicate much more of a right leaning bias.
Left wing bias? Fuck off! It’s just that the BBC is not right-wing enough for fascists like Trump or Farage. But they can go to Hell!
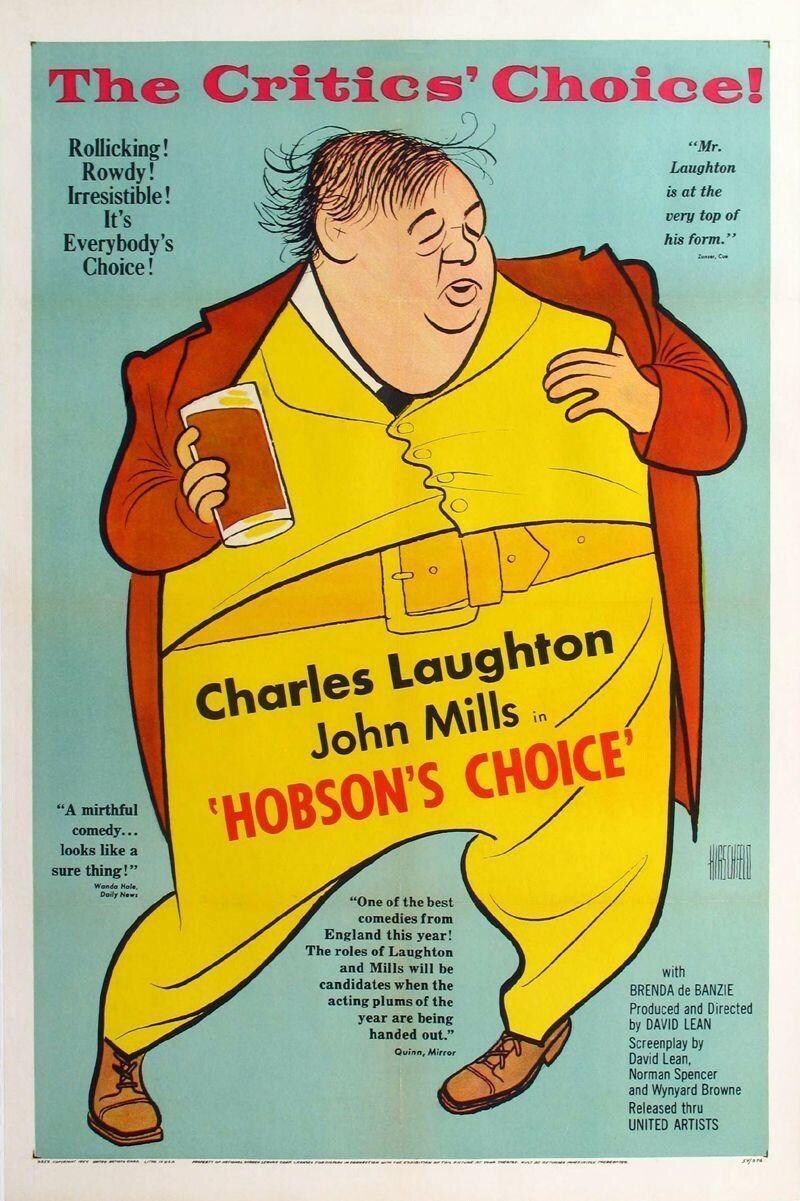
What a terrific film. They don’t make ‘em like this any more. And we’re all poorer for it.
We watched this again, just last Sunday. And thoroughly enjoyed it. Charles Laughton is superb as the bossy, drunken widower – the titular Henry Hobson – running a shoe shop, in which his three daughters (unpaid!) and troglodyte workers (paid a pittance) do all the work.
His attempts to rule the roost, in the style of a Victorian pater familias, evidently successful, to a point, up till now, are fraying at the seams. In Henry’s plans, his eldest daughter, Maggie (superbly played by Brenda de Banzie) – at 30 – an old maid, past any marital prospect. Destined to see out her life as his servant, effectively.
He desperately wants rid of his two younger daughters, via marriage, feeling hen-pecked, as the lone man in a household otherwise solely female.
The expression Hobson’s choice has a slightly slippery meaning. But it’s at the core to this story: things unfold not as Henry wishes, but as they will. His ‘choice’ is really no choice at all. Or if it is a choice, it’s choosing to submit to a kind of ineluctable fate.
Very luckily for Henry, Maggie turns his plans upside down, becoming the first of his daughters to marry. And, what’s more, marrying Will Mossop, his ‘boot boy’ (John Mills, in forelock tugging yokel mode!). They then set up as rivals of Henry, and pinch all his best business.
He, meanwhile, descends – literally – into alcoholic oblivion. This sounds like it could be the prelude to a very dark, dystopian turn of affairs. But this isn’t the post ‘60s 1970s come-down, when so much I name took such a bleak turn. It’s 1950s Britain. And an eccentric one, at that.
Maggie, who has been managing Henry’s shop so expertly, having pinched and married his star shoe and bookmaker, is like a fairy-godmother of the best kind. She contrives to reunite so many unravelling strands, all seemingly headed for disaster, into a happy knot.
Sure, this a bit dated in many ways; a bit corny, perhaps. Almost Dickensian in how it both celebrates and critiques a bygone era. But it’s also quite radical in several ways: a very strong woman, at its heart; social mobility/the changing of the guard, and other issues of class.
Filled with warmth, humanity, humour, and even a very unfashionable optimism, personally, I love this film. And absolutely recommend it.
I’m anticipating that this little essay won’t be popular with many folk.
It’ll upset the Gammonry, obviously, as anything that isn’t moronically monosyllabic hate-filled tripe does. But it’ll upset the liberals as well, perhaps. We’ll see, I guess?
I’ll try and keep this brief and to the point. But that is hard, given the enormity and complexity of the many interrelated issues.
Before I get going, why am I even bothering with this? There are two main threads to the answer: motivation, and the subject itself.
First, the latter: I’m prompted to write this due to the tidal waves of vacuous crap that one encounters on social media around Remembrance Day (today!) [RD, hereafter, for brevity]. I want to address that later.
Secondly, as a wet behind the ears country bumpkin, newly arrived in London, studying art and art history, I wound up interviewing Noam Chomsky, for a putative student rag that never really took off. It was a disaster. But you learn from your mistakes. At least I hope we do?
My key issue that I’d hoped to explore with the famed linguist and philosopher was ‘why bother?’ In relation to his stuff about manufacturing consent, and engaging with politics. This seemed so alien to him that it appeared to irritate him. The interview was a shambolic mess. Or at least that’s how I remember it.
The point of this reminiscence is this: I find ‘The Man’ has already defeated me; I’m simply overwhelmed by the oppressive state of the world as it is, as I experience it. Any desire to engage is punched out of me, before I can even try and get in shape.
To live like that is to live defeated; it’s enervating and depressing. But I think it’s poss’ far more a norm than is generally admitted. Sadly, Stockholm Syndrome means that many might not even see it. They’re so embedded in The Matrix of everyday consumer Crapitalism that no other reality seems plausible, never mind possible.
Anyway, in moments of higher energy and more optimism, I’m with Chomsky, in wanting to create a better present and future, somehow. So… enough with the digression. Let’s get to the meat…
Excellent.
WAR
I believe that war, like religion, has been essential to getting us to where we are today. And as much – maybe even more? – in a good way as a bad way. But that’s a whole huge other debate from the one I’m concerned with here.
Like religion, however, whilst essential to our survival and thriving up to this point, we may have reached or be reaching a point where it is becoming less beneficial. Even counterproductive.
Just as religion’s explanations of what we don’t understand have been and are being replaced almost entirely by better understanding, through science, so too ‘politics by other means’ – aka War – now that we have world-obliterating tech, may no longer be the ‘least of all evils’ it once, arguably, was.
REMEMBRANCE
The way WWI and WWII are talked about – in the popular culture soundbite arenas of social media – esp’ in the run up to RD – is stupendously one-dimensional. Anyone who actually studies these conflicts will know that they were neither of them righteous anti-fascist Crusades.
Both world wars were essentially started (WWII), or escalated (WWI), by the kind of 19thC empire-building associated with Britain’s short-lived global dominance.
The hordes of the lower orders recruited and sent off to kill and die, under the type of appalling circumstances war always produces, weren’t well informed politically aware heroes. They were cannon fodder, fed into the ever more mechanised machinery of empire building (Germany) or preservation (England).
If we cross The Pond, and take the US’ role, in both World Wars, the idea of good vs evil is even more problematic, as the US was, despite their 19thC Civil War over the issue, a massively racist and largely apartheid nation.
I hate Trump, and his fascist DHS/ICE goons. But the endless ‘our fathers fought fascism’ stuff I’m seeing, mostly from the US (but the UK as well), right now, is just nauseatingly oversimplified. These complex issues shouldn’t be so relentlessly dumbed down.
POISONED POLITRICKS
It’s interesting, as a Brit, to see that some of the American military are, as they should be, disgusted by Trump et al’s fascism. Here in the UK, sadly, almost all ex-military types I’ve encountered are hysterically and myopically right wing. Many loudly braying their support for the beyond odious Reform.
There is a small quorum of folk who appear to see through the tsunami of misinformation that is most of our mainstream media these days. What’s odd to me is that it all seems so blindingly obvious.
If you want to investigate a crime, look to see who benefits from the commission of it.
It’s so blatantly obvious that the real enemy of the masses is, as always, the hyper-elite. In our times that means the billionaires. And the systems that produce and enable them. That would be unregulated capitalism.
The ‘plunder of the commons’ that has characterised Tory politics – and the word Tory derives from an Irish term for ‘thief’ – for hundreds of years, from The Enclosures Acts to the selling off of nationalised assets (PO, utilities, etc), has been relentless.
Reform represents the extreme right wing, i.e. the worst, of Toryism. And that’s who they are: Farage and most of his cronies are former Tories. Mostly ex public school, many millionaires, and all on a quest for personal enrichment via deregulation (the real reason for Brexit, and the motivation for their antipathy towards the ECHR). Sold to idiots as ‘taking back’ or ‘making Great’ Britain.
The role of the Tories in preparing the ground for this, with the sham referendum on voting (we urgently need PR), the politically destabilising and economically catastrophic shambles of Brexit, along with chronic underinvestment in social services coupled with constantly bailing out private disaster with public funds, is fundamental.
Modern Conservatism is an oxymoronic (not to mention plain moronic) nonsense. They’ve taken a wrecking ball to a lot of what was once (and only very briefly, as in post WWII) good about British public life and the fabric of society.
I like to say that this long and disturbing drift ever further right in UK politics doesn’t just beggar belief, it buggers it, with a barbed-wire chainsaw.
The Boris Johnsons, Rees-Moggs, Michelle Mones, Farages, and their like – and the millionaires and billionaires who fund them (and the CEOs and shareholders, milking this oligarchy) – enjoy luxurious lives largely funded from the public purse, or built on the back of underpaid workers. Countless thousands of whom – people these politicians (and even the business types) are supposed to serve – live miserably squalid lives, only to die long, protracted, painful deaths.
Not because nothing can be done about it. But because it doesn’t suit the richest to give up even a fraction of their privilege.
NOTES
[1] And what do we do with these beauties? Get high, or remember/celebrate killing each other. Humanity, eh!?
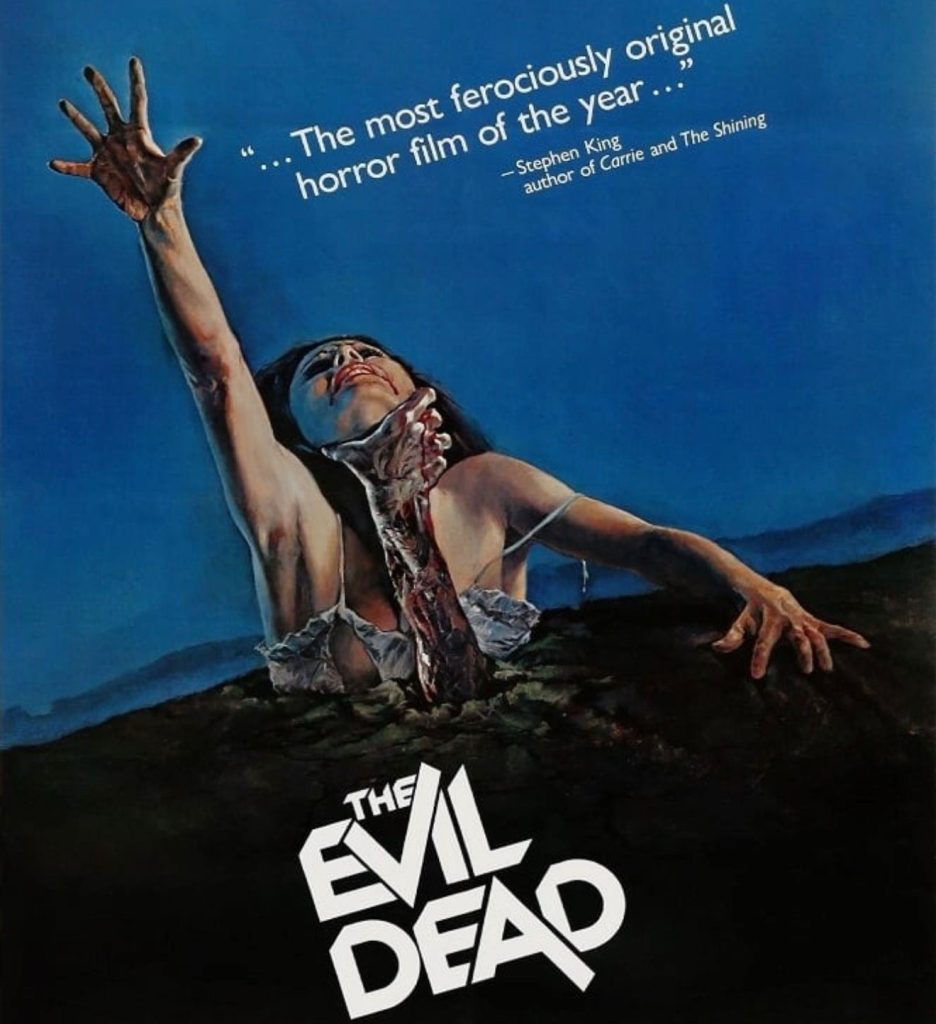
Ash and four friends on vacation travel to a remote cabin. Things quickly go to Hell, when they discover a ‘Book of The Dead’, and listen to the tape-recordings of a former occupant of the site.
Ash, central protagonist of the movie.
By modern horror movie standards this venerable old classic starts off pretty slowly. But it builds nicely. A lost art, perhaps?
Cheryl, Ash’s sister.
Sam Raimi already has some chops – this is his directorial debut! – visually speaking, with only Into The Woods as warm up. Tricks like the wobbly low-to-the-ground camera , scooting over the rather squalid terrain…
Cheryl’s not well…
Bruce Campbell, and co. are great. Cheryl, his kid sister, is the first victim. In a highly controversial scene she is violated, by the evil spirits of the woods!
From hereon in the pace picks up. And very soon, with Shelley – Scotty’s gal – taken, chaotic carnage ensues…
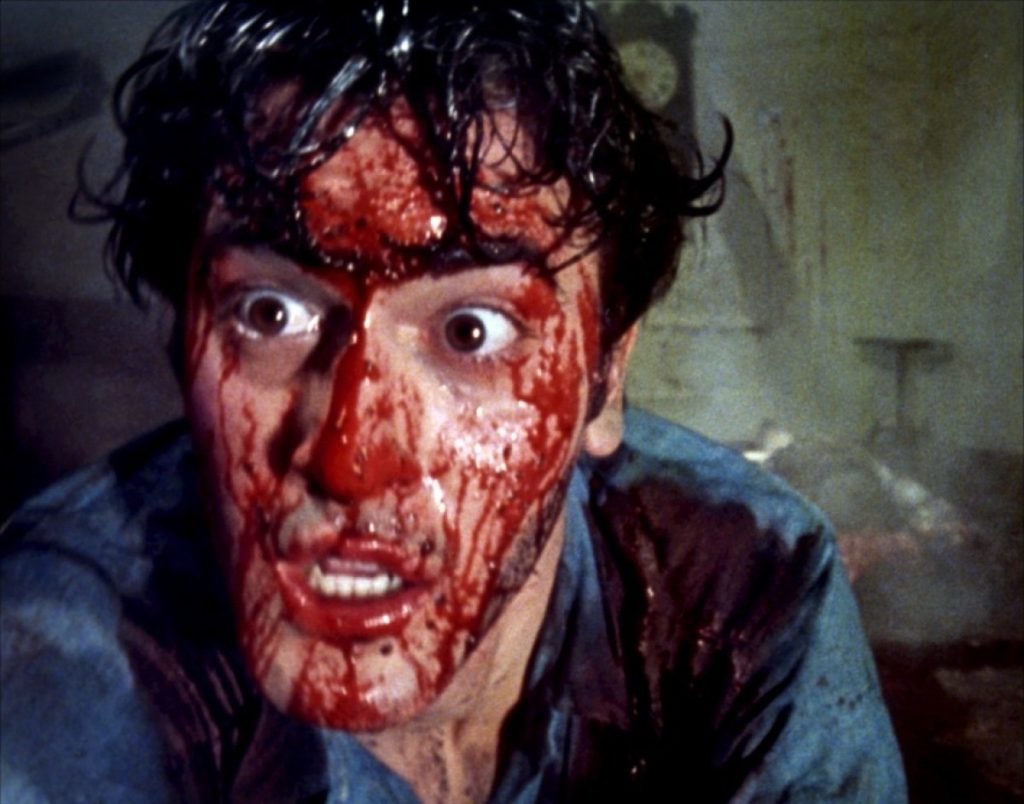
Bruce Campbell is great, as Ash.
Ash and Scotty are the last; all three gals get possessed first. But not long after Scotty’s failed solo escape bid, it’s just Ash… As Scotty fades, and the gore revs up, the movie switches into a more overtly absurd and even morbidly comic mode…
It’s alternately jaw-droppingly amazing, and utterly preposterous. Scary, then silly. But there are some terrific passages. A favourite for me is the several minutes of Ash’s apparent descent into madness. The camera angles and lighting are, at times, terrific.
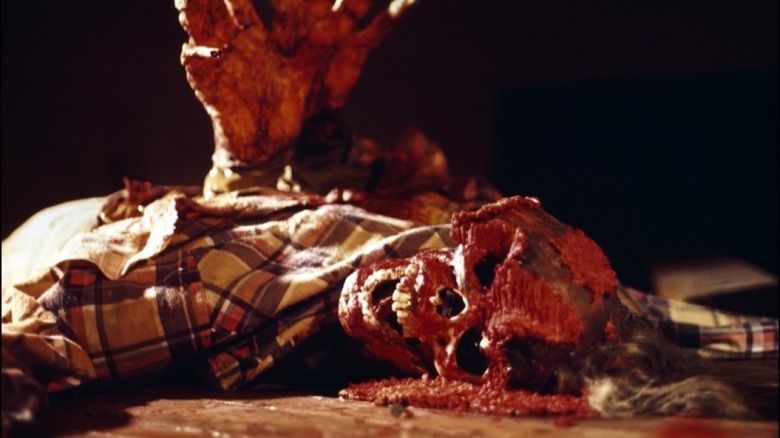
Insane lo-fi gore galore!
And then there’s the whole epic lo-fi gore meltdown, which is extraordinary. Porridge? Plasticine? God knows…
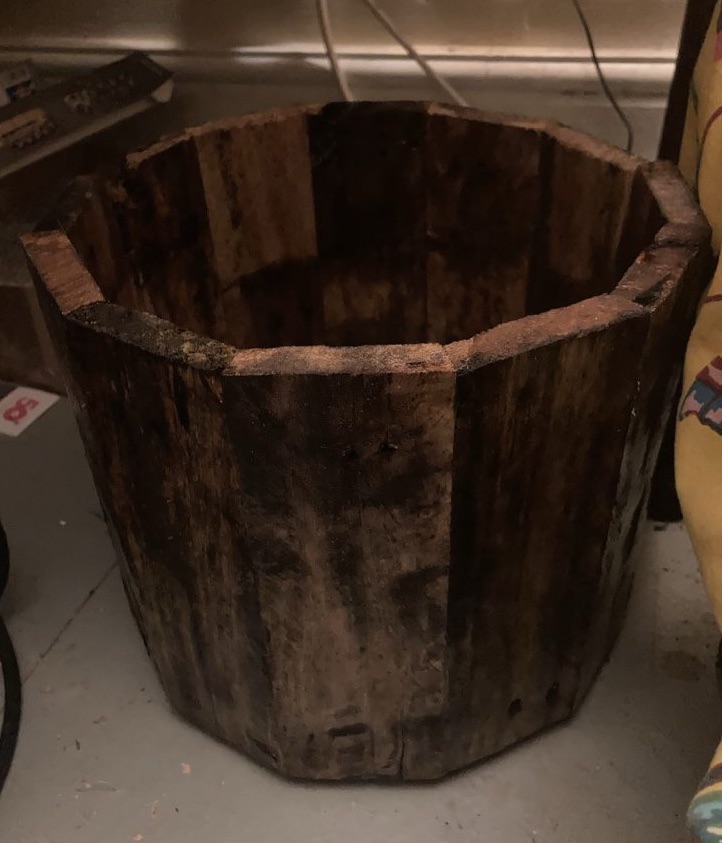
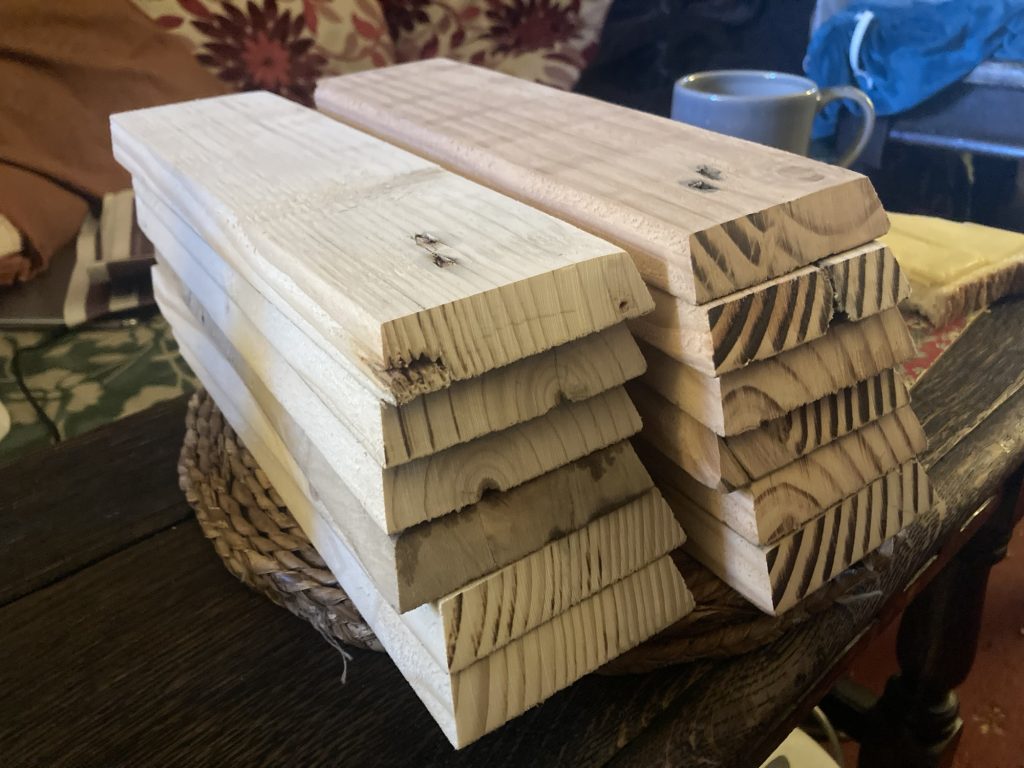
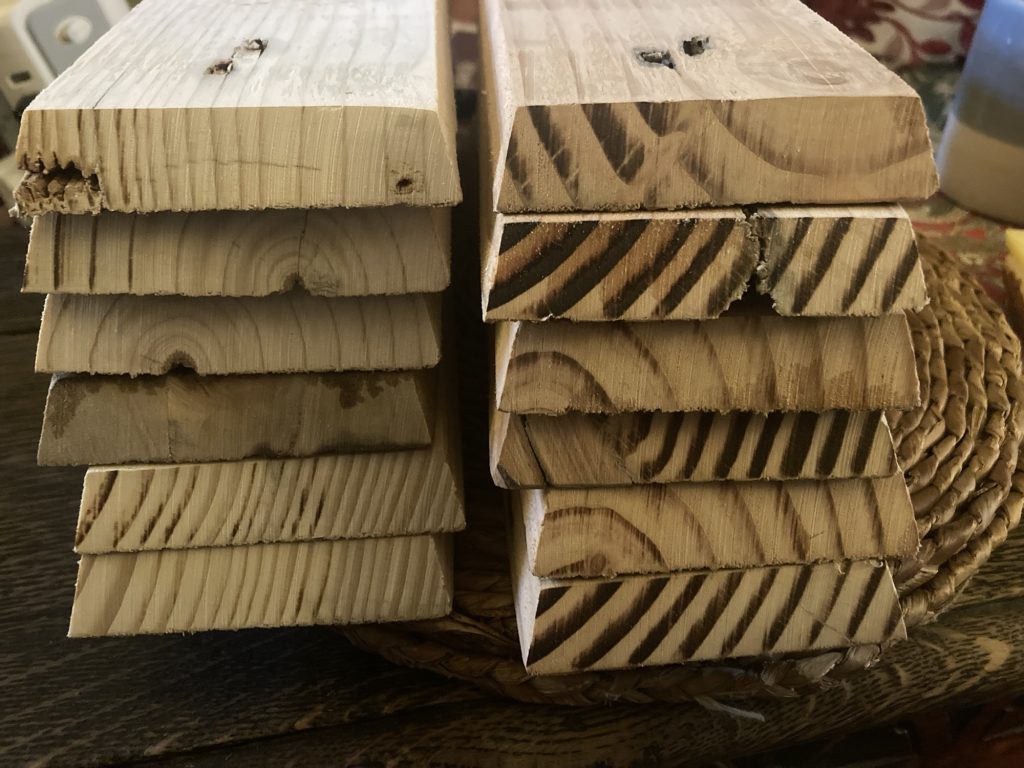
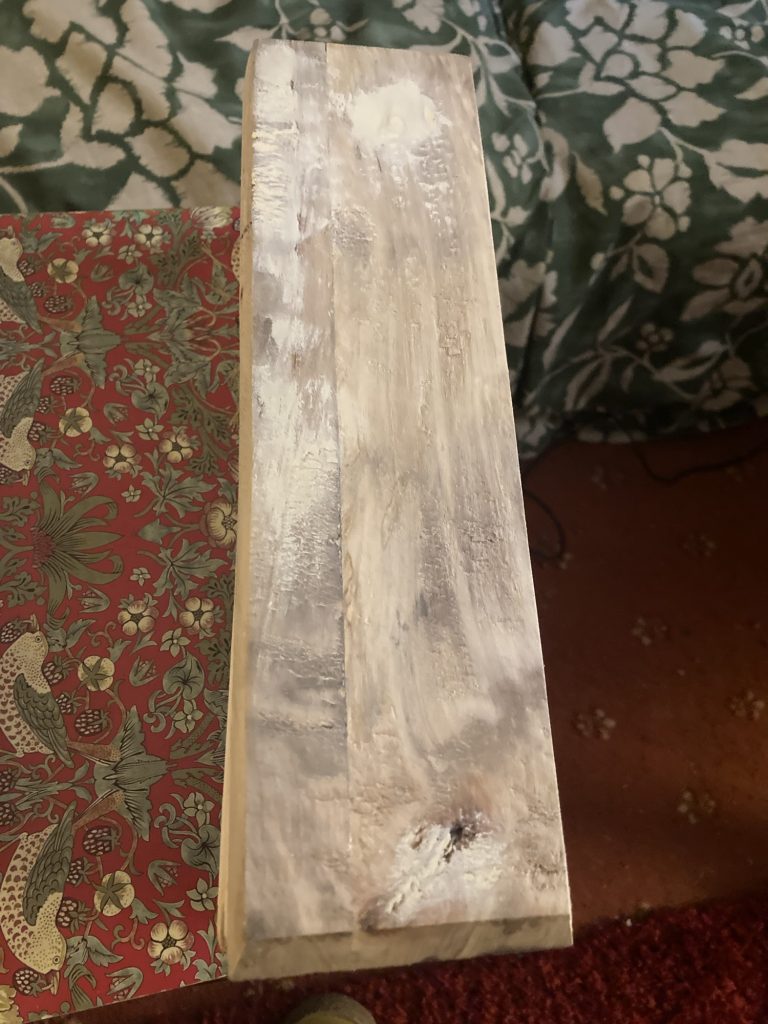
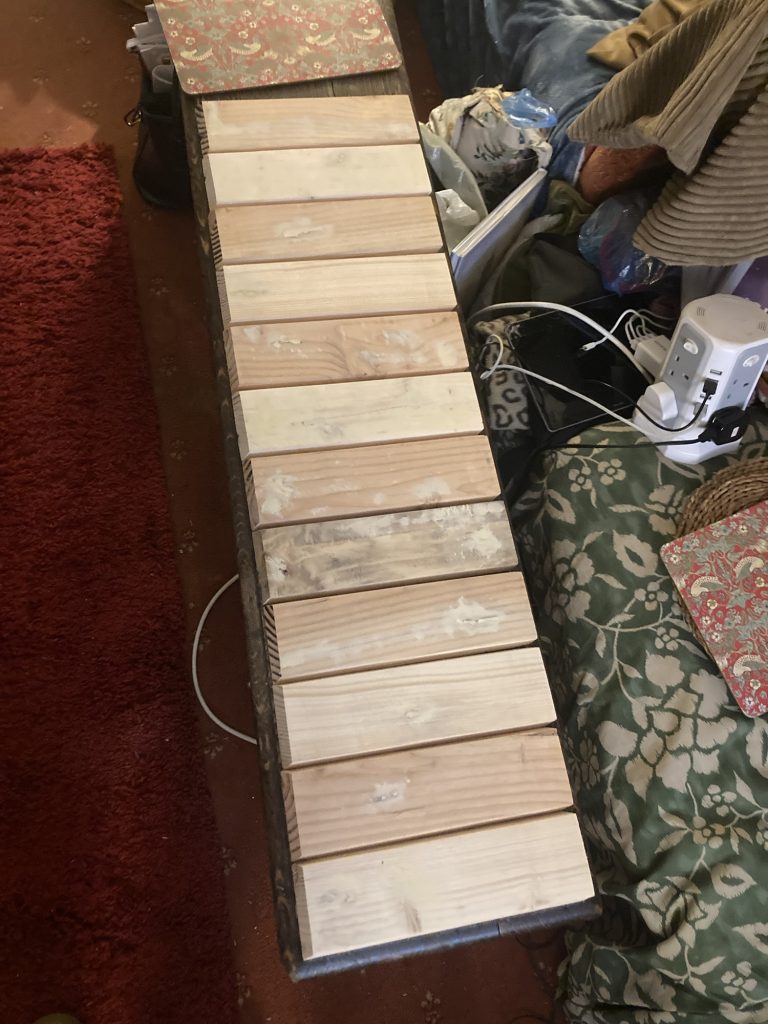
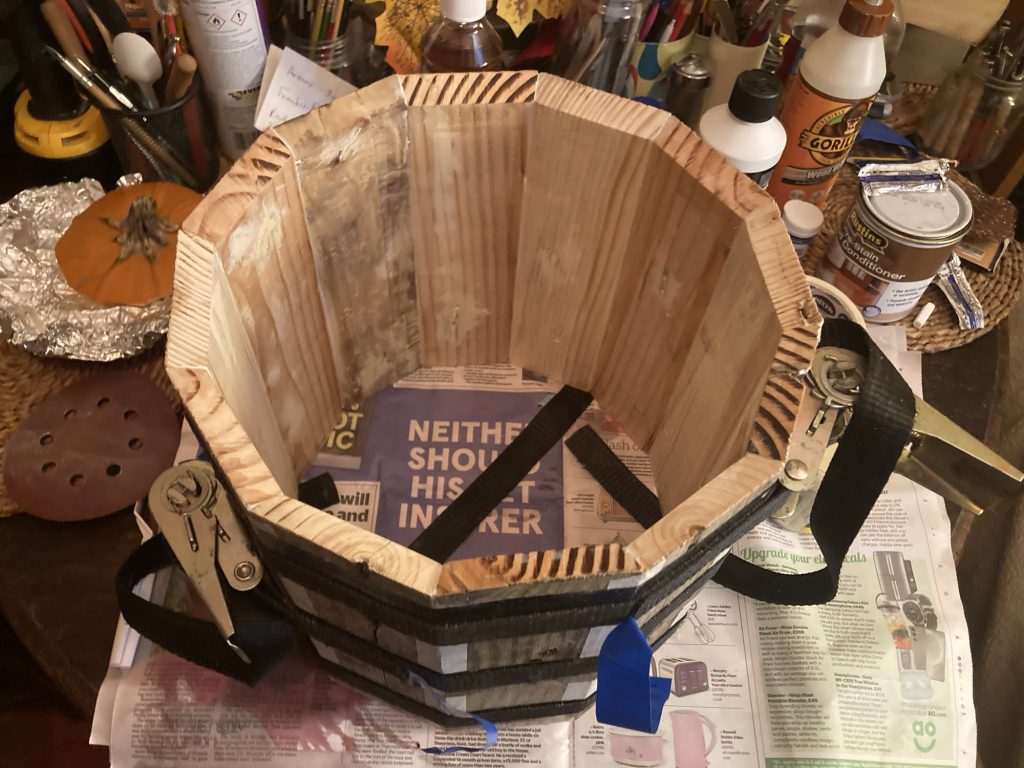
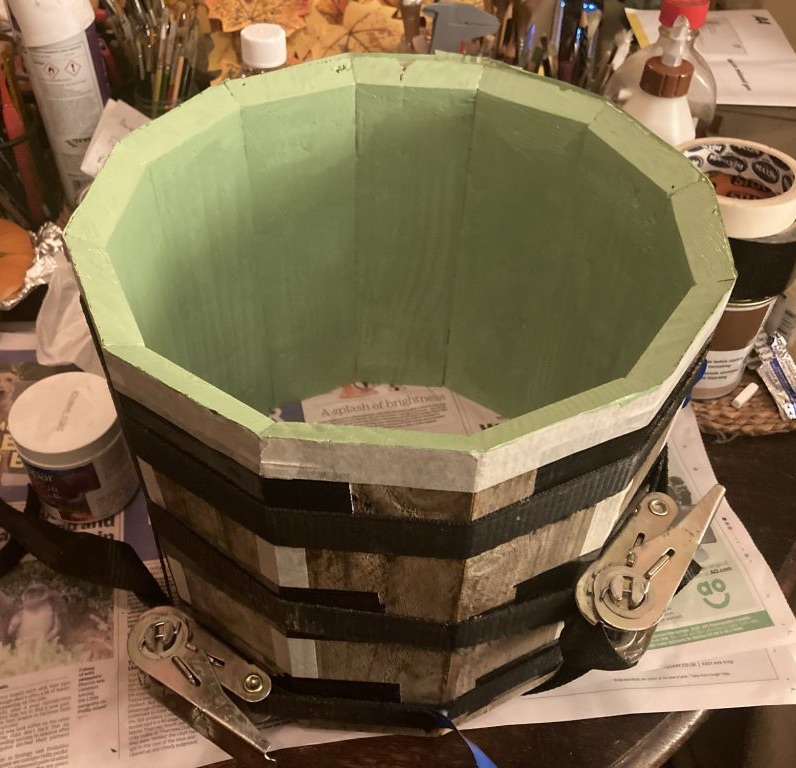
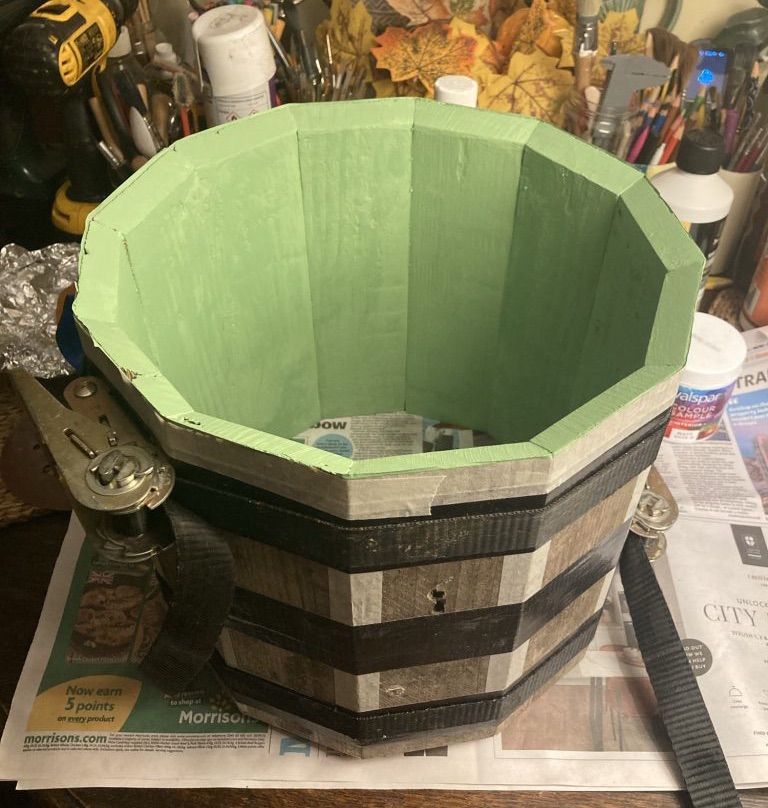
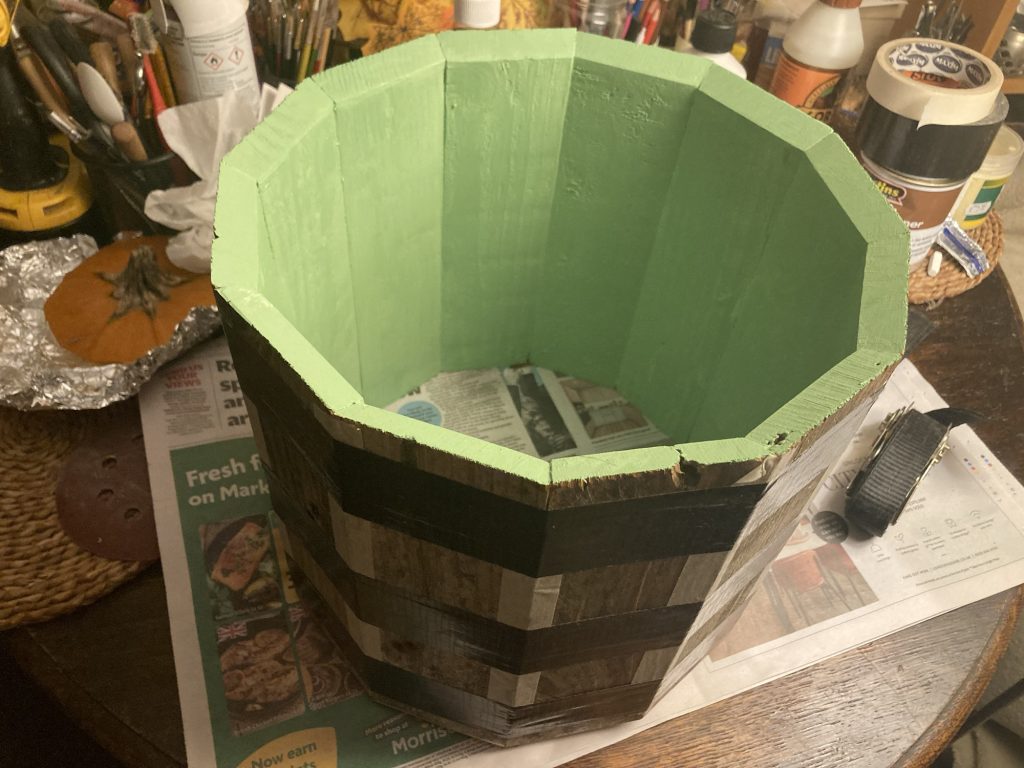
Having decided I’m sick of cheap n’ nasty plastic or metal (or even woven) waste bins, I’ve started making some from recycled palette wood.
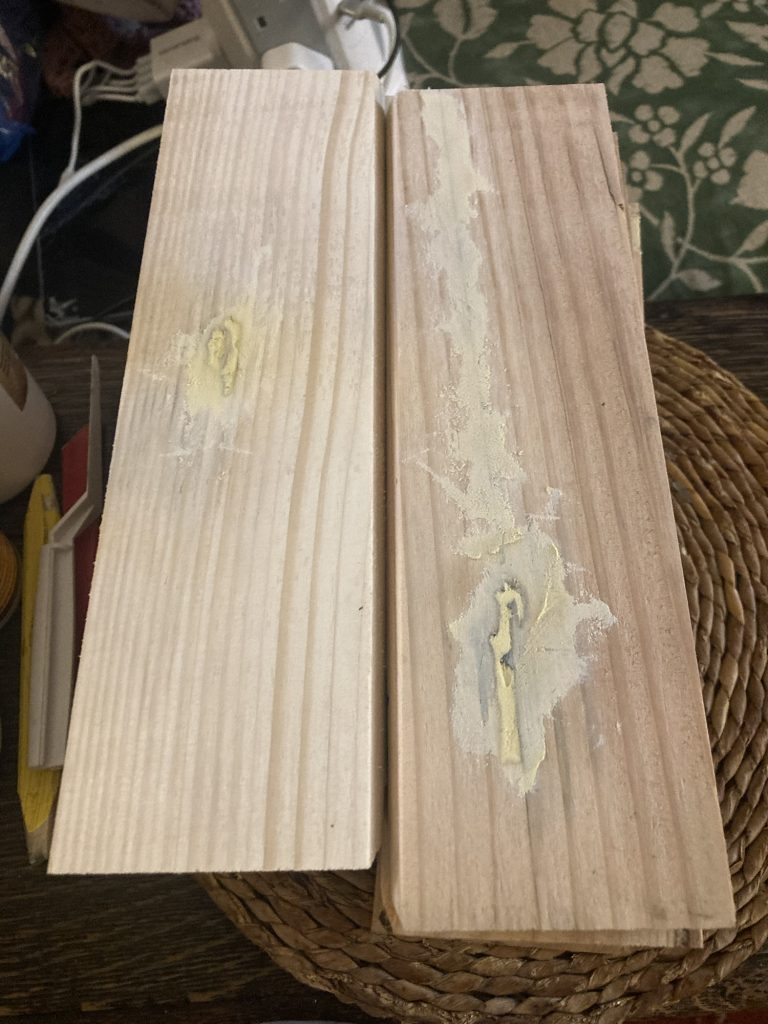
The first is shown above, finished and in use. The second is detailed below. From processing the lumber to gluing up and painting.
The first bin is ‘raw’ wood, inside and out (and along the upper edges; warts and all). The second is more processed, with a smoother and coloured interior. Both are 12-sided.
Gluing up.First coat…
Went with a pea-green interior…
Second coat.
I quite like the idea of making and selling a few of these. Will there be a market for them?