I’m totally on Jack Stratton’s – or Vulfmon’s – wavelength when it comes to digging the guitar artistry of David T Walker. And what a beautifully minimal rendering of a classic song!
I’m joining the Vulfmon’s new religion!

renaissance man
I’m totally on Jack Stratton’s – or Vulfmon’s – wavelength when it comes to digging the guitar artistry of David T Walker. And what a beautifully minimal rendering of a classic song!
I’m joining the Vulfmon’s new religion!
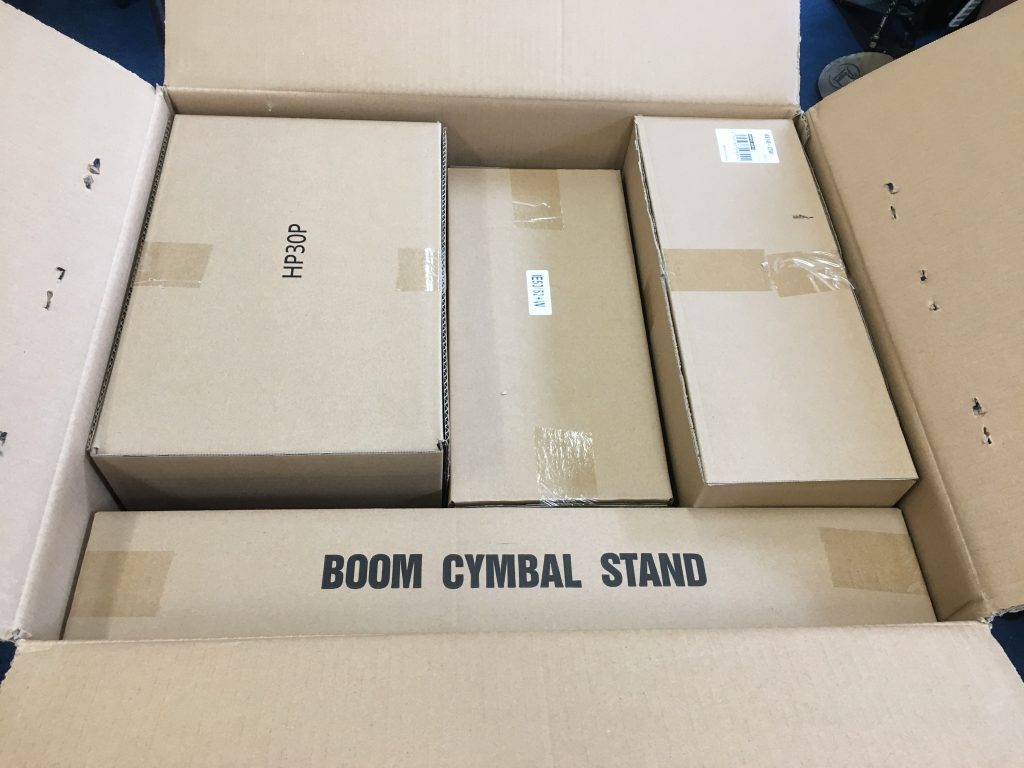
Wahoo!!! Today one of my schools surprised me in the nicest way possible. Head of Music & Performing Arts, Jenny W, told me, on my arrival, ‘There are some boxes you might want to see’.
I knew what this meant. We had a Drumathon fundraiser event s while back. Actually it was what feels like ages ago now. So far back I can’t remember exactly when! A big thanks to all the staff, pupils and parents who helped us with that, as that’s what’s lead to this.
I’ve included pictures of both the former or ‘before’ kit, as well as the present or ‘after’ state of affairs. If I was a savvy YouTuber I might’ve made an ‘unboxing’ video. I suppose this a ‘slow’ version of that?
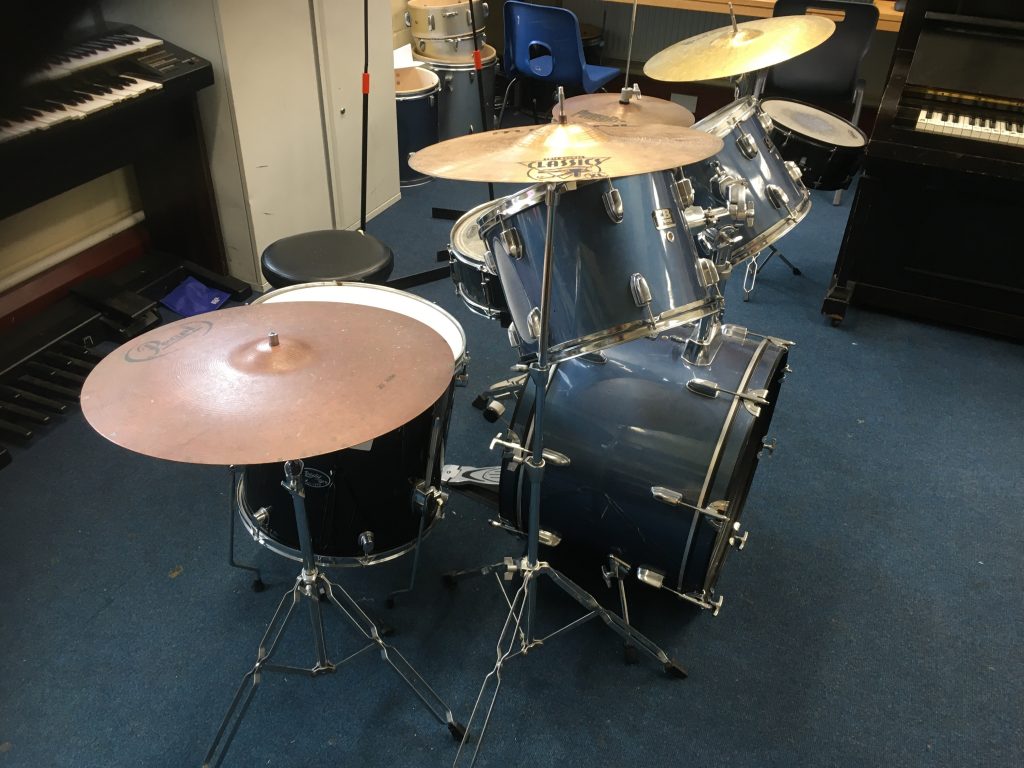
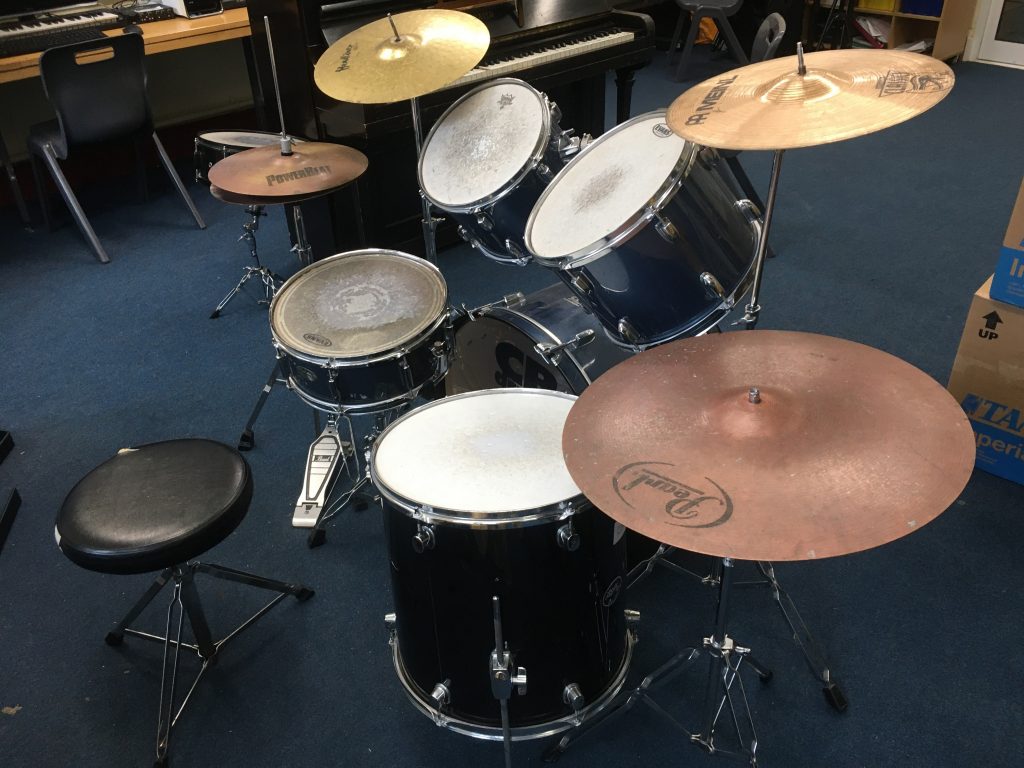
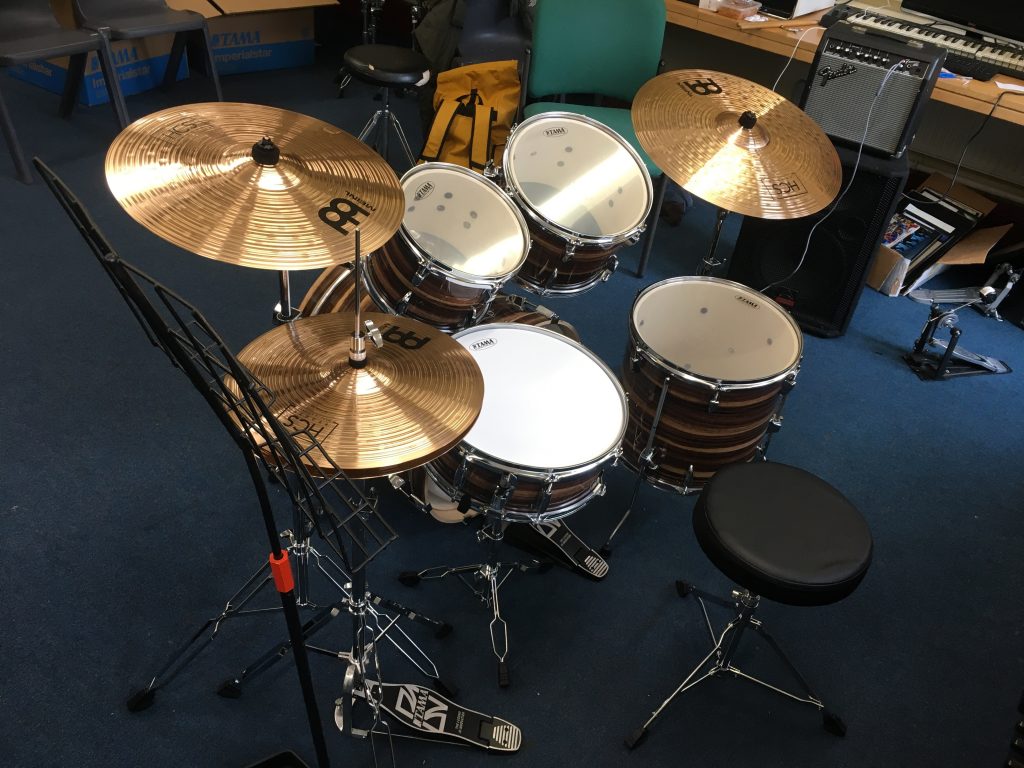
The old school drum kit – actually there are several; but this is the one I teach on – has more than done it’s duty. The current incarnation, which was preceded by a slightly better mostly Pearl Export kit, is mainly not so great CB drums, with the old Export snare, a Leedy floor tom, plus an assortment of cymbals and hardware.

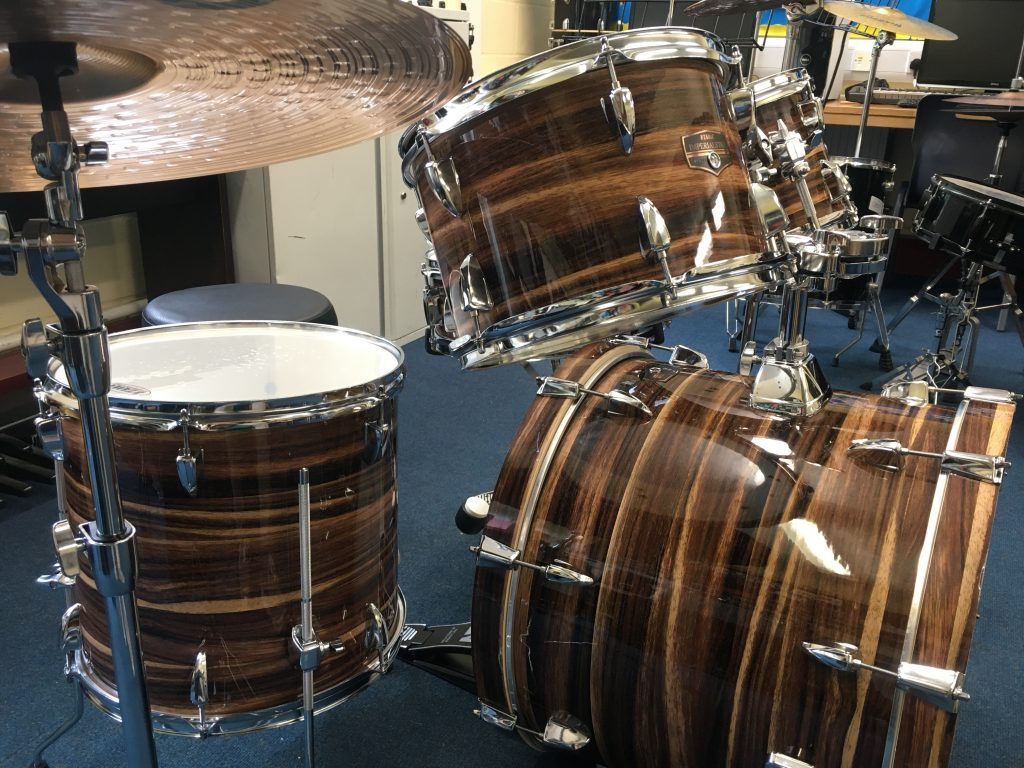
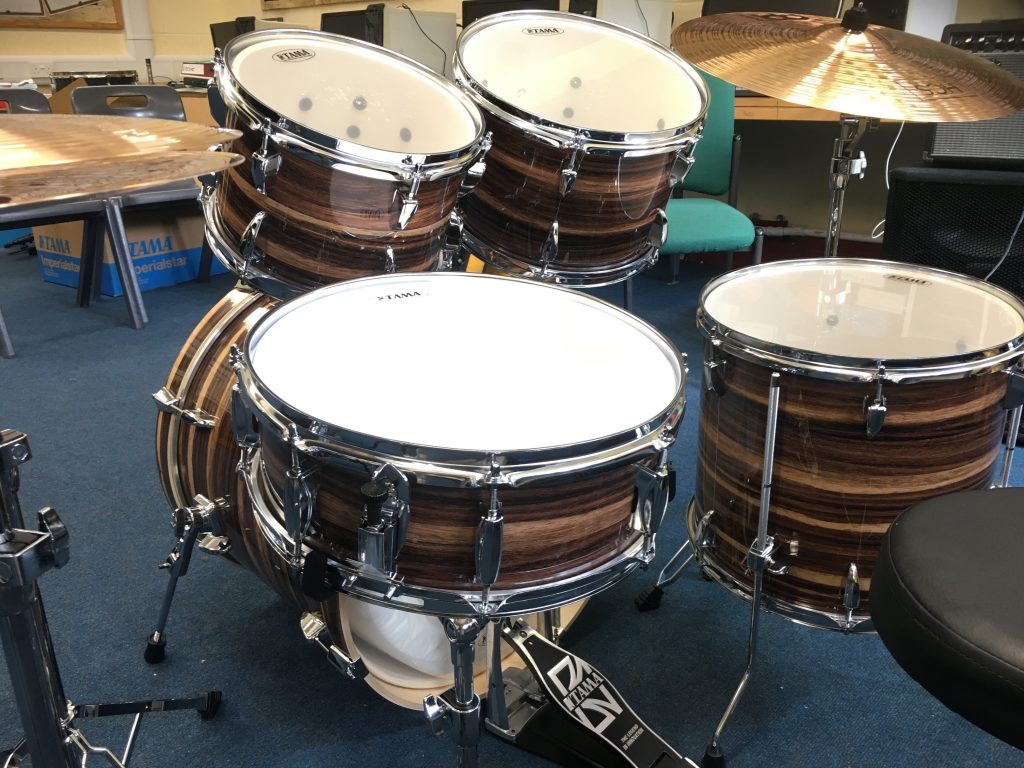
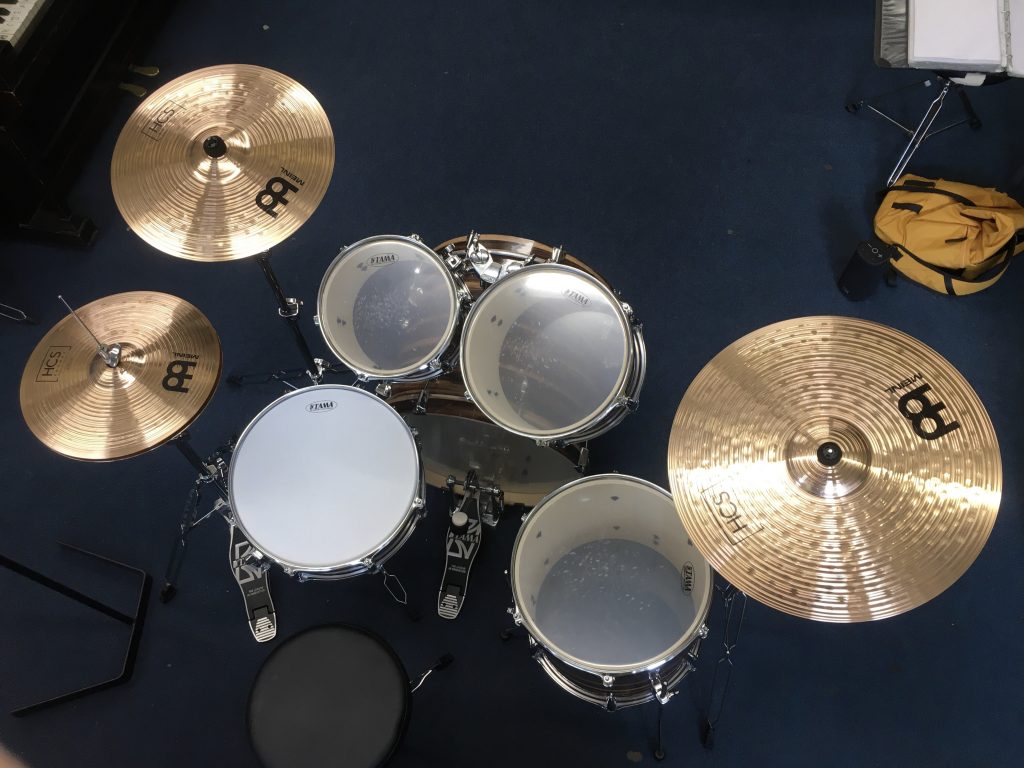
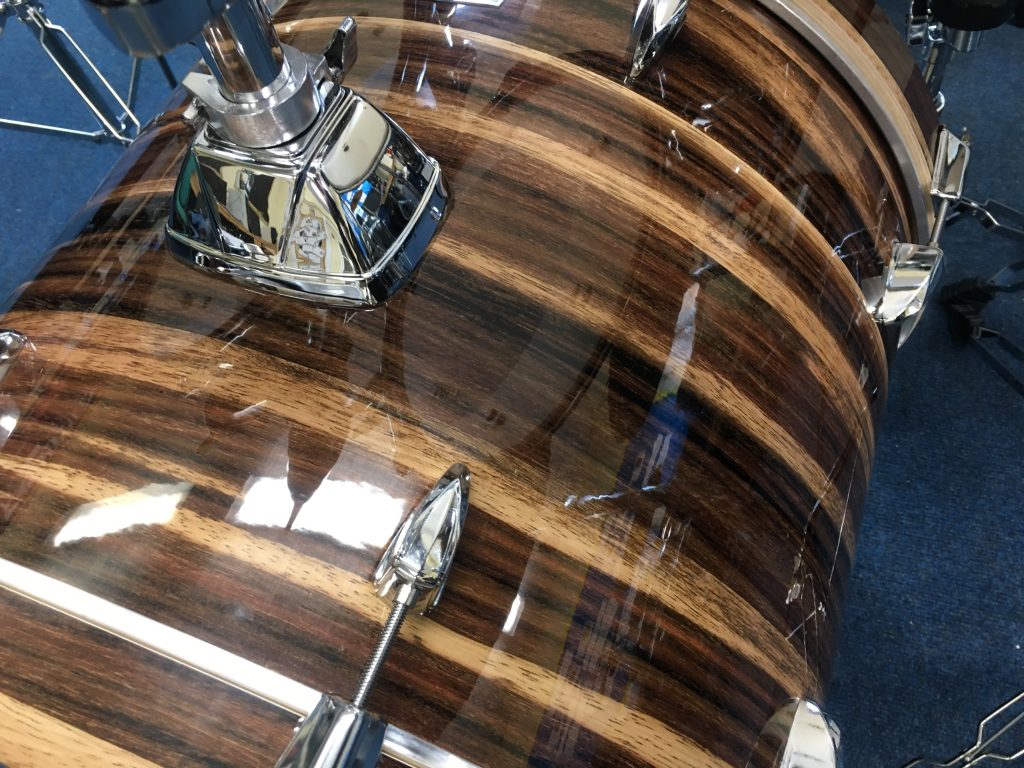
The schools’ several drum kits, all partial and all none too hot, share one thing in common; they sport plain monochrome wraps. The new Tama Imperialstar , by contrast, has a gorgeous and rich Coffee Teak veneer, in a lovely high gloss finish.
The school’s tired old kits all have ancient and very weathered drum heads. Whilst the new Tama kit has shiny new heads, it has to be admitted they aren’t the best feature of the kit. Hopefully we’ll re-skin this kit with coated ambassadors, and maybe get a CS-dot on the snare? (The kick is fine as is.)
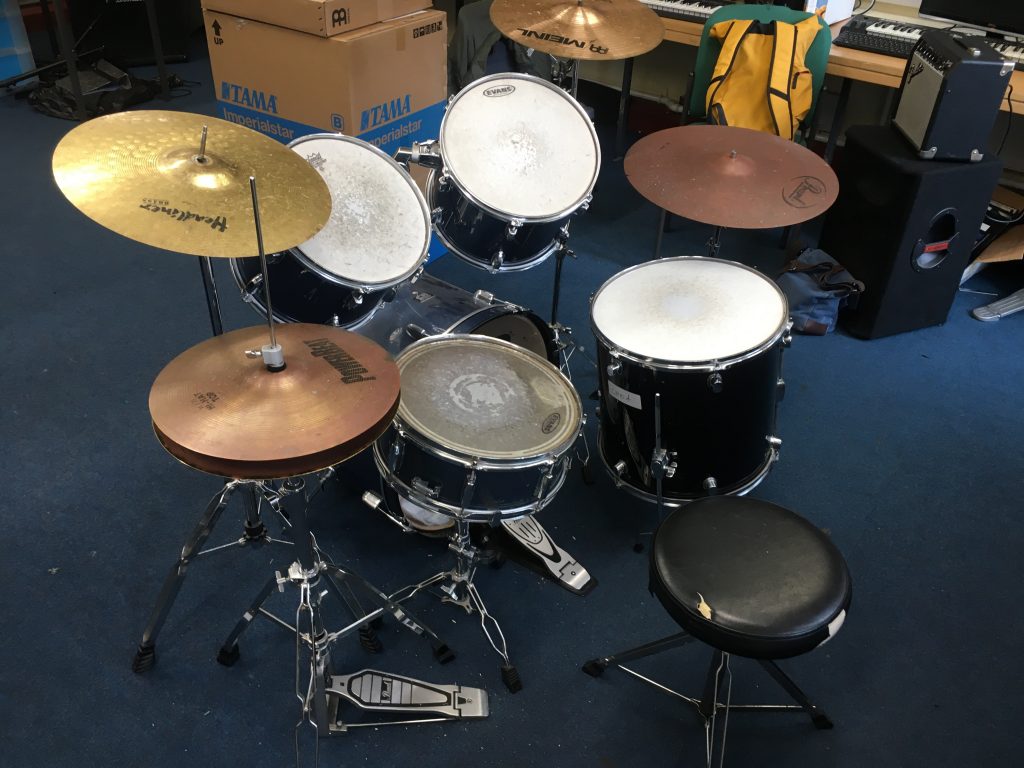
The ancient Frankenstein kits that the school’s soldiered on with have certainly served the school well. But now they’re all way too tired, and long past the point of simply being sad and decrepit, belonging, frankly, to ‘useless scrap’ territory! This shiny new Imperialstar should add a bit of bling and zing to proceedings.
So anyway, I moved the boxes from the office to the current ‘drum room’ (also the school’s music tech suite), and started the unboxing and assembly process. Some of the kids, who were off on a school music trip today, helped me un-box everything before the left. Shame I didn’t get any pics of that. But schools are funny about teachers photographing students nowadays.

Opening boxes of new stuff is always fun! I can totally see why unboxing videos have become a thing.
The drum sizes are as follows: 22” x 16” kick; 14” x 5” snare; 10” x 7” and 12” x 8” rack toms, and a 16” x 15” floor tom. The cymbals are HCS Bronze: 14” hi-hats, 16” crash and 20” ride. They’re not top end cymbals. But they both look and sound better than anything we had previously.


Although the music trip kids left after the unboxing, I still managed to get a decent chunk assembled before my first pupil, Dan, showed up for his lesson. Fortunately he was happy to spend that lesson helping me finish putting the kit together.

The snare and rack toms arrived assembled. The kick and floor tom needed putting together. Once everything was assembled – with a pillow in the bass drum giving instant satisfaction – it was time to start tweaking the tuning.
I’m really chuffed the school went with the brand/line and finish I suggested. I’m wondering did I also suggest these specific sizes? The kit consists of rather fusion-esque smaller tom sizes, which, with the supplied heads, give a pretty high pitched sound.
Whenever one has a new kit, it takes a while to tweak it, and get it bedded in. Today that took the form of some tom tuning, tightening up the snare, and getting the toms properly aligned relative to each other.
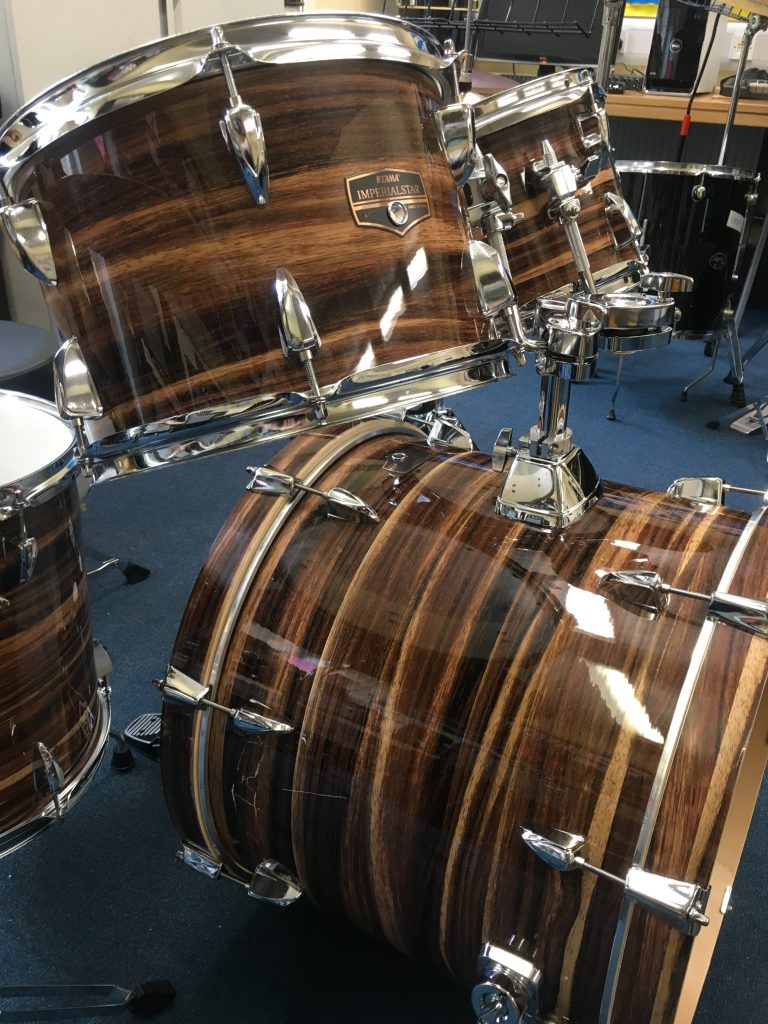
I think the aesthetics of this kit, it’s physical allure, are actually very important. A sexy kit makes friends easily. People want to play it, and that makes teaching a little more fun, and quite a bit easier.

So, all in all, how totally terrific! Aren’t we lucky to have such a lovely new kit?
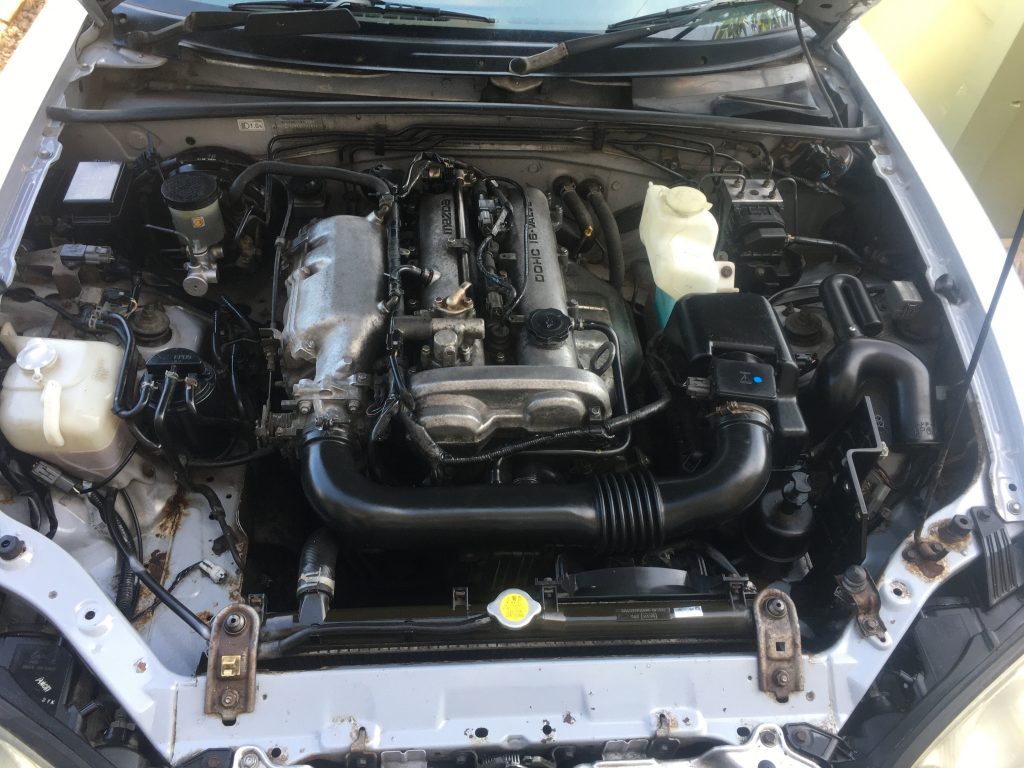
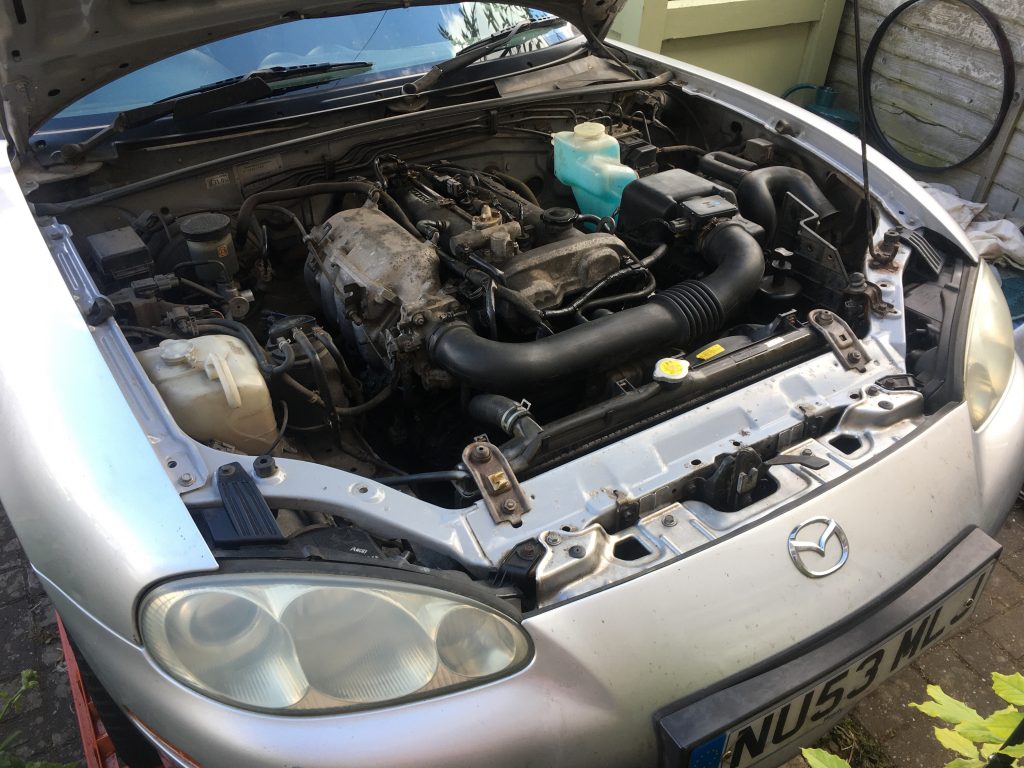
Having fixed my motor, and cleaned the engine bay, I checked all my levels, coolant (still good; so glad I fixed that!) oil, etc, checked tyre pressures, and belt tensions.
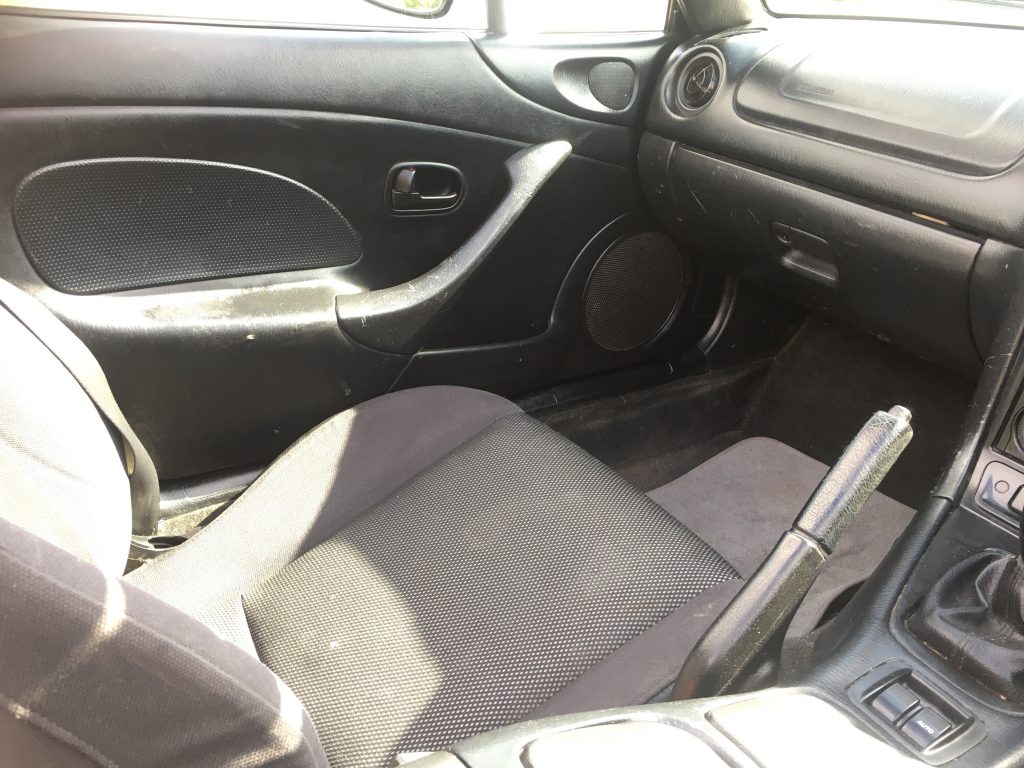
With everything ship shape, I moved in to cleaning and sprucing up the interior. After a serious vacuuming, it was out with the cleaning stuff. Once again ChrisFix (and others) was invaluable. I used his list of products and steps for cleaning.
Once you start down this road, however, I can see the danger of obsession lurking. The nicer any one part looks, the more you notice the other less spruce aspects.
A few more jobs are definitely looming: replacing the worn out ‘shift boot’, aka gear stick shroud (?). My knob (chortle) is pristine! And ditto all the engine bay hoses and tubing, along with all their clips.
I’m also going to clean all the wheels. Although I doubt I’ll be going as far as ChrisFix and others in trying to get them looking like new. That said… maybe!? But in truth I’d like some nicer wheels anyway. Wire wheels are the dream!
Another little mini project, for as and when I get a new set of tyres, could be to ‘whitewall’ them. I reckon that’d look super-fonky!

Having replaced the cambelt, etc, and got Maisie back on the road, I’ve felt a sudden urge to look after her generally.
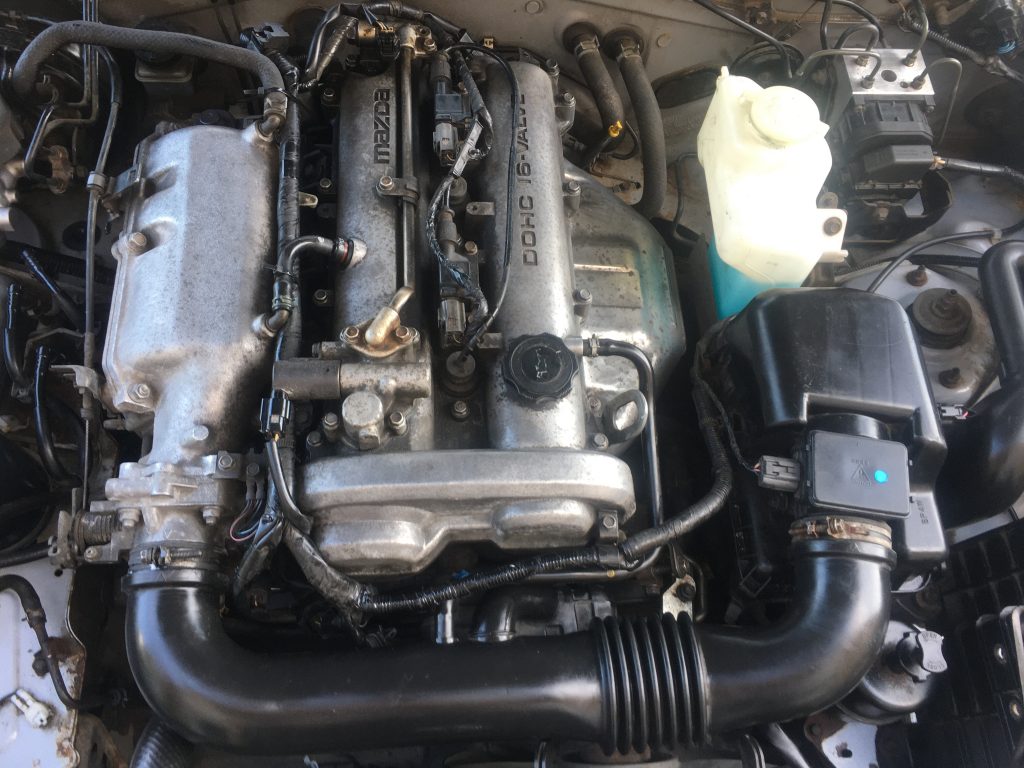
The first manifestation of this bizarre compulsion has been to clean the engine bay. I watched a video by the very popular American YouTuber ChrisFix, to glean how to clean, so to speak.
I wasn’t quite as patient or methodical as he evidently is. And although I was recently given a jet-washer, I was unable to use it, as I couldn’t find a tap close enough to reach the front of house/car.
But I did spend the required time, knuckling down to a good few hours of fairly fastidious cleaning. I cleaned the inner ‘hood’ as our former colonials have it. And the whole engine bay got a once (twice, or thrice?) over.
My before and after shots aren’t quite as drastic and compelling as ChrisFix’s. But they do show a marked improvement. One notable lacuna being that I didn’t do the cam cover as well as I might.
But in order to do that properly, I need to remove the VVT and spark-plugs. And I decided to leave it at a cursory clean for now, as I might be having it off again (snigger) for a really proper clean, and poss’ even a spray paint.
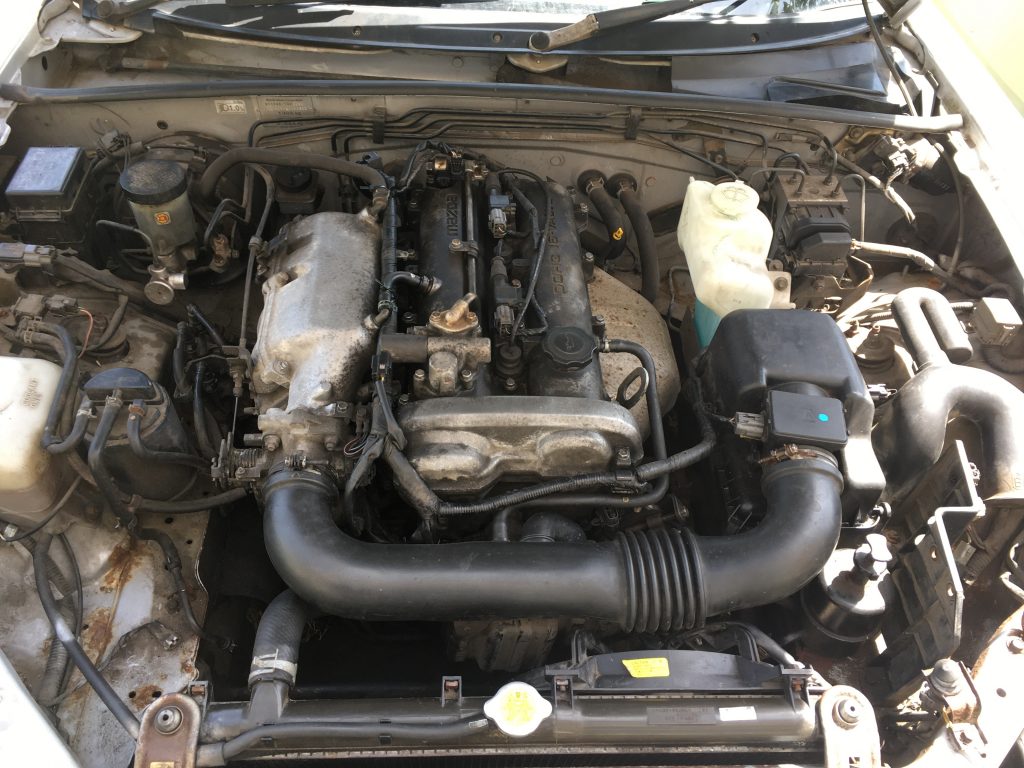
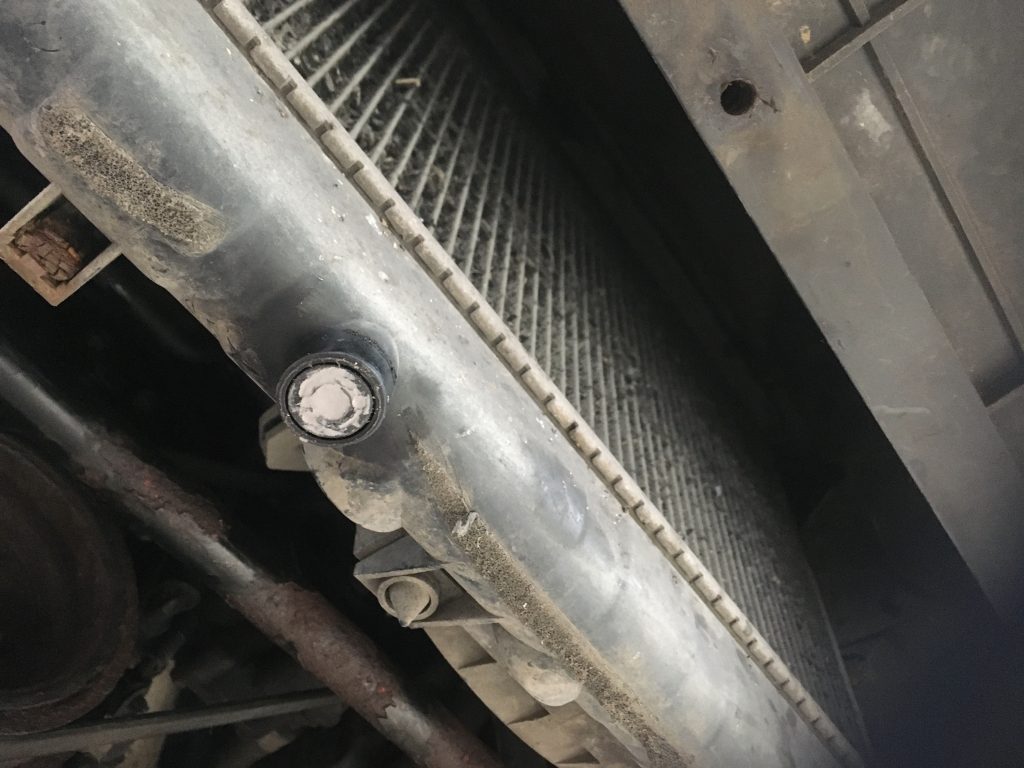
Looking at the pic above, I can see a few things I might want to re-visit. The above-mentioned cam-cover is the most obvious. But the two clamps that hold the radiator in place (and the radiator itself!) would make a notable difference.
Another ‘when funds allow’ job for the engine bay is a complete new set of hoses, pipes and clips. Some of the hoses definitely need replacing. And not only should everything look better, it ought to function better, and add longevity.
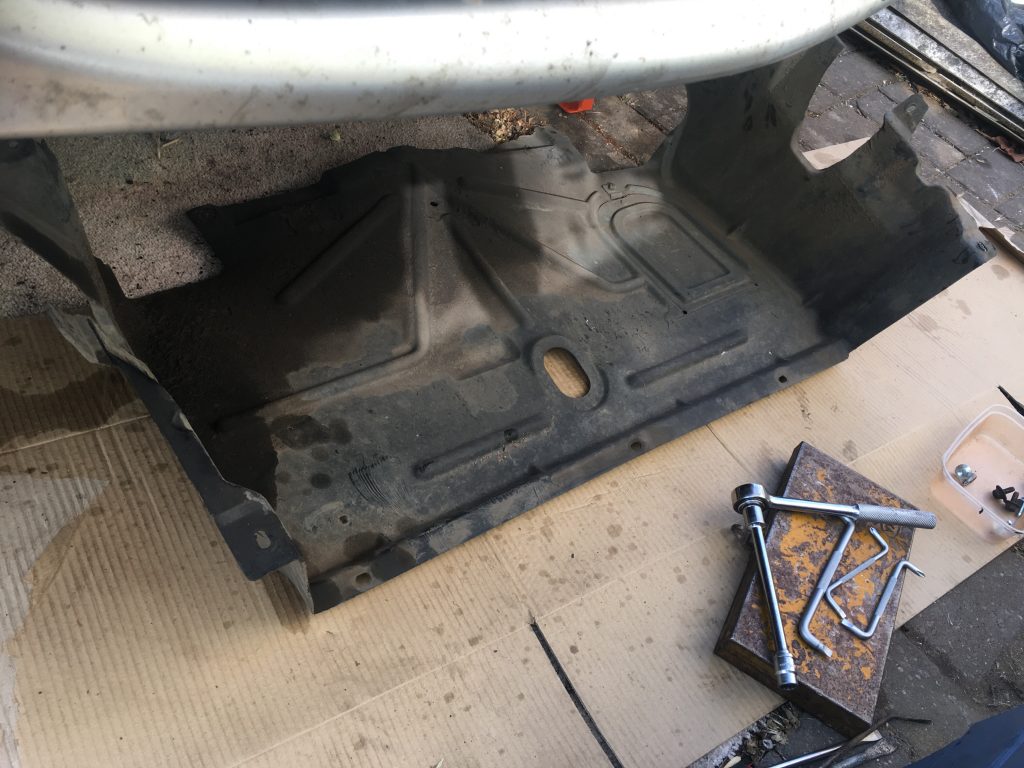
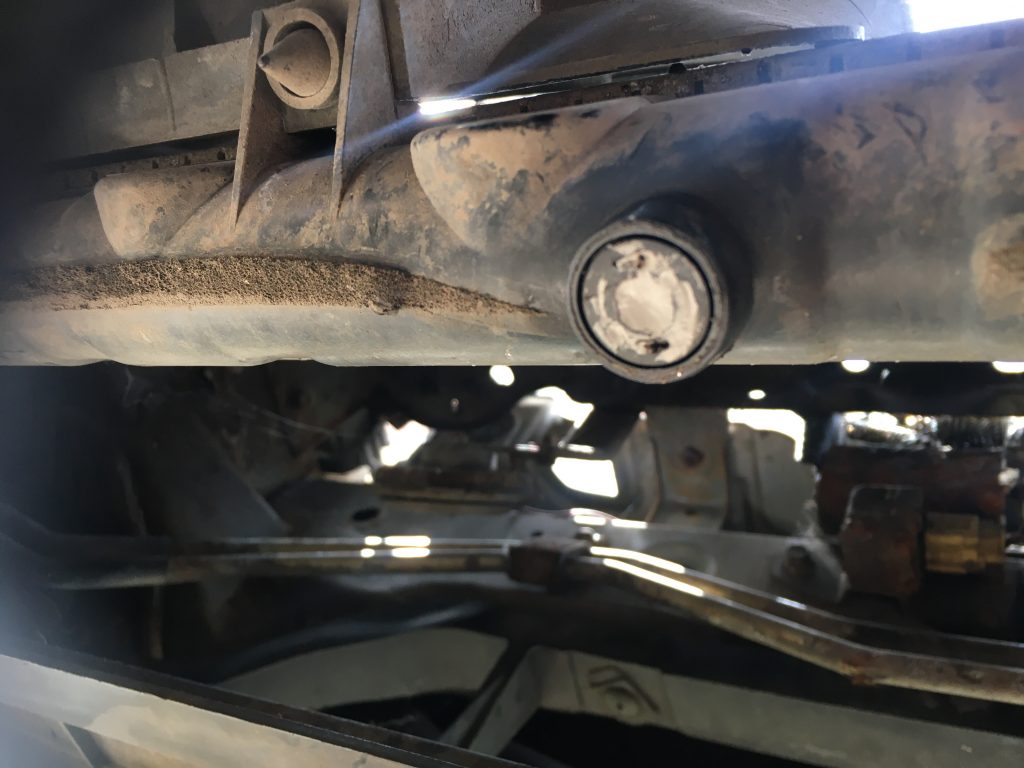
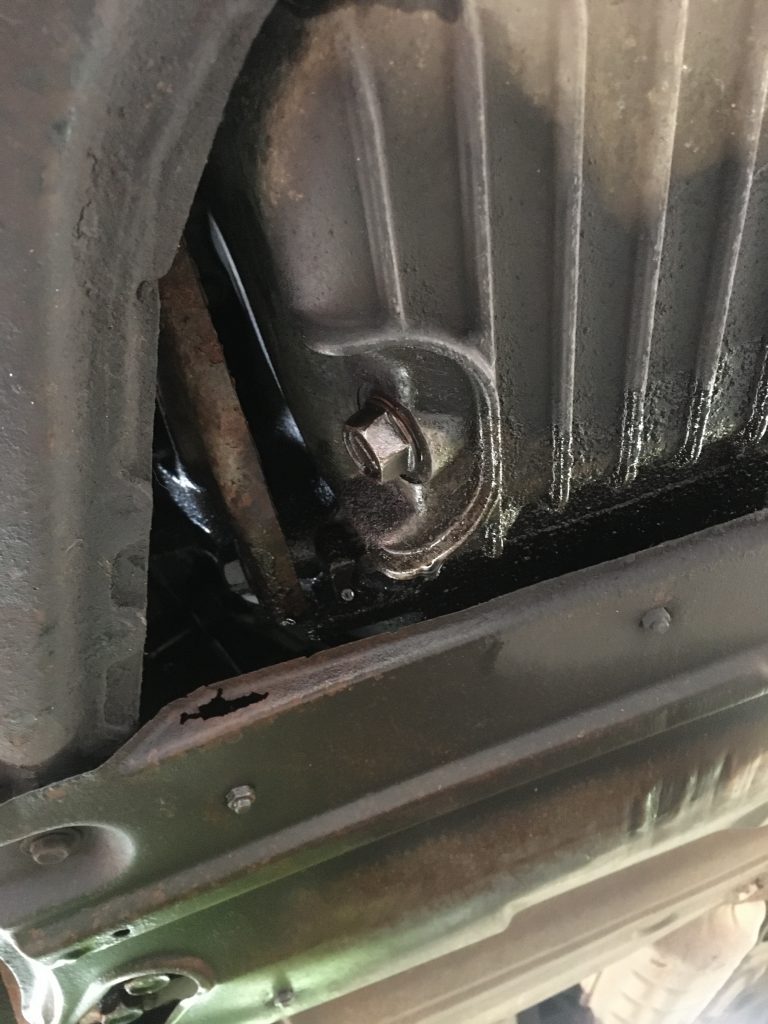
The large and rather unwieldy plastic under-tray ought to be fixed at about nine points. One old and two new bolts secured the flat frontal portion nicely enough. But at the rear, one old bolt had to suffice. The other (passenger side) bolt had broken off, and remained in her hole. So I had to zip-tie that off!
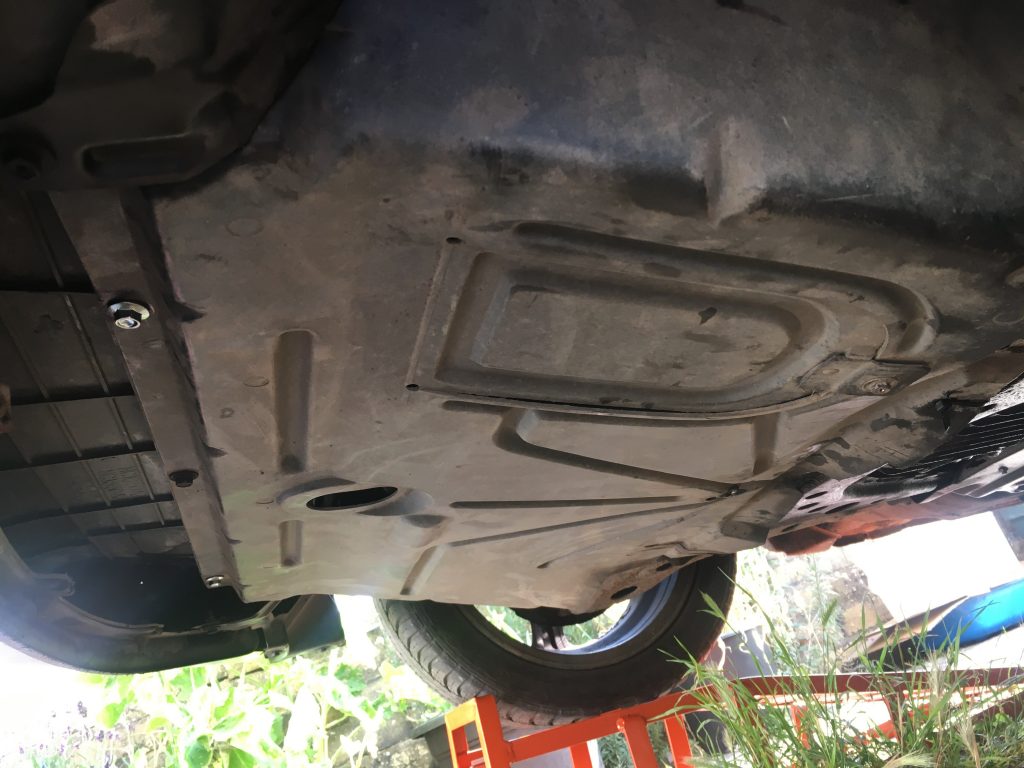
Both sides of yon under-tray go up into the wheel arches. But the two holes on either side don’t seem to correspond with any locating holes in the body. So they’ve been left – see picture directly below – as is.
So now all that really remains is the major coolant leak, which urgently needs addressing. I’d bought a few bits at BOFIracing, inc a new thermostat gasket, and rubber doodads for the soft-top latches. I installed the latter there and then, before a surprise visit to mum and Malcolm, who live nearby.
As it happened they’d already passed me, earlier in the day. So my surprise wasn’t quite as complete as planned. But still, it was nice to visit them with the ol’ jalopy back on the road! Albeit still suffering from the coolant leak.
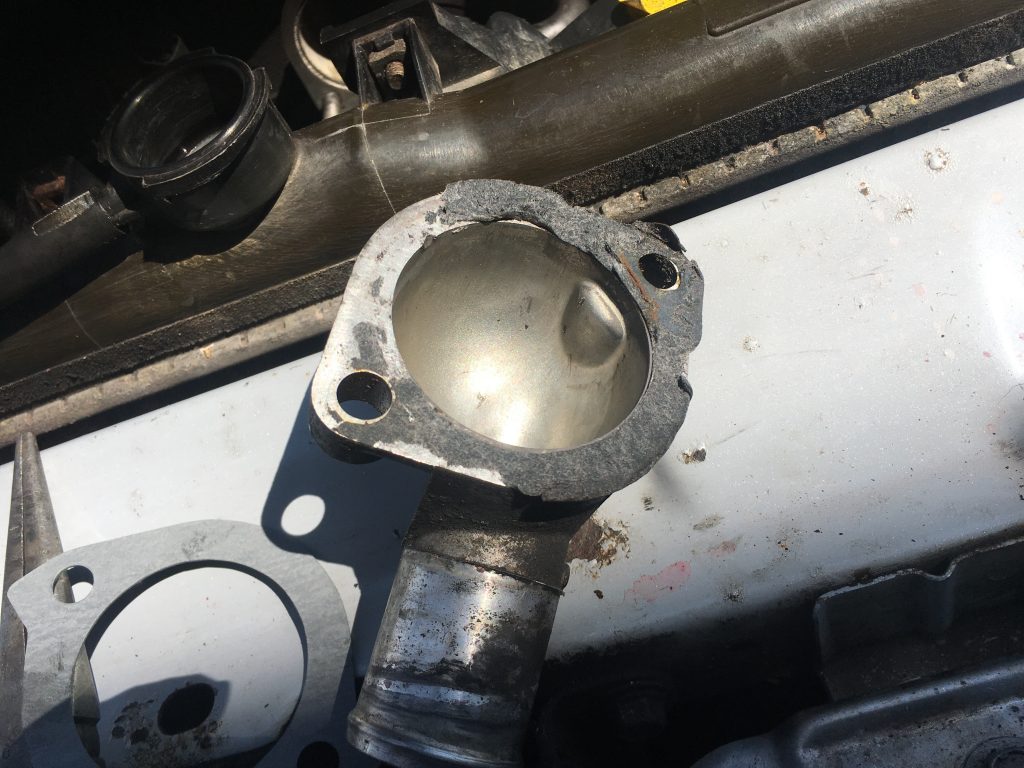
As can be seen, from the above photo, the old (new!) gasket needed removing. And the two faces of the thermostat housing needed to be thoroughly cleaned and flattened.
The gasket originally in the car seemed to be made of something metal like, and brittle. And was in pieces. Whereas both of the new gaskets appeared to be made of card, or some similar compacted fibrous material.
I got conflicting advice about adding RTV, belt and braces style, to this gasket. I’d done so on the previous newly installed one, and that failed. So this time I just left it at the gasket, and torqued up my nuts – ouch! – to the appropriate degree.
And so far so good! She’s holding. No major coolant issues since I did this.
Whilst at BOFI, I enquired re a complete engine bay hose set. And they have them in, at roughly £100. That’s something I’ll do as soon as funds allow. There is another lesser coolant leak, coming from the very old and worn out main radiator hose (the radiator end clip of which is busted!).
I’ve taken her out for several runs since things have been brought to a satisfactory conclusion. Having my wheels back is sheer bliss!
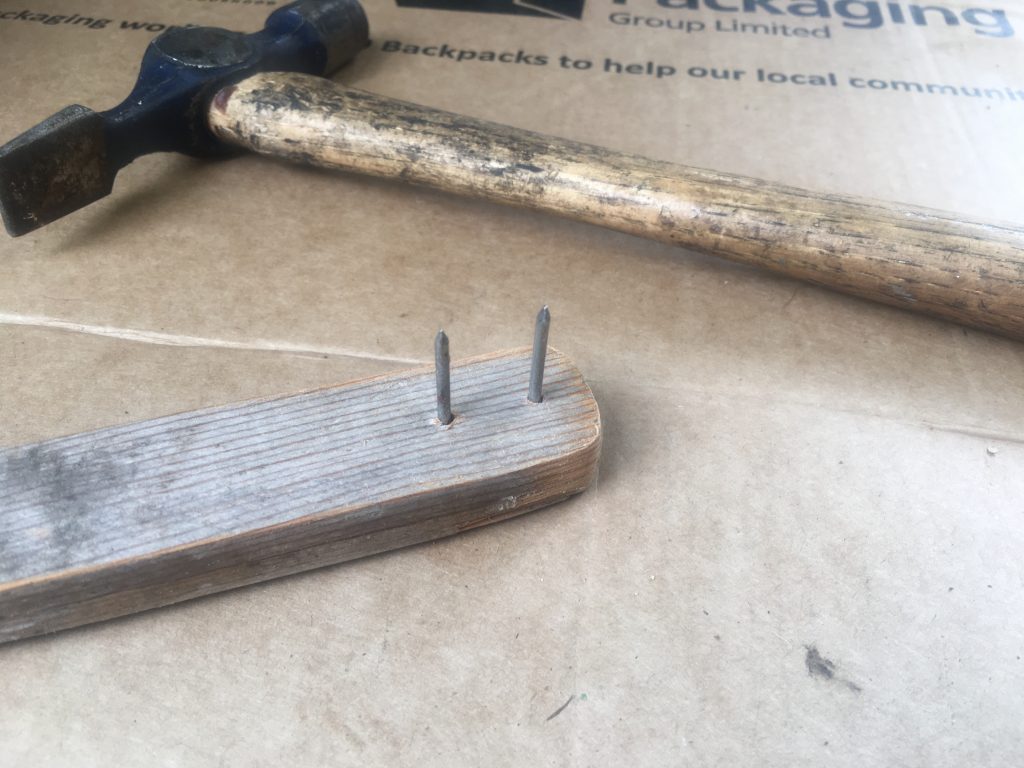
Today I decided to have the trigger wheel off, in case that was what was making the engine wheeze, stutter, stammer and stall.
I wondered if I’d put it on the wrong way round; was the concave or convex part pointing forward? And was it aligned as it should be tooth position wise?
Taking it off required yet another dis-assemble/re-assemble routine. I think I’ve done it all five times now, since starting these repairs! I suppose I’m getting better at it, as a result.
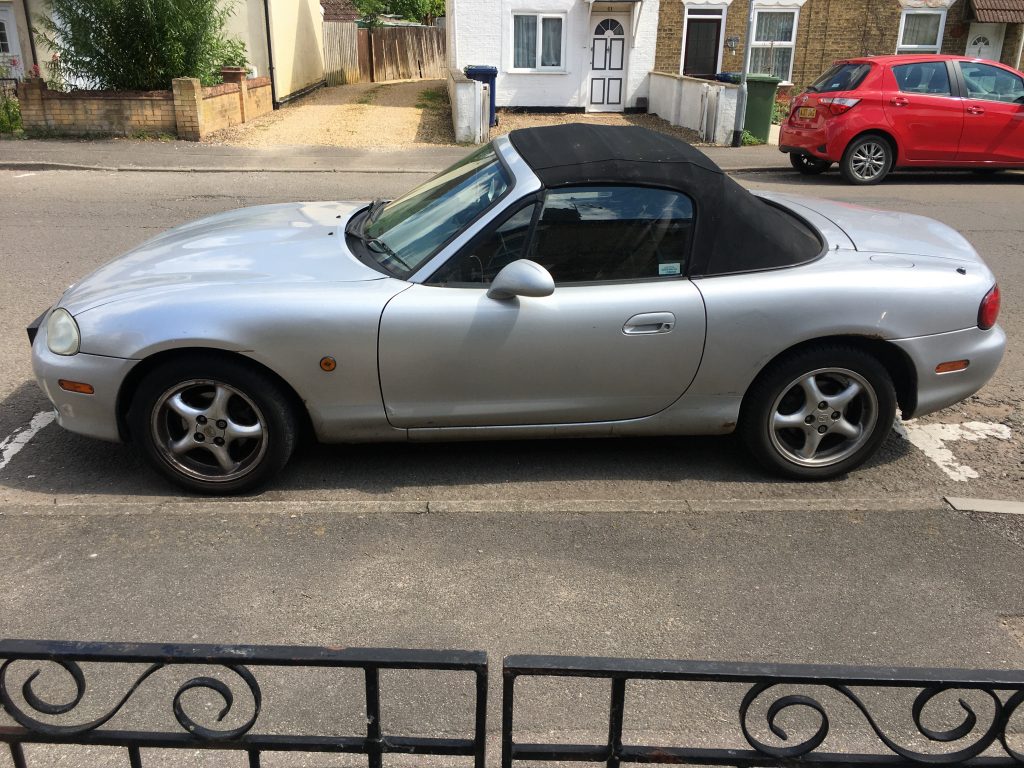
I’m also getting to know my car better. Decided to name her Maisie!
I’m not really watching it, but in the background we have the TV on, and Hungary are humiliating England with a 4-0 pasting.
One job that remains to be done is re-installing the plastic engine under-tray. It was barely attached before. And came off pretty easily. In trying to re-attach it, I realised it should have been quite differently installed.
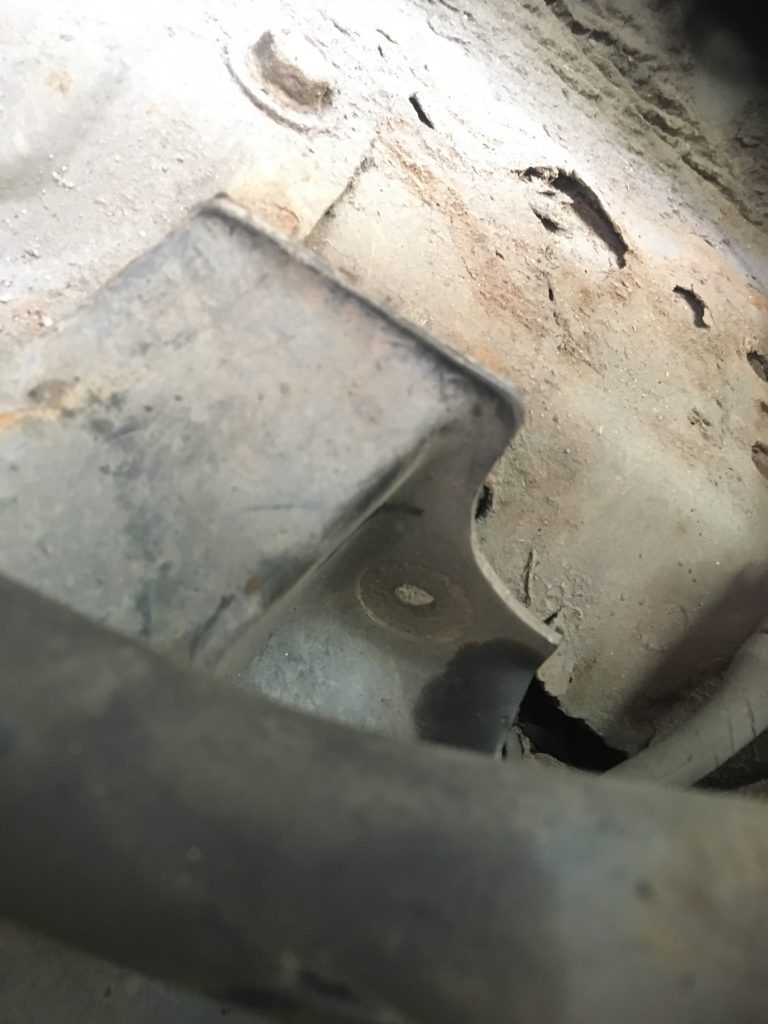
I was unable to do it at all, for want of the right tool; some of the plastic ‘splash guards’ I need to remove are attached with doodads that I can’t get to. I need an L-shaped Philips head tool to get into the very confined space in the wheel arches. So I’ve ordered a set from Amazon. Should be here tomorrow. In the meantime, I’d best just drive gently and carefully!
At this point I’m starting to lose count of how many times I’ve taken stuff apart and put it all back together. But I guess it’s all good, in a way? As with repetition comes better facility.
I’m posting this in its proper timeline sequence, but retrospectively. And as a result I’m a bit sketchy on detail. But I think at this point I had the engine back to life, running. But it wasn’t sounding strong or healthy.
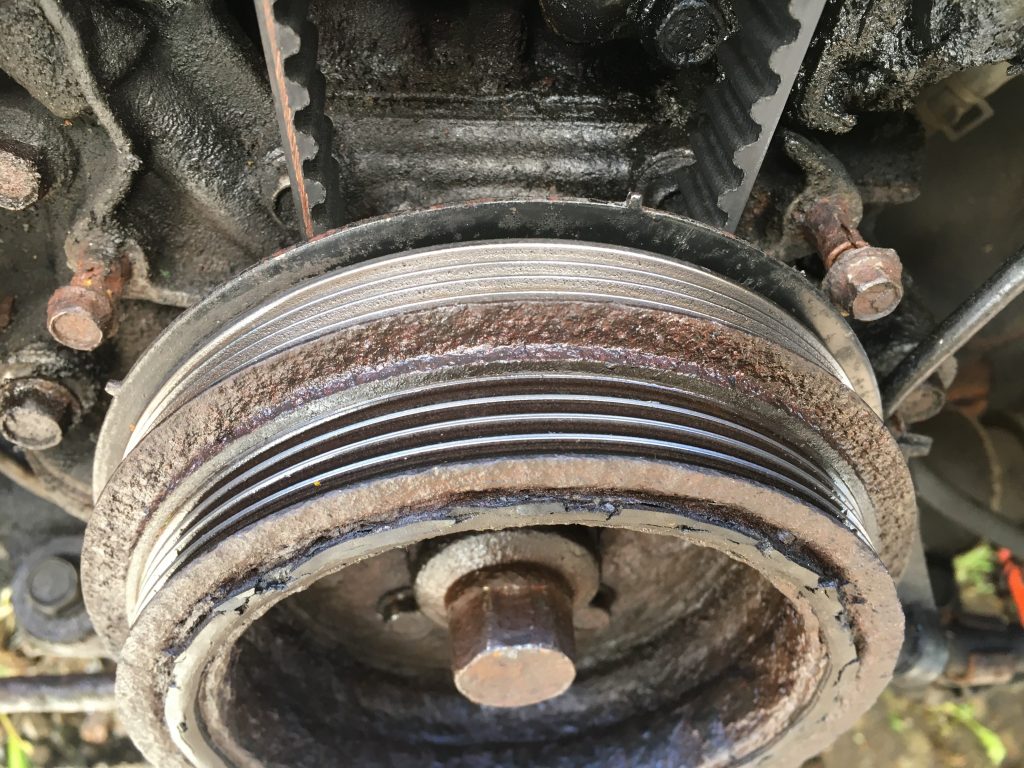
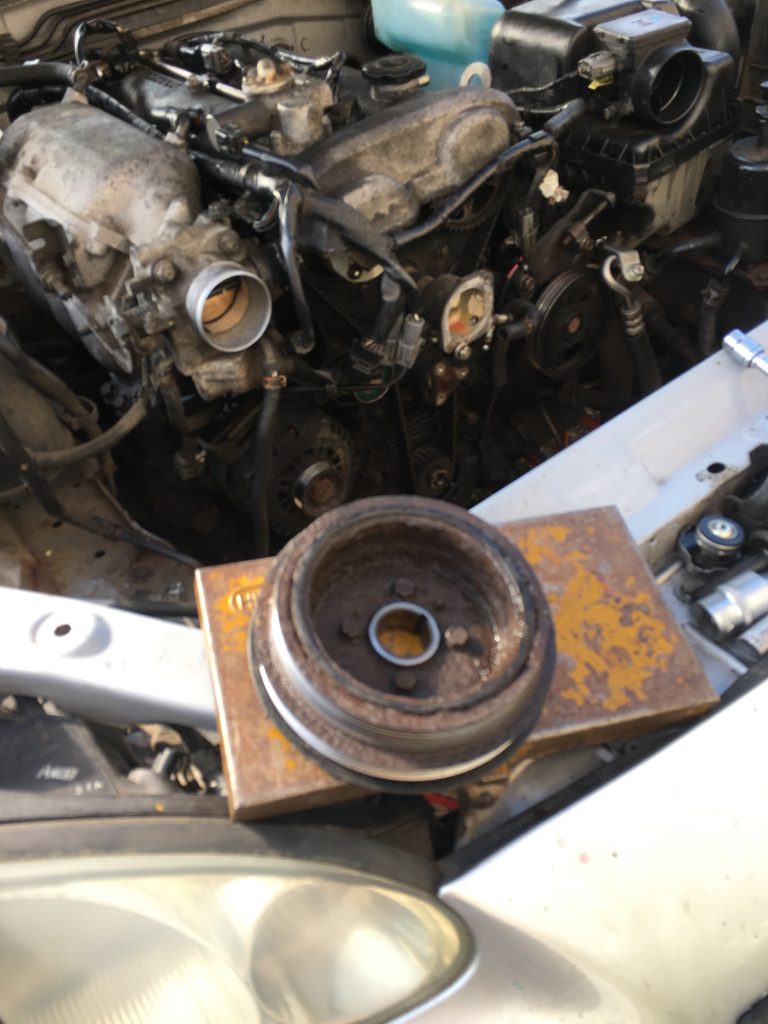
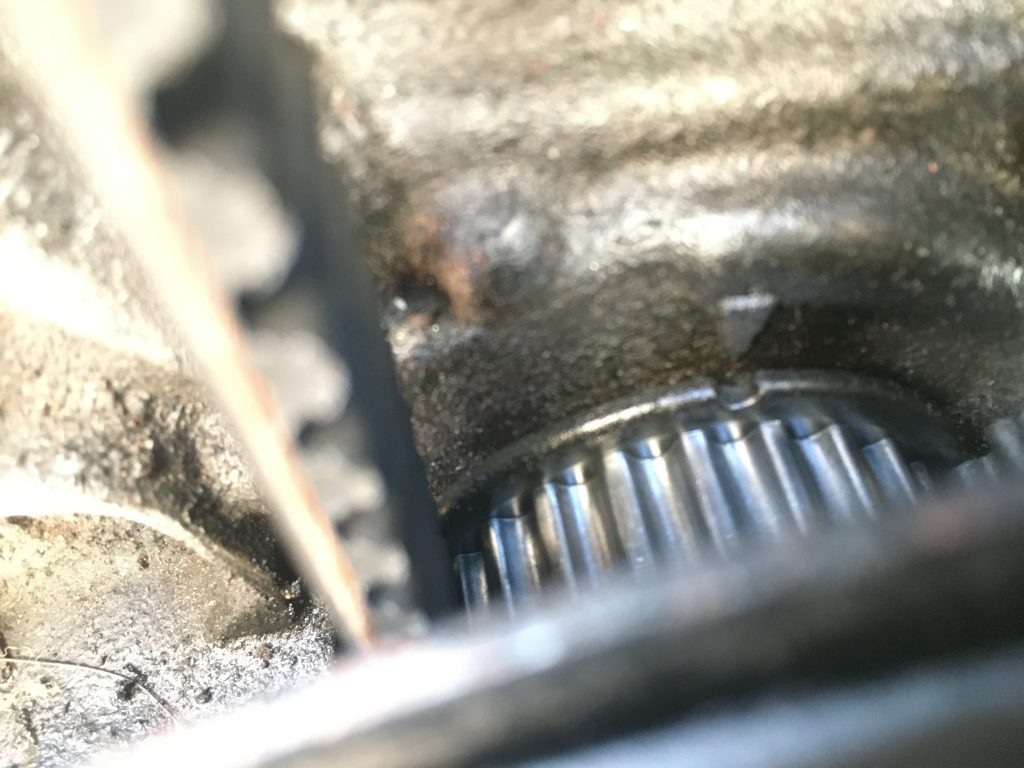
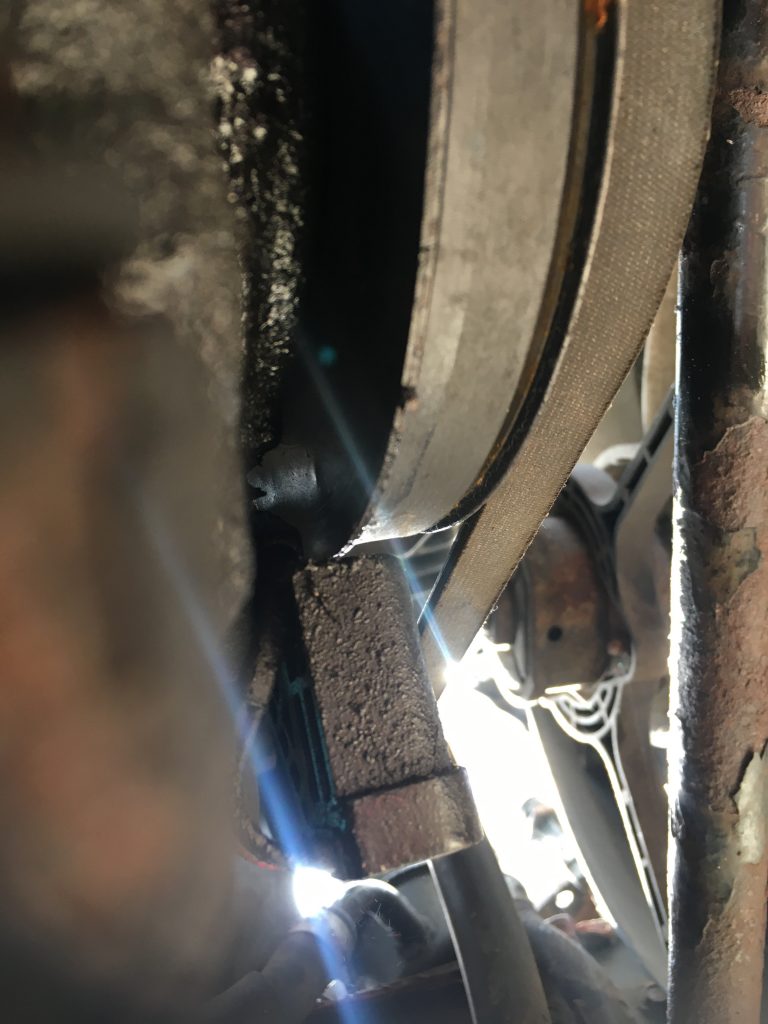
I.e. the timing was still out somehow. My intuition told me that it was probably the trigger wheel. which can be seen behind the harmonic damper in the above image. Just two of the teeth are visible in this shot.
In removing all of this stuff initially – trigger wheel, damper/pulleys, and central crankshaft wheel – I’d needed to use mucho persuasion! This lead to the trigger wheel getting somewhat deformed, by the time I’d banged/prised it orff…
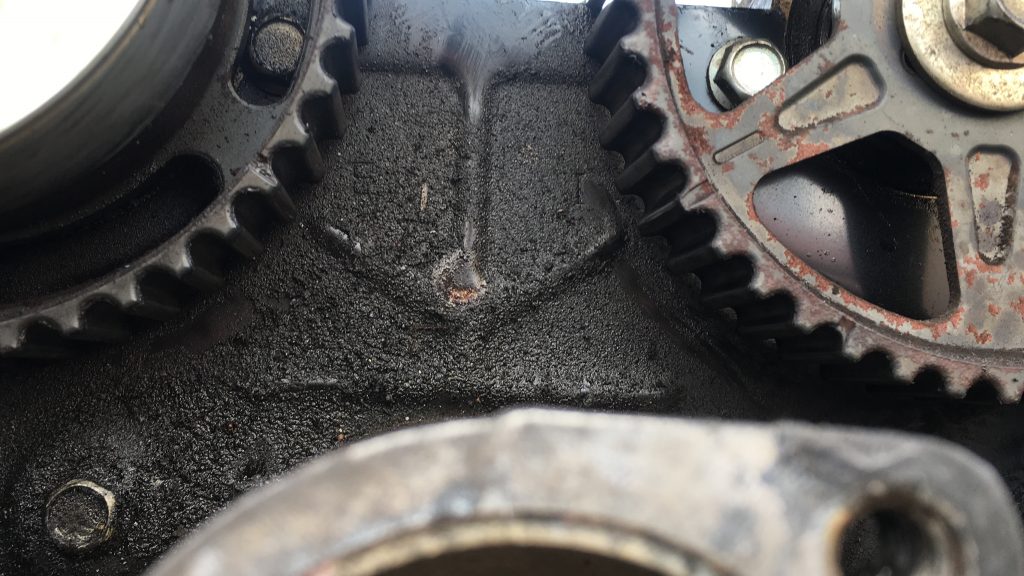
I used numerous hammers, mainly large heavy soft-headed types, and some vice compression action, to flatten the bugger! And then I re-installed it, making sure it was properly aligned: concave face forward, convex rearward, locator pin in hole, and engine TDC, resulting in the top tooth (of just four!) being just past 12 o’clock.
With the trigger wheel replaced and hopefully now in its proper position, I had to once again set up the timing. By now I’m getting quite good at this. That said, it’s always hard work!
I didn’t super document any of this, given I’d done it all before. Instead I photographed the bits that were specific to the days’s work
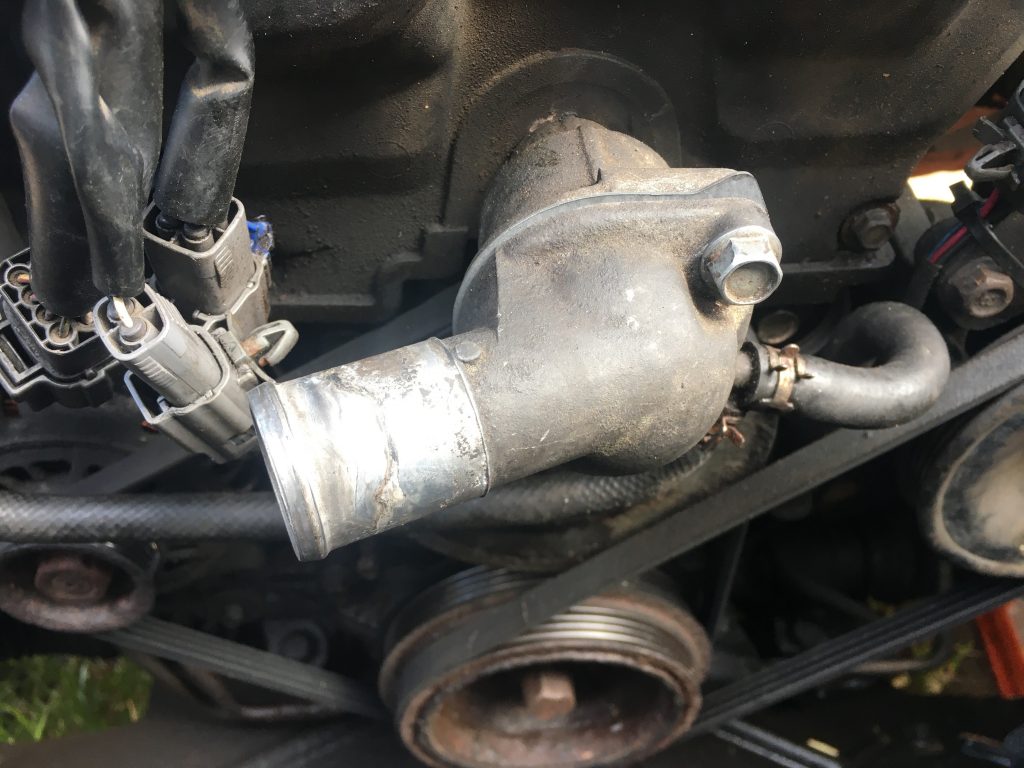
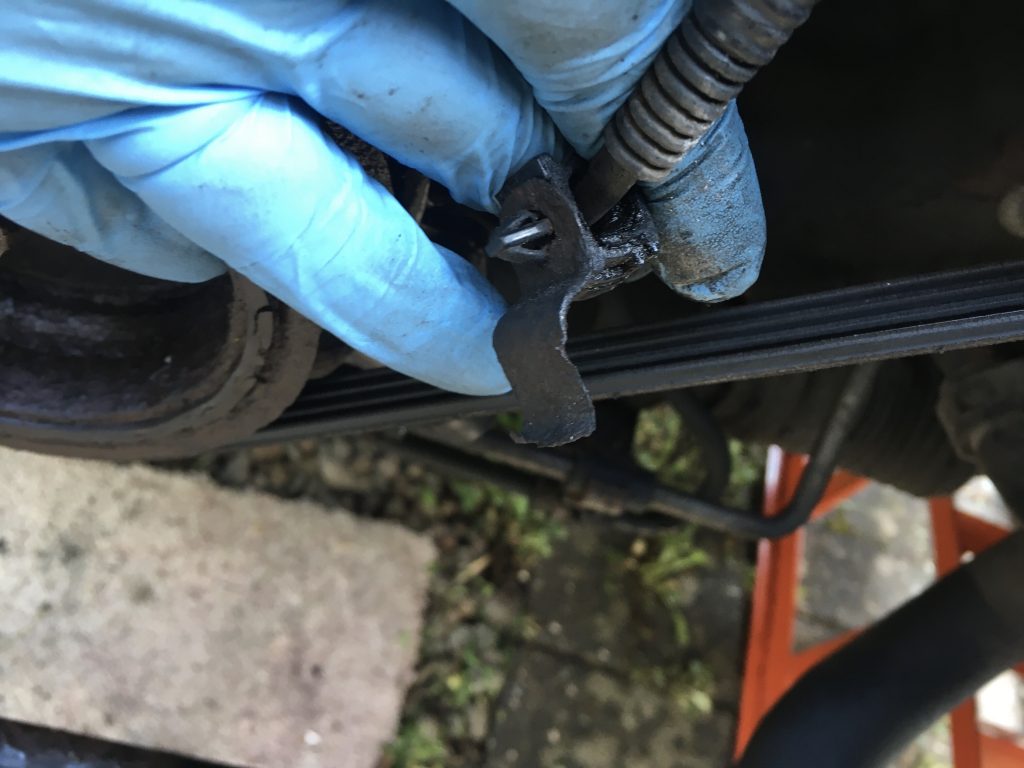
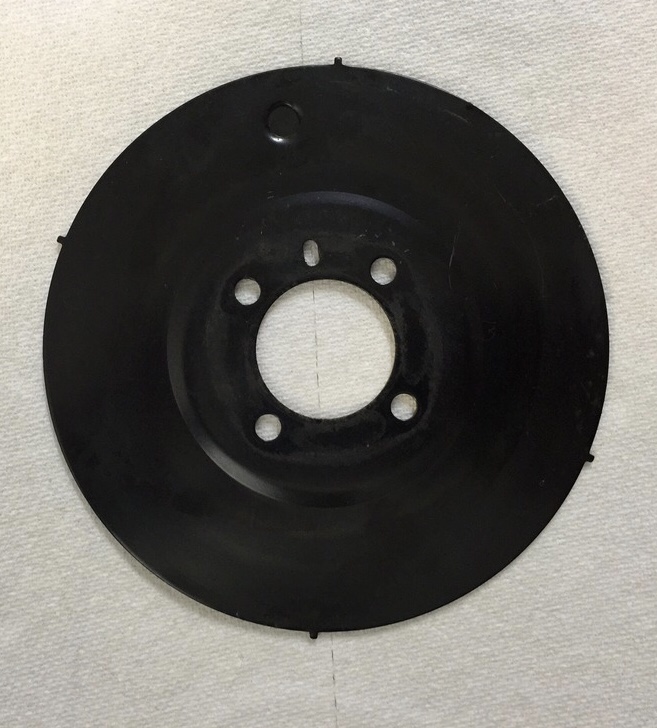
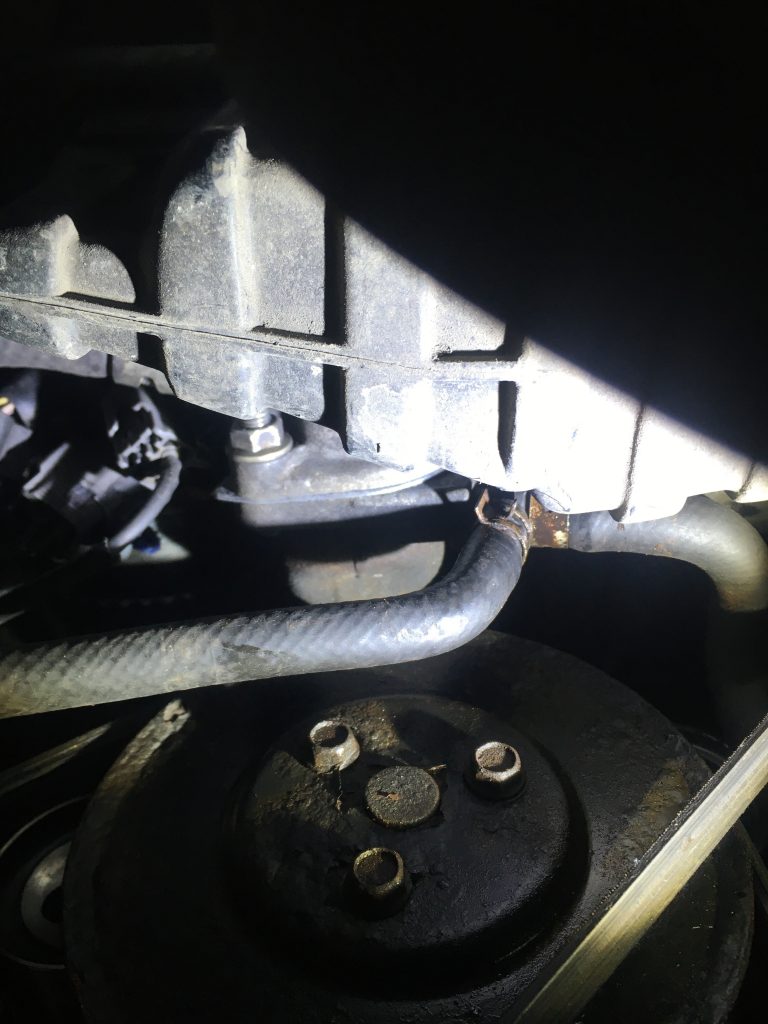
Pictured below was a bit of lower engine detail I’d missed before. The plastic clip and metal doodad I’m holding should be affixed to part of the three-part front engine cover, which protects the cam-belt and pulleys. but two thirds of that isn’t back on, due to it being k-nackered!
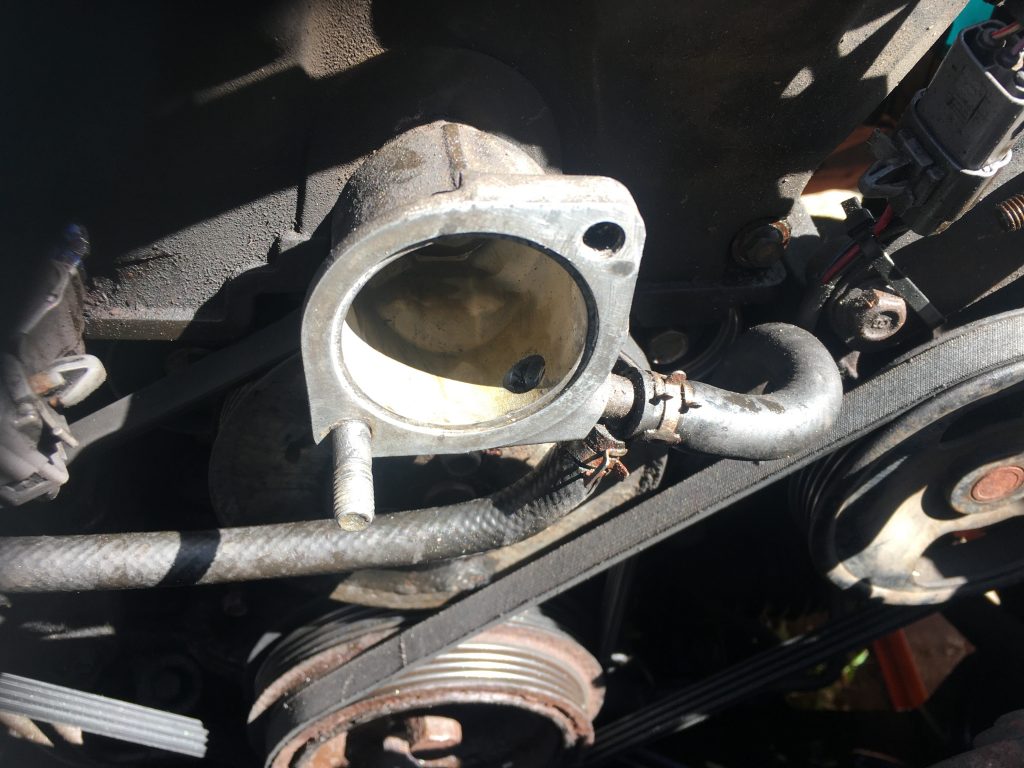
Once this fixture was removed I cable-tied the lead out of harms way. All of this business required, once again, the drainage and removal of the radiator and various pipes and hoses.
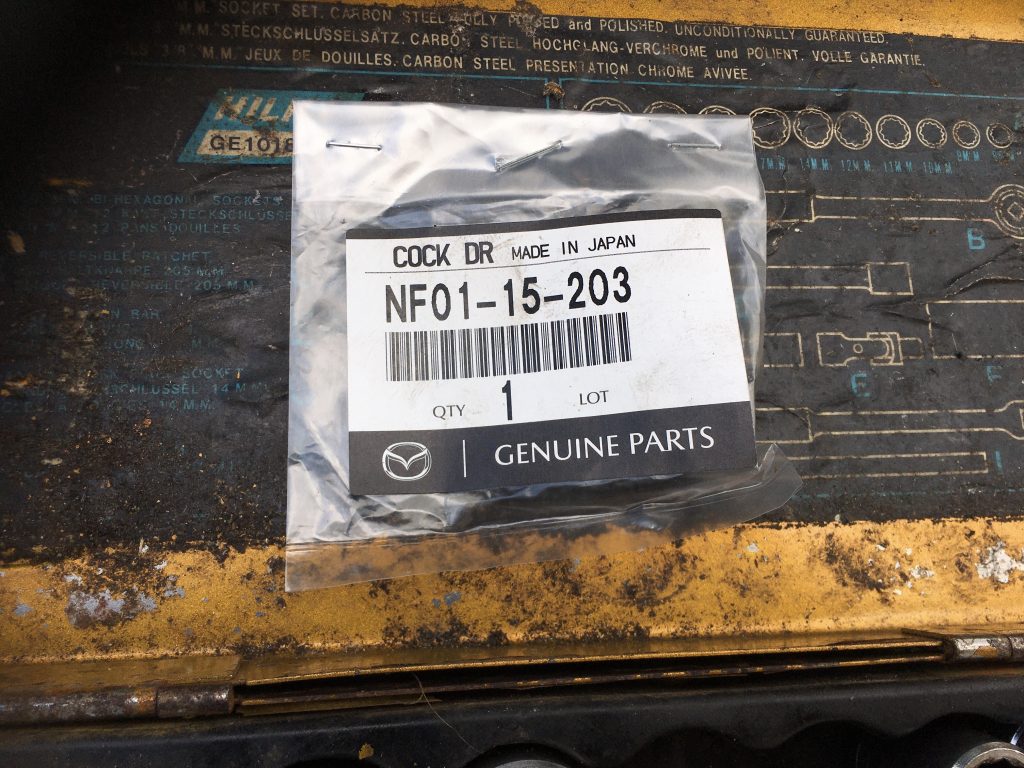
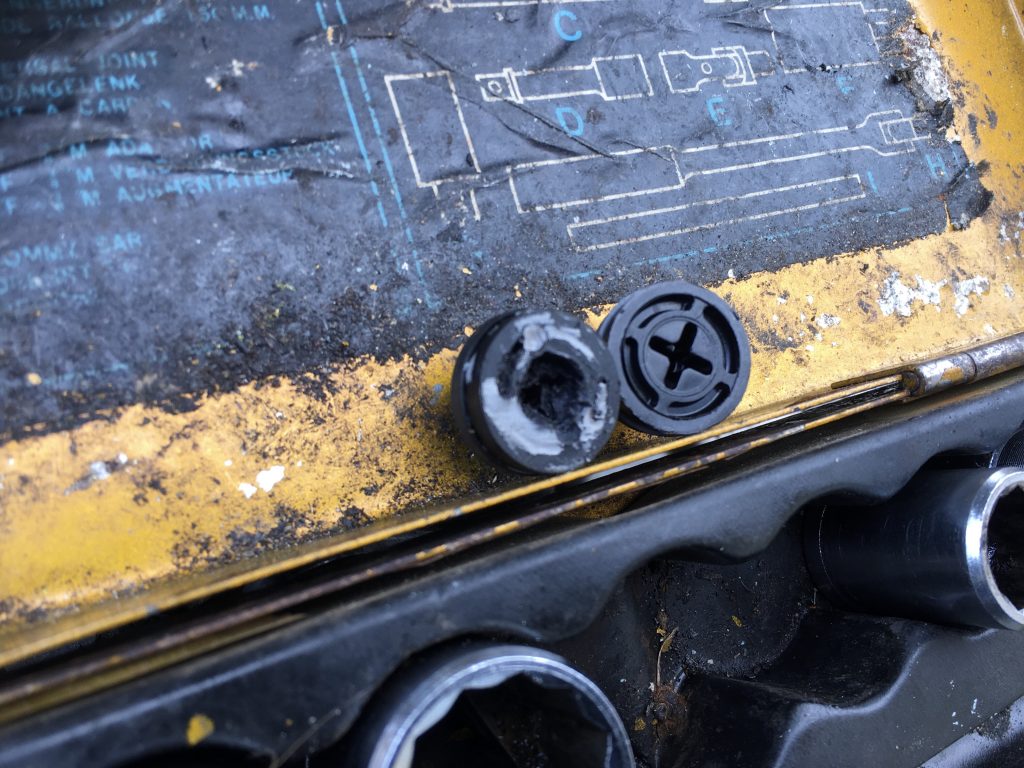
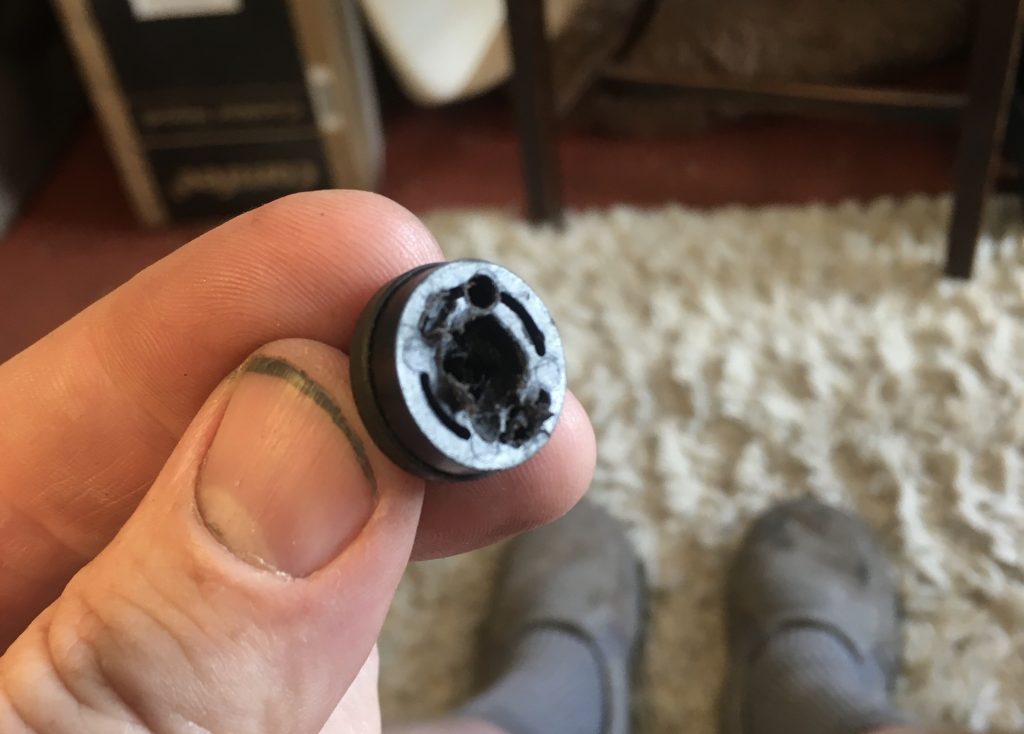
Having lived with a bodged radiator plug fix up till now, the arrival of a new genuine Mazda radiator plug was most welcome. There they are, directly below, and facing the same way. The old one is completely jiggered!
With the trigger wheel properly installed, and the new radiator plug allowing a coolant refill, I took her around the block, and then parked her up in her accustomed spot. And all was well! (Aside from the persistent coolant leak!)
By close of play today the engine was running much more smoothly. And where before she’d struggled as you increased revs, she was now sounding consistently healthy across the whole range. Result!

Today I didn’t do that much on the car. I re-filled the radiator with coolant. My sealant gasket fix of the radiator sump plug seems to be working, which is great (although I also have a brand new plug on the way to me).
I also torqued the crankshaft main bolt, to 160 NM, which required dropping the sway bar again, and removing some o’ the upper pipe works. And then, not forgetting to reconnect the negative terminal on the battery, it was time to have another go at starting her up. I was totally convinced it would be exactly as before, and not work at all!
So it was gobsmackingly amazing when the engine actually fired and turned over. I’m not a religious man, but… Hallelujah! Seems my timing belt change was successful after all. Sadly this state of bliss didn’t last long; the engine, whilst running, sounded bally awful, spluttering and struggling. So I switched her off, pronto.
Going round to the engine bay revealed an almost explosive looking oil leak had occurred at the rear of the engine. So I had to clean that up, and then take off and re-seat the cam cover. Whilst I was at it I cleaned up and removed the previous gasket sealant. I then refreshed the latter, with a new application, and re-seated the cam cover. Sadly I don’t have a small/low enough torque wrench for the final buttoning up.

So I’ve ordered a smaller (5-25NM) torque wrench, via Amazon (pictured above). That ought to arrive tomorrow. Once I’ve torqued off all the bolts topside, it’ll be time to try again. Third time lucky!?
I’ve learned a lot, and enjoyed working on the car. That said, there were some hairy/sweary moments. And occasionally it was too much like hard work. That one episode where I worked on one nut/bolt for about three hours was not a favourite moment!
And we’re still not there yet. There are at least three things still outstanding: 1) Have I sorted out the oil leak? 2) There’s also a very slight drip-drip-drip type coolant leak from somewhere on the thermostat housing (despite the new gasket). 3) Did I bugger the trigger-wheel when struggling to get the crankshaft pulley off?
This last is a bit of a worry, as it concerns the accuracy of the timing, as did the whole cam-belt replacement shenanigans. Apparently it can quite easily by put on the wrong way round. It’s also supposed to be quite specifically aligned. I’m not sure mine is right in any of these respects!?
My thoughts at close of play today are that I’ll have to wait for the smaller torque wrench, then tighten off ye engine and try it again. If she runs and doesn’t haemorrhage oil again, I’ll take her for a shirt run around the block. But I’ll most likely need to get her to a garage to have someone competent look over her… hmmm!?
And finally, what about work? Last Friday I did a full days’ teaching, for the first time in two weeks. My journeys were long and very arduous: two trains, a bus, and a long walk either end of the day, with a taxi journey in the middle!
Will I be able to teach tomorrow? It looks unlikely. I don’t want to lose that school and those pupils! Perhaps, if I get the car running tomorrow, all will be well and back to normal? But what about getting to a garage and checking the trigger wheel, etc?
* It didn’t work, sadly. So I wound up using a pair of circlip pliers, instead.
Yesterday a thermostat gasket and engine under-tray bolts arrived. I fitted the thermostat housing gasket quite late in the day. I’m holding off on the under-tray until she’s working again, or whatever else may transpire (gulps!).
I ordered a radiator sump plug replacement from MX5parts, which won’t get here til Monday or Tuesday, and being impatient to get the 2nd fix tested, I thought I’d attempt a DIY repair of the old damaged plug.
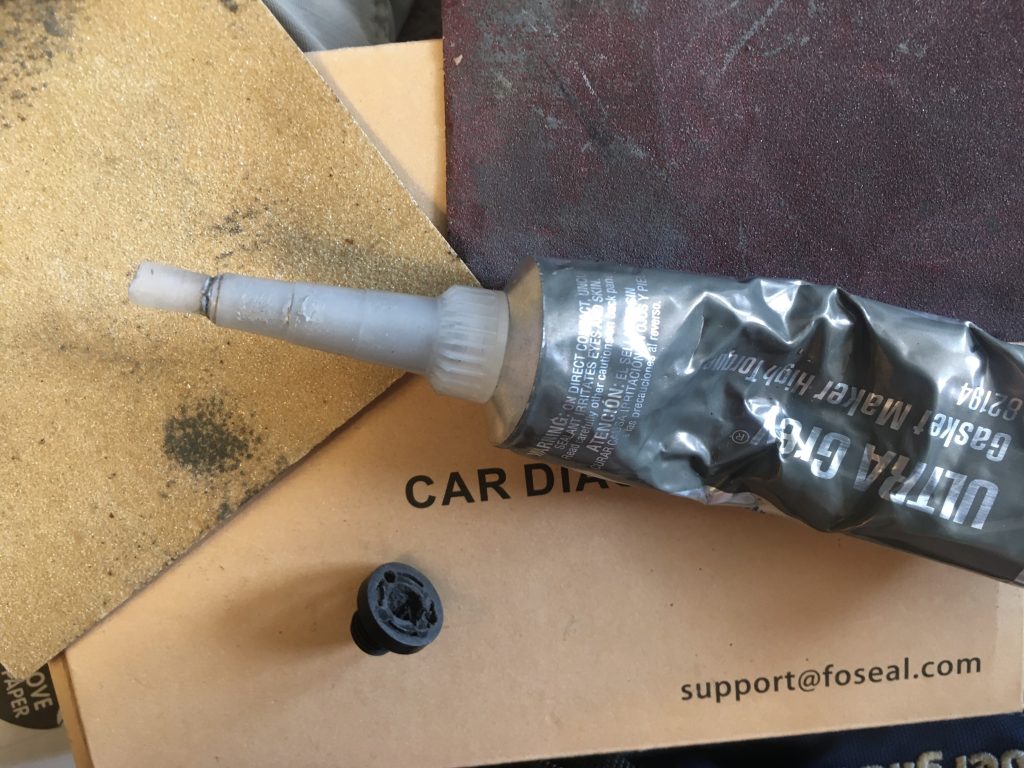
I sanded it down with two grits of sandpaper, and cleaned up with a scalpel. I then used the gray gasket sealant I was supplied by BOFIracing. Just checked that… ‘Allow 24 hours to fully cure’ ! Well, that will still give me a potentially usable plug a day or two earlier than waiting for the new part.
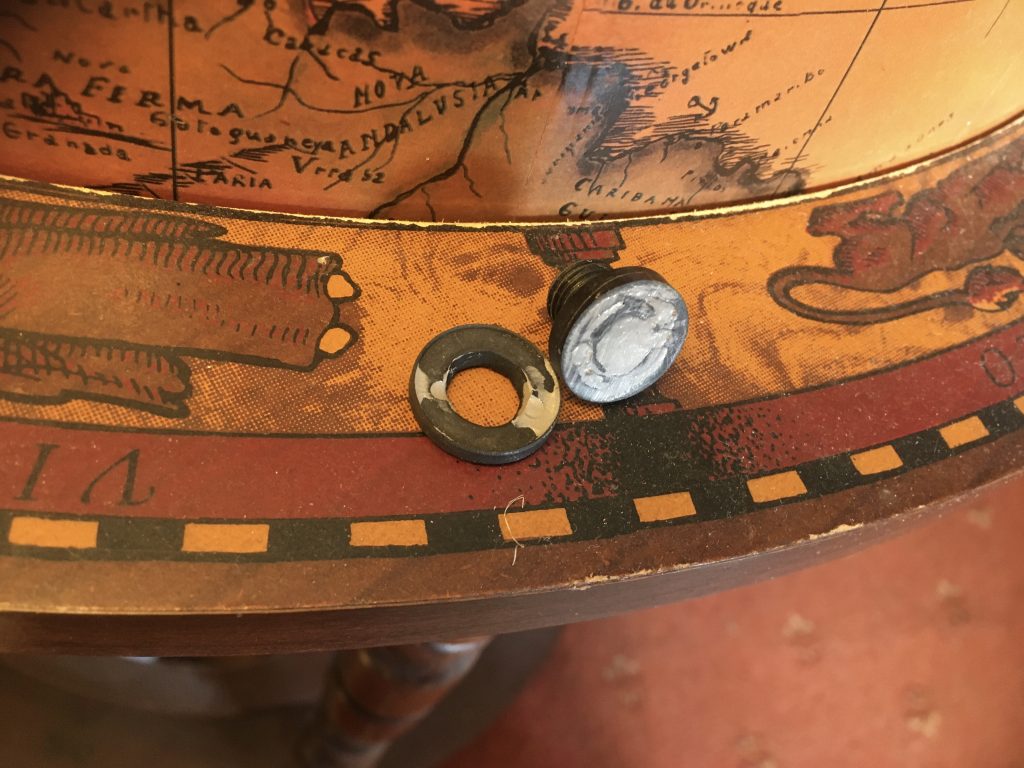
I’ve let it cure for about six or so hours, and installed it. It went in very easily and nicely. It may need tightening up a little bit more. I’ll wait till tomorrow, and test it with a wee bit of coolant.
As can be seen from some of these photos. I got under the car, partly to put the radiator plug back in. Let’s hope it holds! Whilst under there I got shots of other things, like the oil sump plug. No leakage there. Very gratifying!
Did a load of other stuff around the home today: put the towel rack that had fallen off back up; cleaned the living room window and frame; cleaned and refreshed the lounge to kitchen door paint, which had gotten mucky and grim looking.
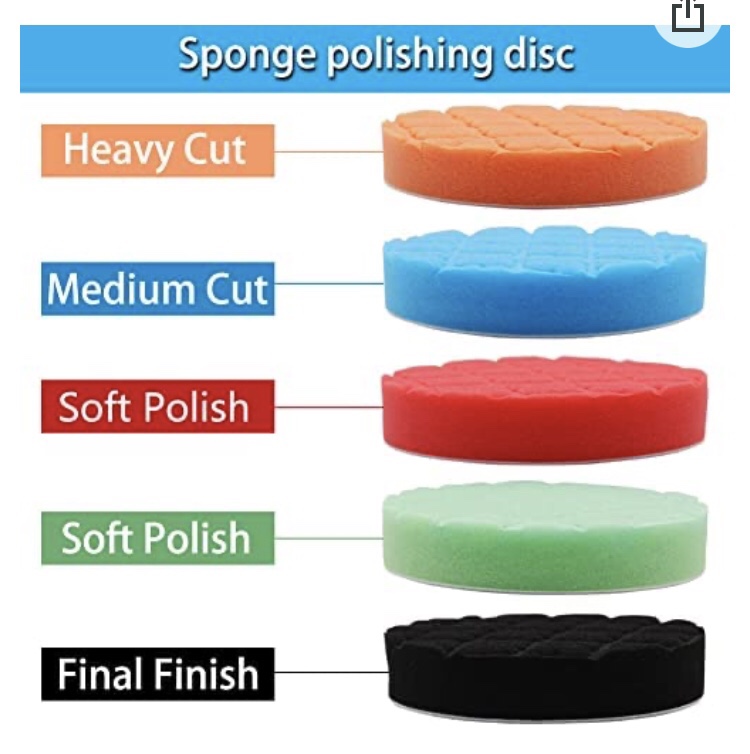
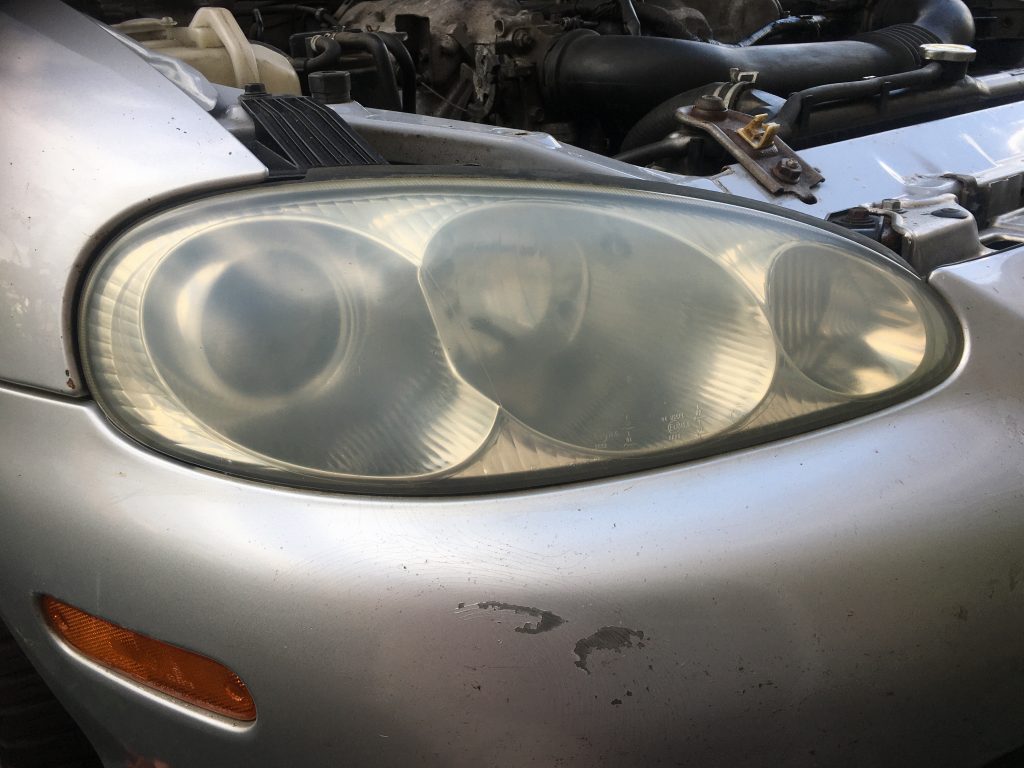
Also tried a set of buffing pads – pictured above – I got from Amazon Vine, on the headlights. The plastic over these has become very cloudy and dull. This means the headlights are a lot weaker, as the plastic is nearly opaque!
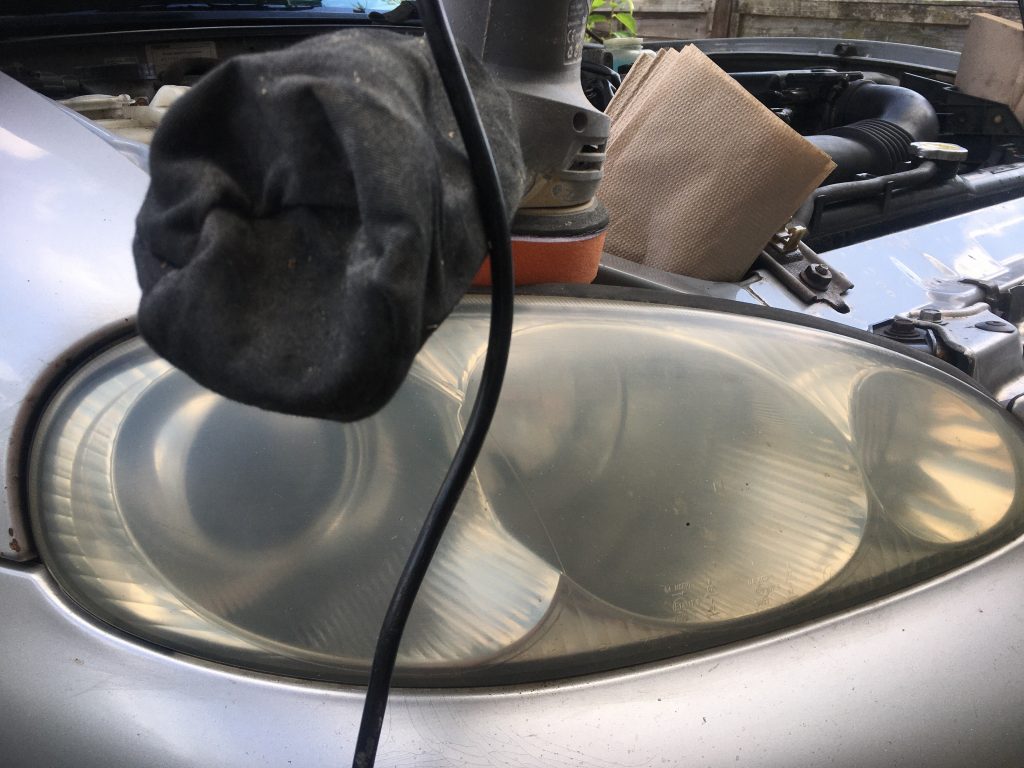
I have to say that I’m not sure the five grades of pad, coarse to smooth, really did very much. The pics here suggest a very minor improvement. If any!?
I’m itching to try the car again. but I need to torque up the crankshaft bolt, and I’m scared that doing so will knock the timing out of alignment. I’ll wait till tomorrow. And I can try out the radiator coolant as well.
* I’m an idiot! Of course there aren’t any leaks… I haven’t re-filled with coolant yet. Dumbkopf!!!

Whilst engaging in a spot of FB banter/lurking, this topic somehow hove into view, along with a parallel thread in which ‘Trane was compared with that other modern deity, Elvis (Baz Luhrmann has a biopic on the latter coming out soon, God help us!)
I wondered, did the Oops, er… oops? I mean the Pope (I love that predictive rendered Pope as Oops!), know of this beatification?

A bit of Googling revealed that John’s elevation to sainthood was actually a demotion from godhead! And not via the ‘purple inflatability’ of the Oops. Oh no! It was the AOC, or African Orthodox Church (of America) that sanctioned this sanctifying:
‘In September 1982, Coltrane was officially canonized as a saint by the AOC.’
[Source, NPR. Read more here.]

I love a great deal of John Coltrane’s music. And I also dig a great deal of Alice Coltrane as well. She was a super-spiritual sort as well. It’s kind of cool, as well as downright weird, that ‘A Love Supreme’ has become a kind of hymn and regular service at the church that bears his name.
I find it all totally understandable. John and Alice have made music with tremendous emotional and psychic or spiritual power. But these are vexed terms and ideas, for me.
Not going to say much about it all here and now. Just observe that these things are whatever they may be. They exist!