
When you do DIY, esp’ as an amateur/newbie, you’re always making mistakes and learning. Well, I am.
We need to build some storage stuff in The Blue Room, which is our guest room. We’ll be letting it out to our brother in law, Antonio, very soon.
So we don’t have long to do this work!
In order to construct a built-in wardrobe cum whatever it’s going to be – clothing storage, essentially – I didn’t want the coving interfering with construction.
I watched a few YouTube vids of folk removing coving. And of course, they made it look super easy. I find that whenever I do this sort of thing, other unforeseen factors come to bear.
So, for example, the main video I watched, whose technique I used, was in a more modern house. And it looks like the coving wasn’t super-strongly attached. I used the same technique; a rubber mallet and a flat scraper type thing, hammered ‘twixt coving and walls/ceiling, to prise them apart.
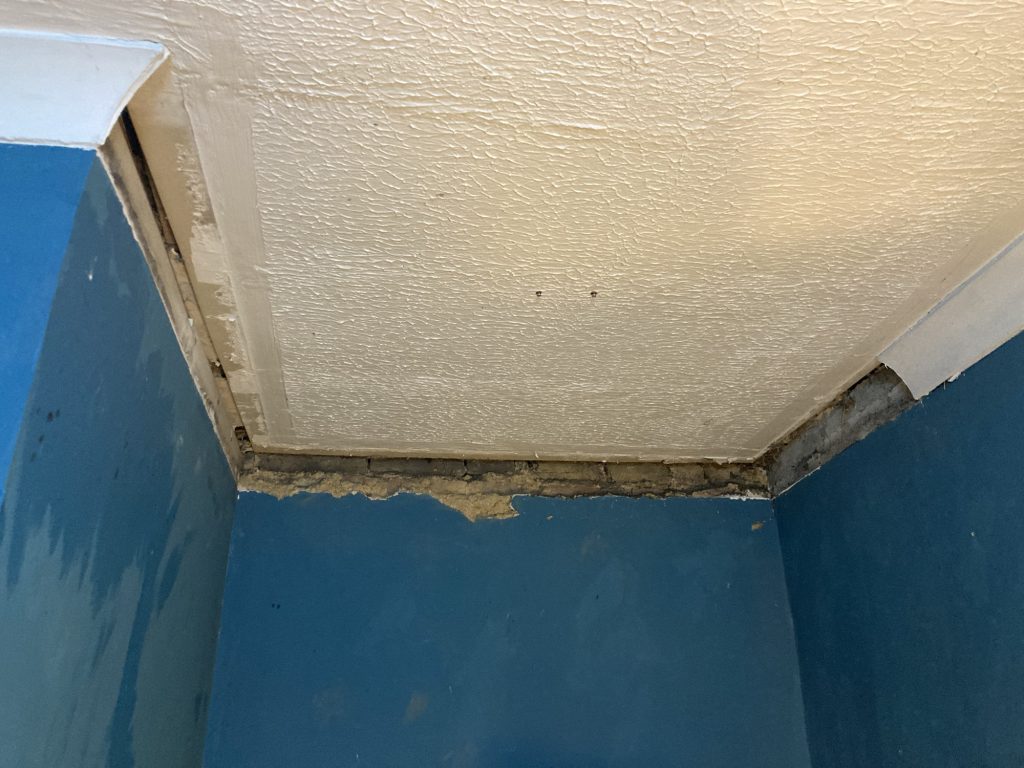
But I needed to use far for more force to get them to separate. And instead of the coving coming away in long complete sections, it would break into smaller pieces. But the worst thing was, that unlike the stuff in the video, where wall and ceiling meet in a nice neat 90° angle, in our home the coving covers yawning and very messy chasms, ‘twixt wall n’ ceiling!
And not only that, but an absolute ton of really disgusting dirt, debris and very fine dust was sat in the hollow area – usually an empty void – behind the coving. This has coated the entire room in a fine layer of cack!
With a mask on, and using dustpan & brush, hoover, etc, I managed to clear up the area below where I was working. The next step will be buying and mixing what the Yanks call ‘mud’, known here as plaster.
But I’ll need to further clean up the voids, and I might even need to put up some plaster board or wood, to fill the empty spaces. Trying to do it with ‘mud’ alone would probably require several layers being built up. And we don’t have time for that.
This is of course massively annoying, because it is all prior to the actual construction of the wooden shelves and whatnot. I.e. the actual storage space I was trying to create. It’s these sort of unforeseen things that seem to constantly bedevil any and all DIY that I attempt.
In the photo at the top of this post you can see that on the left I took away all the coving. Whilst on the right I only went as far forward as the unit I’m building requires. I prob should’ve done the latter on the former. But you live and learn! Plus I still have left-over bits of coving I took down. Poss even enough to do the bit that’ll need re-installing?
Tomorrow we’ll head to B&Q, get some mud, and some framing timber, etc. Who knows, I may even have the carcassing done by the end of the Easter weekend?
Actually… thinking of tomorrow, it’d be good to get all the waste from the box and laurel bushes to the dump, and post the LPA docs as well. Must remember all these things!