
It’s been a while since I posted here. Having got back into making regular posts on my mini-military blog and not having done too much in the home or garden beyond bits of maintenance tidying.
Yesterday I finally installed the first of the four or so fire-alarms we’ve had for some time now, in the guest/airbnb room. One down, three to go!
I’ve also had to prop up a couple of sections of fence, which are busted and sagging under the weight of some ivy. Didn’t want Storm Freya knocking them down! We need to do lots of work on our fence, as it’s very old and dilapidated. About 8-12 panels have either fallen down or are just about to. Some of these have subsequently been burned or dumped, leaving gaps.
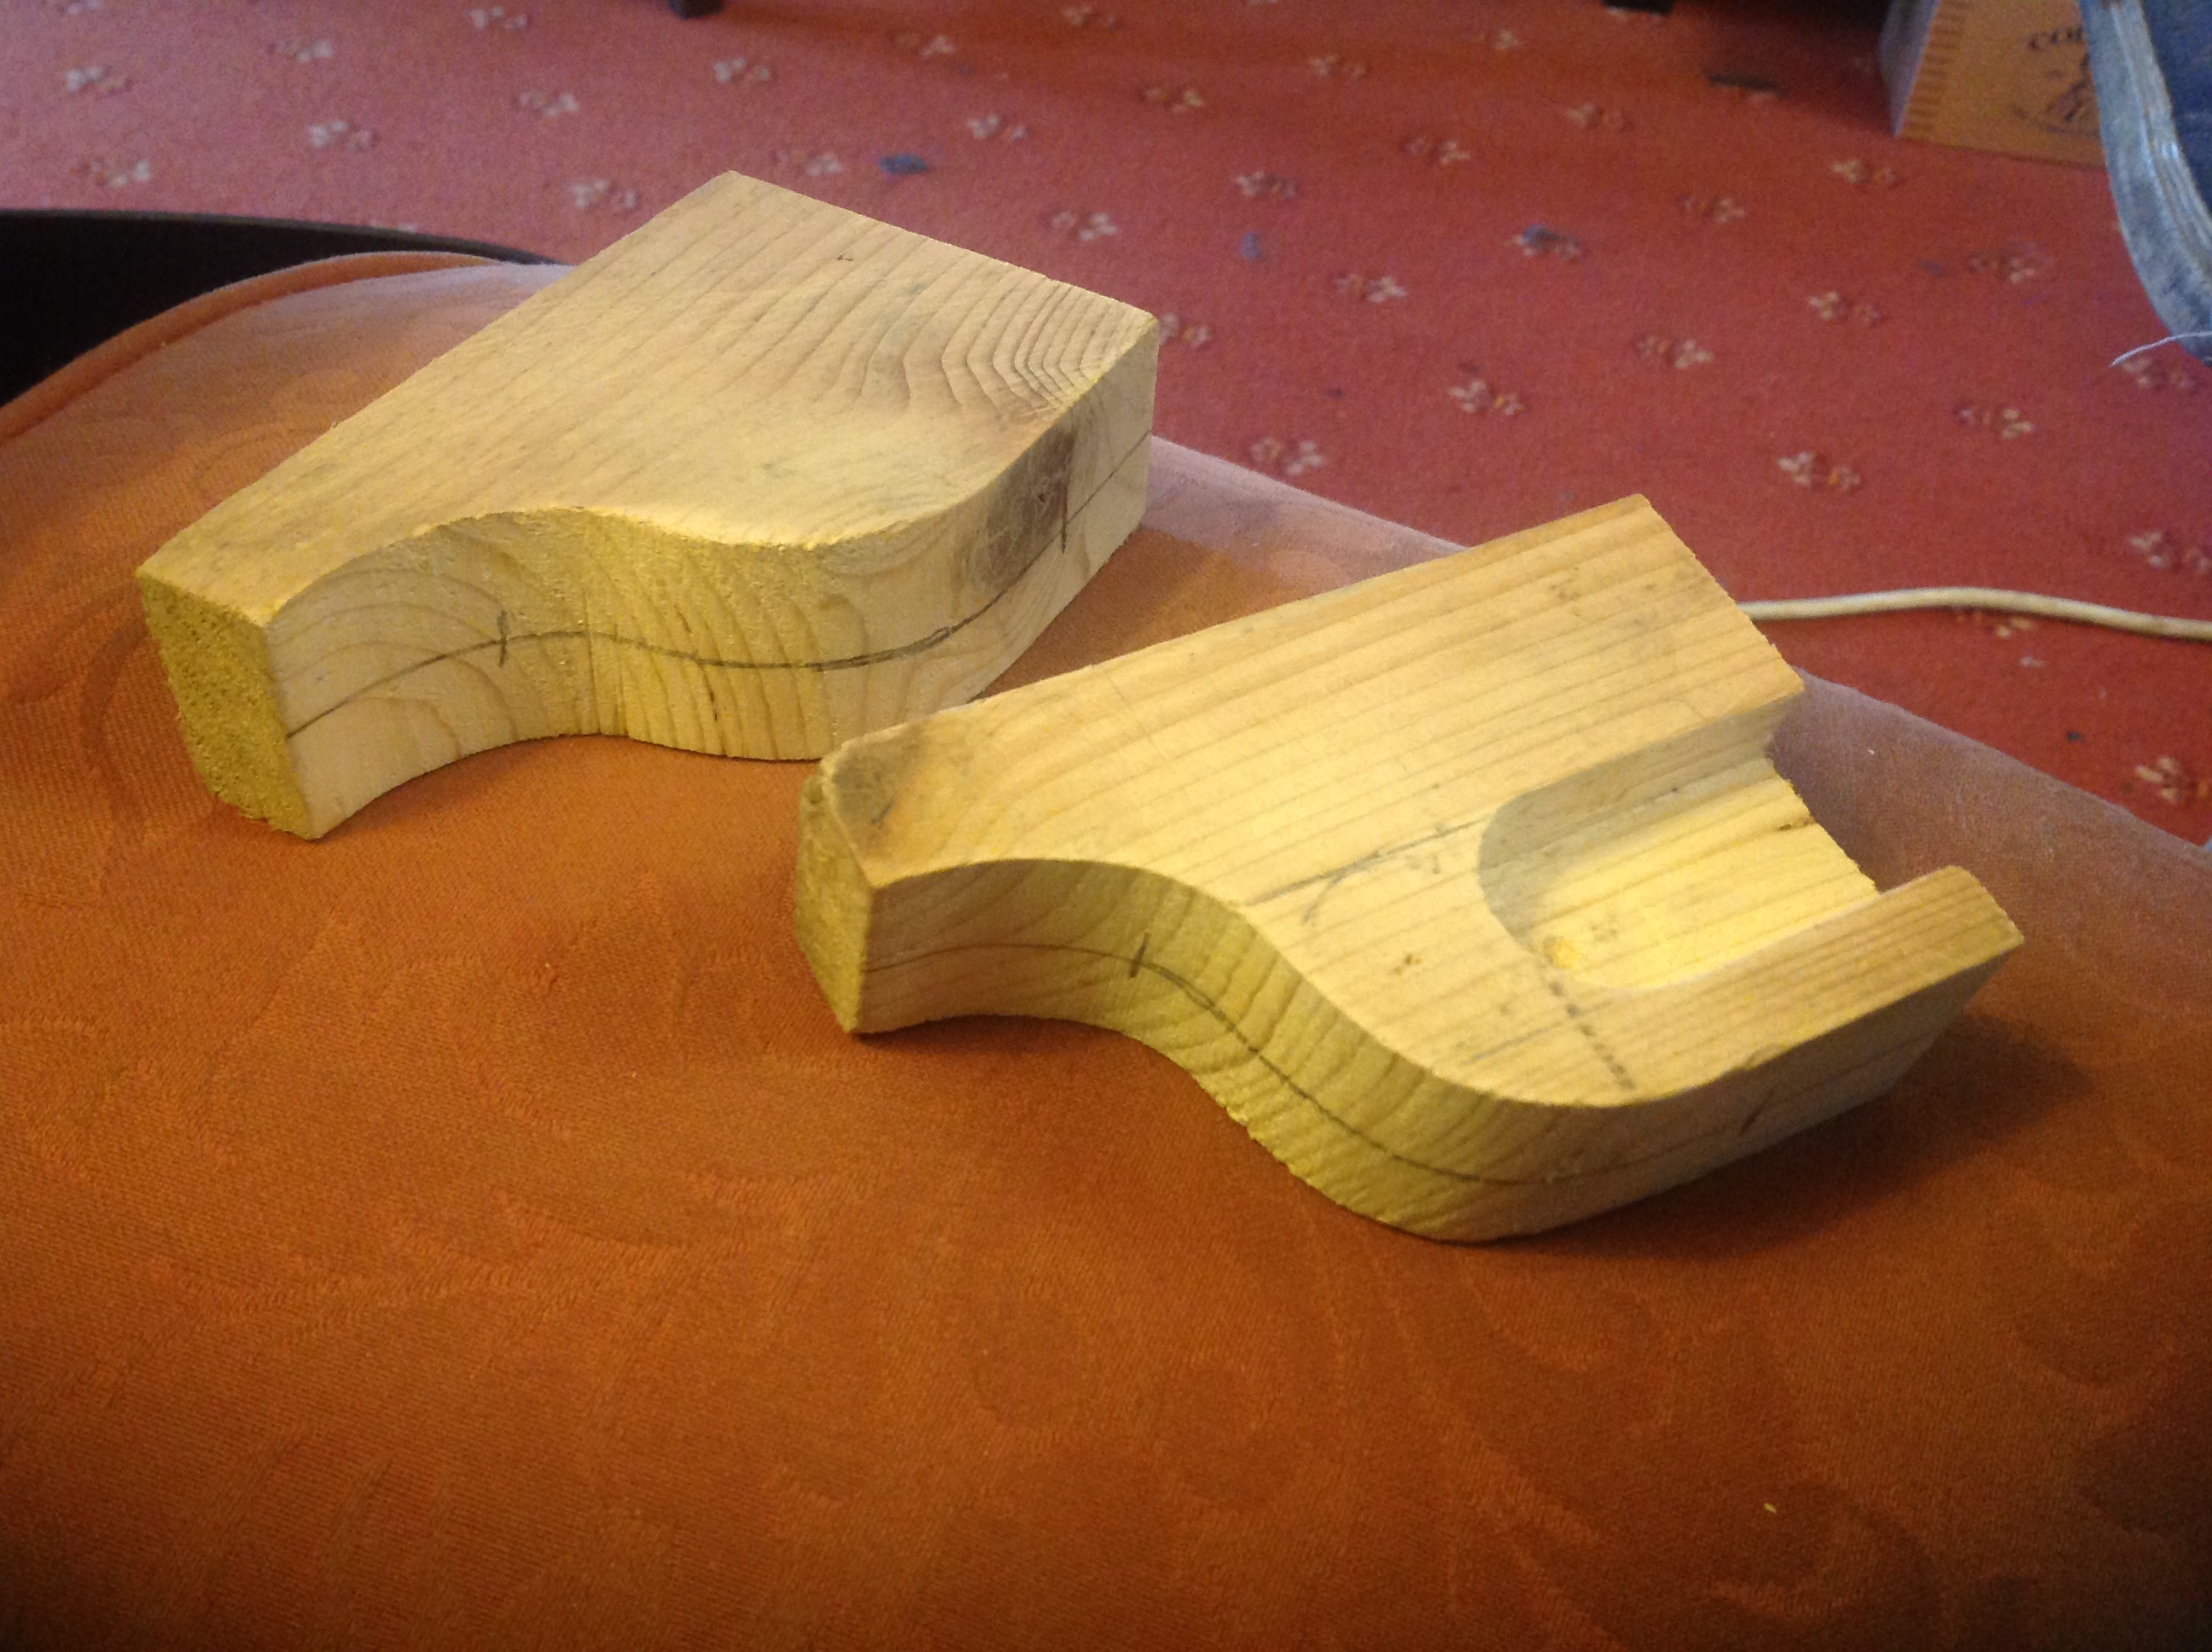 Pine brackets for the curtain rail.
But another job has left Teresa breathing down my neck! She made a green velvet curtain for our back/kitchen door, a little while back, and has been on to me ever since about getting it up (fnarrr, fnarrr!).
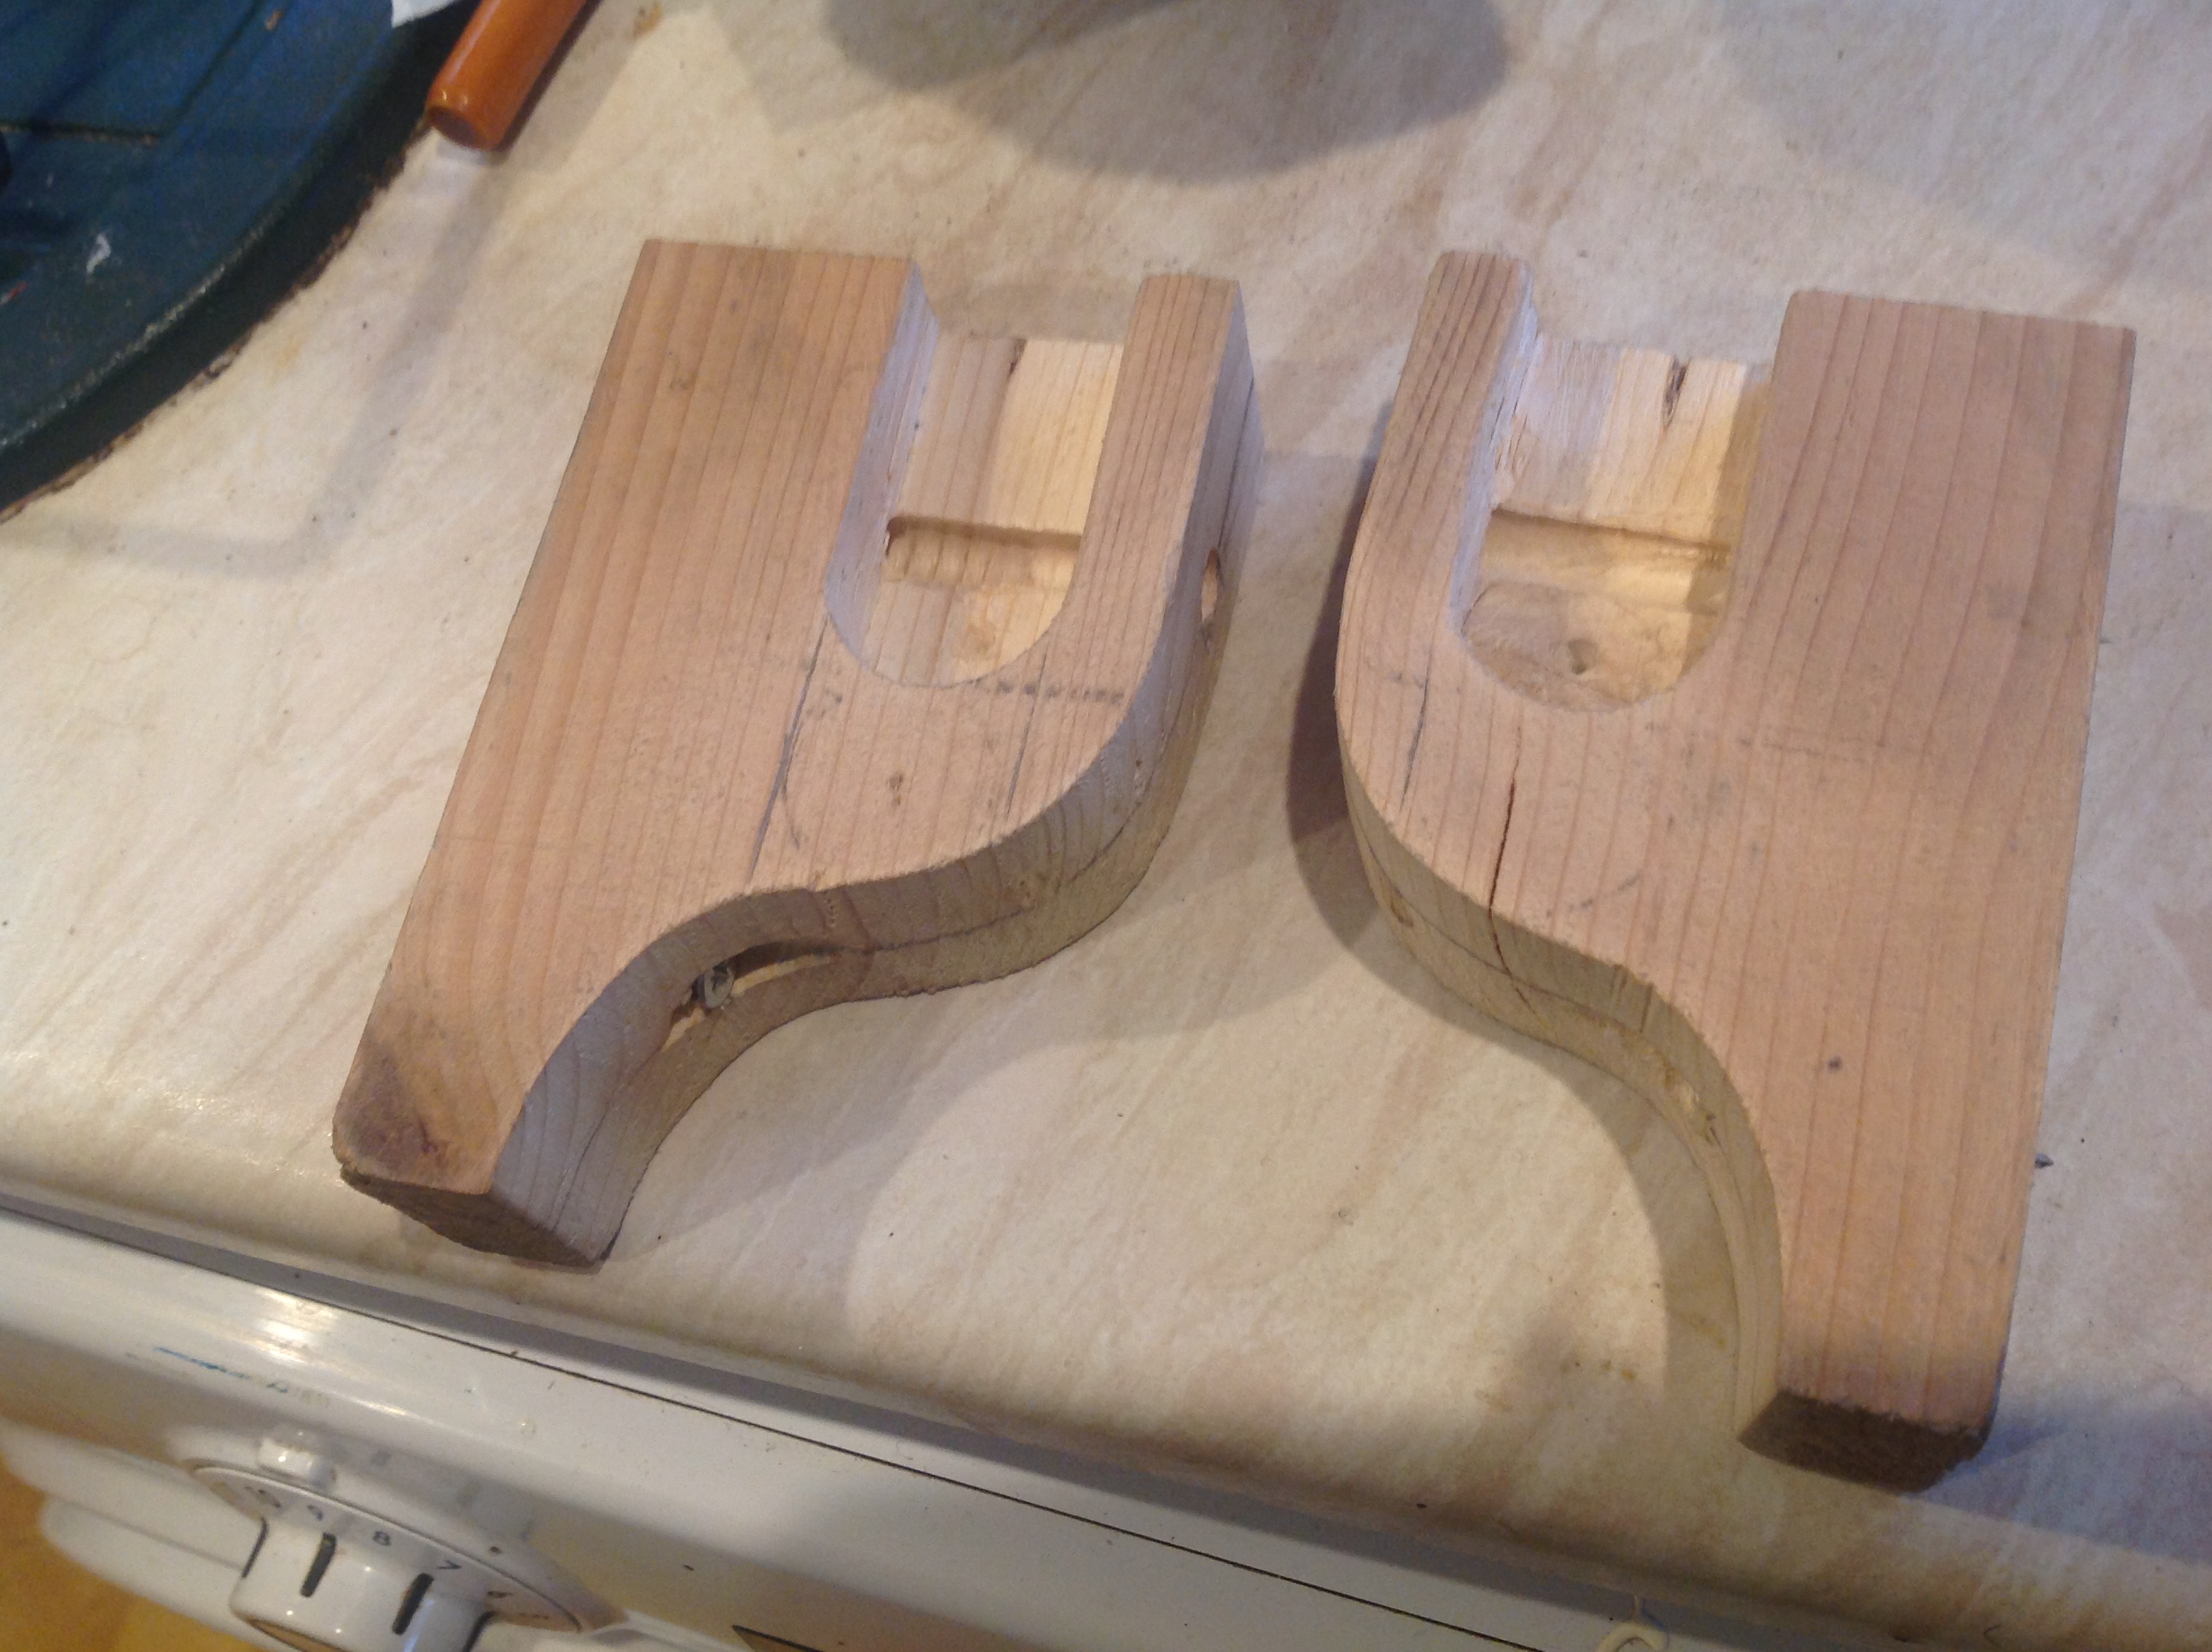 Screw holes drilled all the way through.
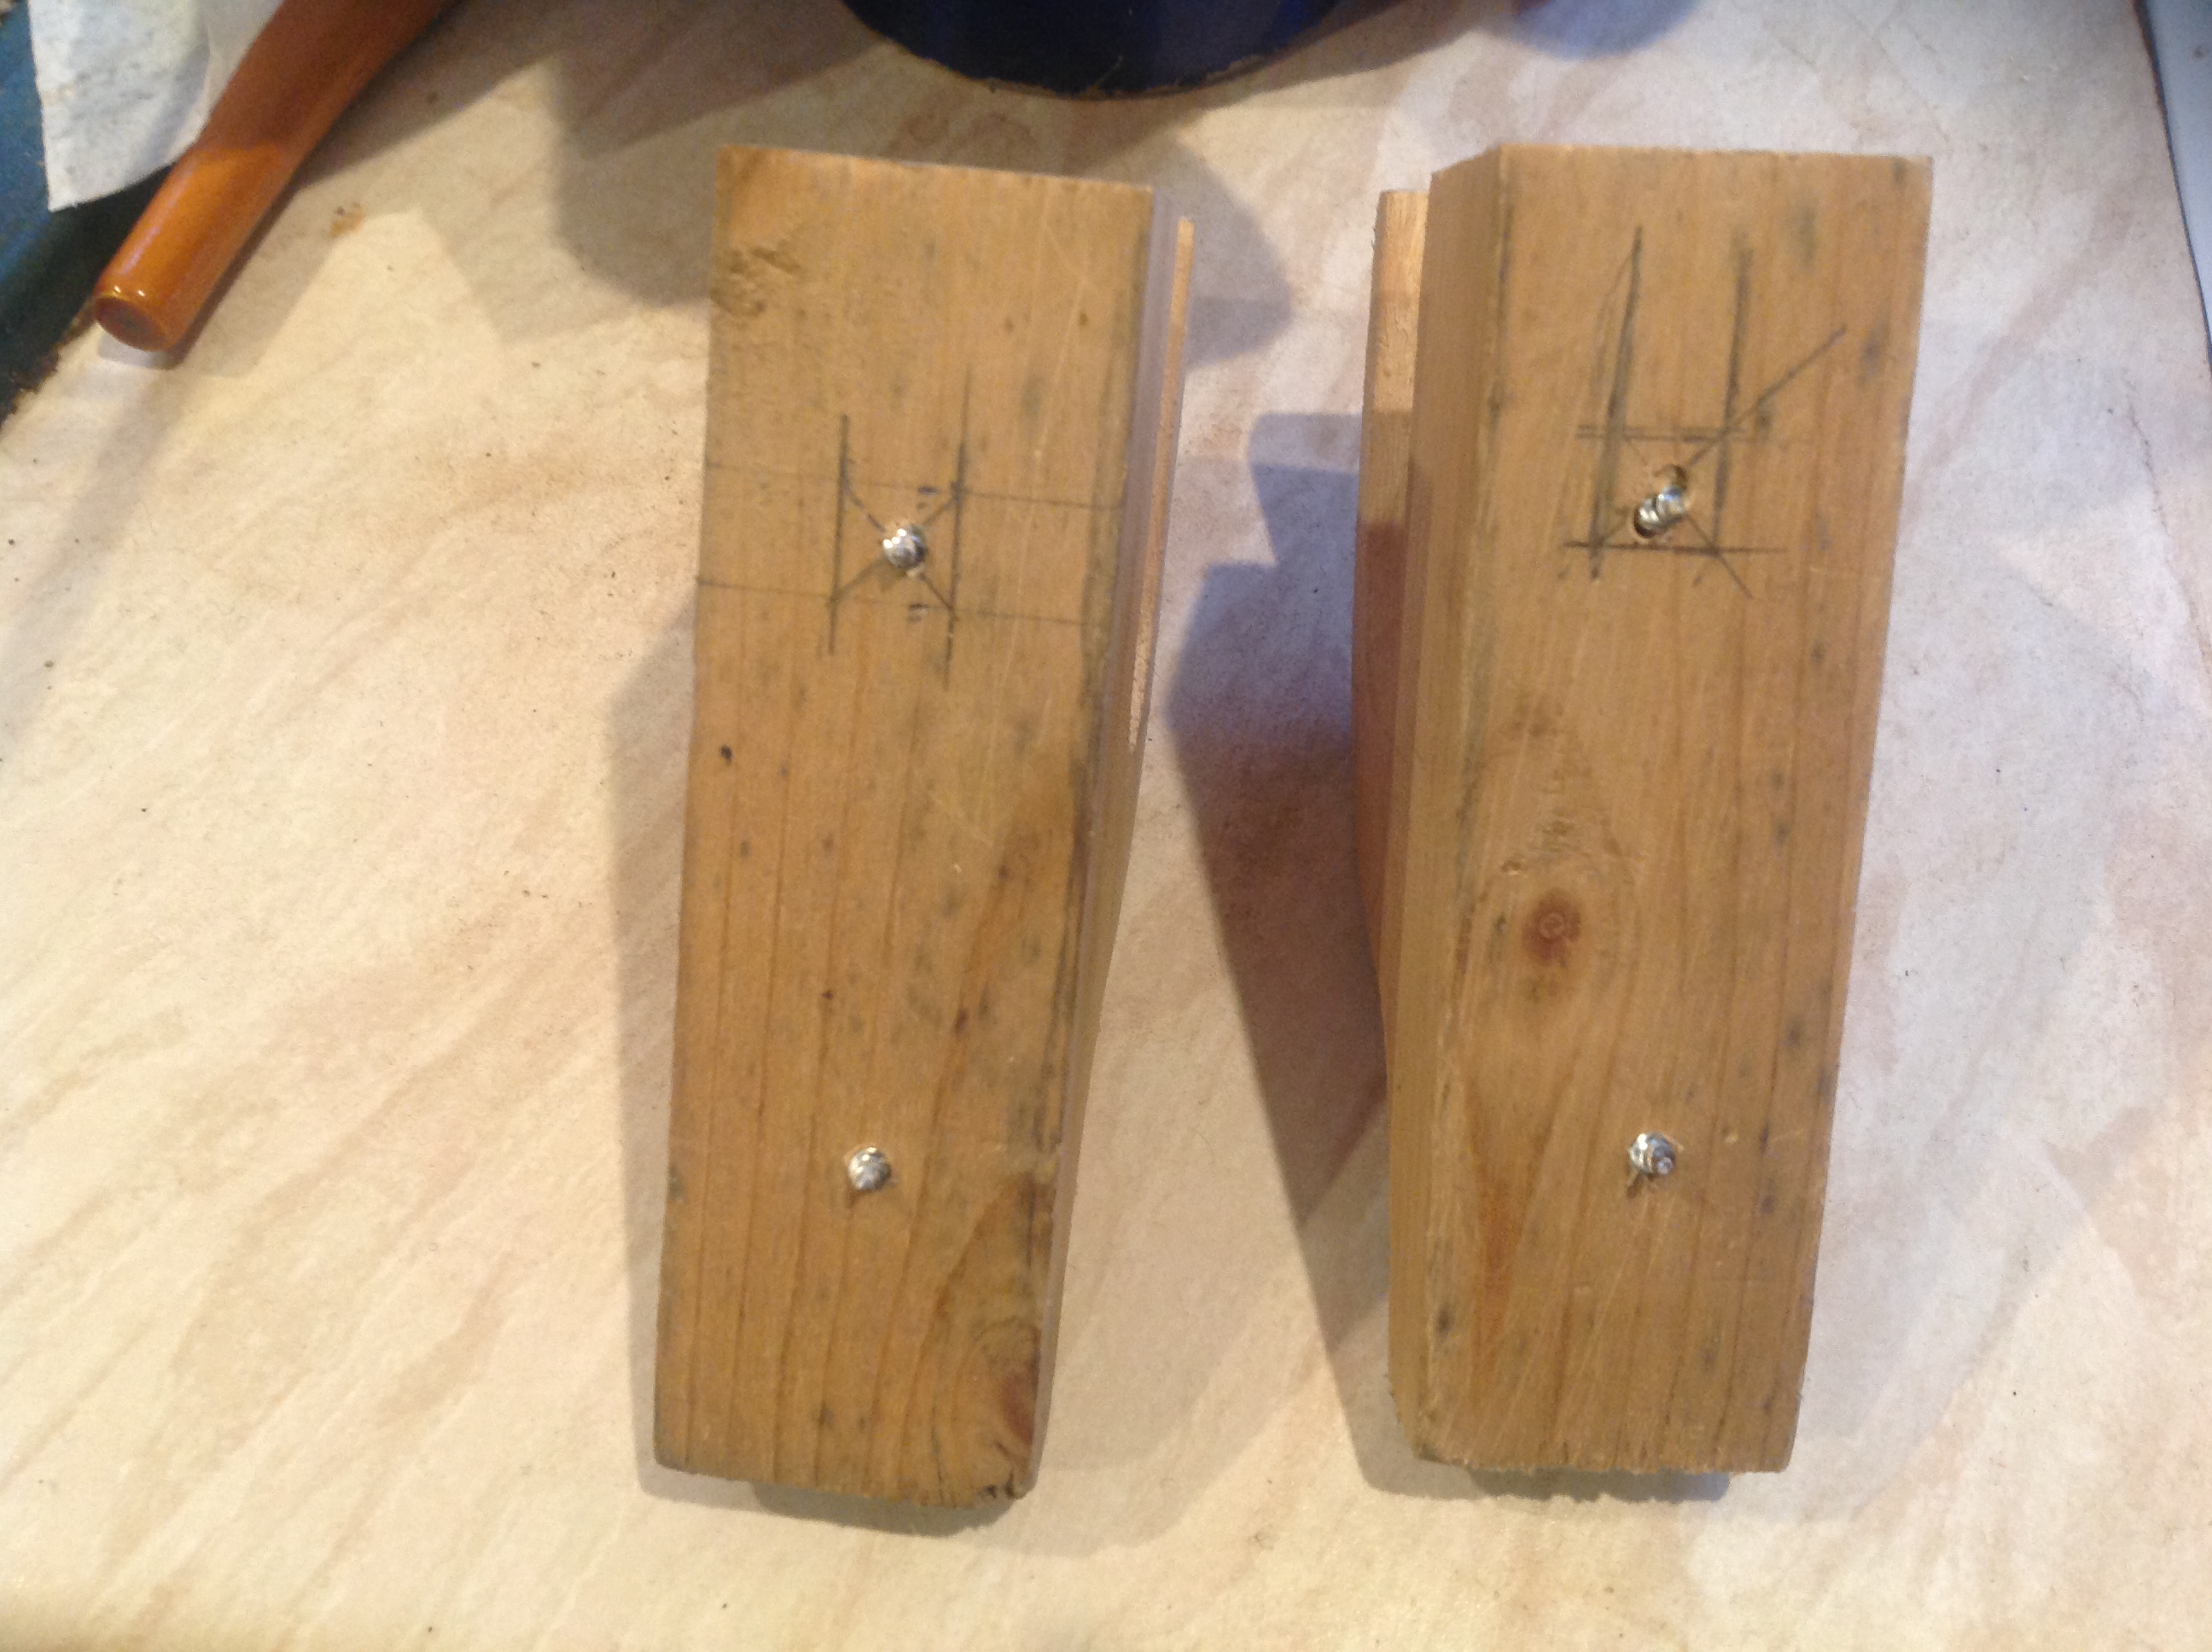 I didn’t have a long enough bit for the top holes…
Starting a few days ago, I began work on some DIY wooden curtain support brackets, to my own design. Cutting the wood for these gave me the chance to use my recently acquired Kity 613 bandsaw for the first time.
She’s a good gal! But I need some new/finer blades. I only got one with the machine – a wide low tooth count one, best suited for deep/straight cutting – which I bought via Gumtree. I travelled up to Lincoln to buy the Kity, paying £300 (I managed to haggle the seller down from £400!). I had to take out the passenger seat in my little MX5 to fit the bandsaw in. Didn’t know if it’d work (transportation, that is)till I got there. But it did. Phew!
Just typing this as I take a tea-break, before drilling holes in my brackets, so as to mount them ‘pon de wall. I was going to buy a couple more blades for the Kity today, from Bedford Saw & Tool Co. But they make the blades to order, and didn’t have any in stock. They’re ordered now, at any rate. Just a question if collecting them when they let me know they’re ready.
I was able to drill the lower holes all the way through on my bench-top drill press. But the upper ones required drilling from both sides. I managed to get the first one perfectly aligned. But the second was ever so slightly off, and had to be drilled twice. But they both worked out fine when it came to installation.
 Drilling locating holes for rawl-plugs and screws.
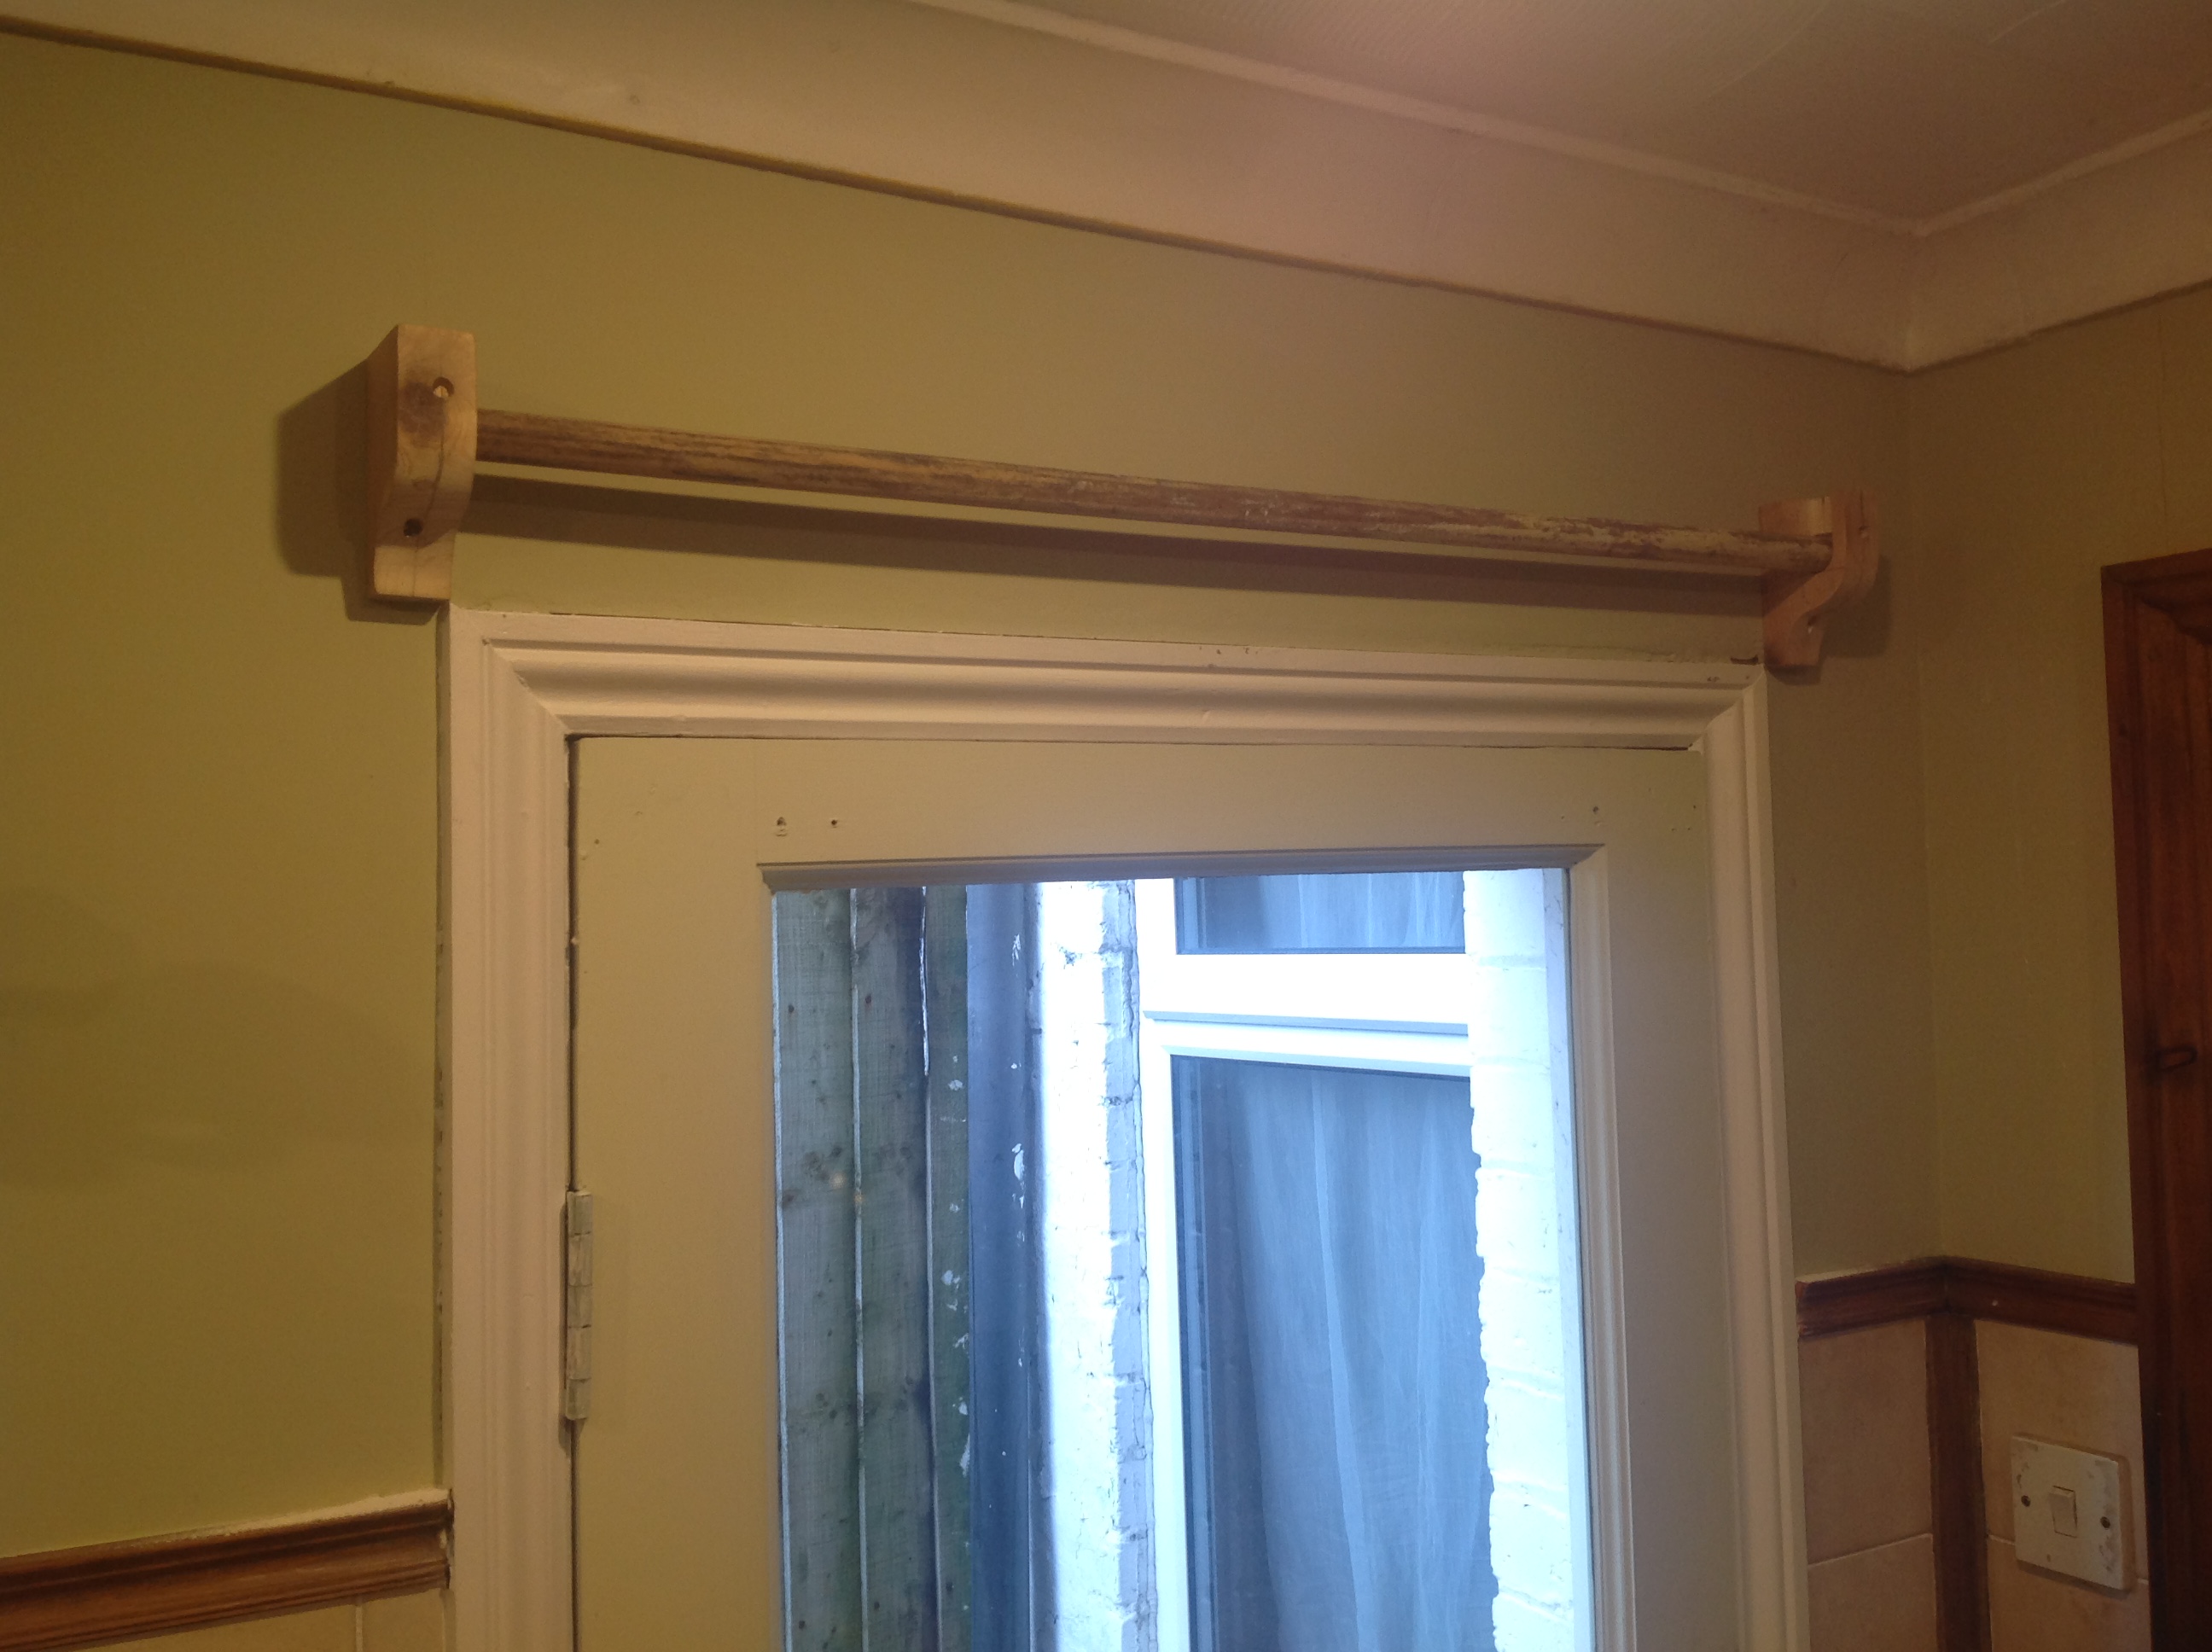 And she’s up!
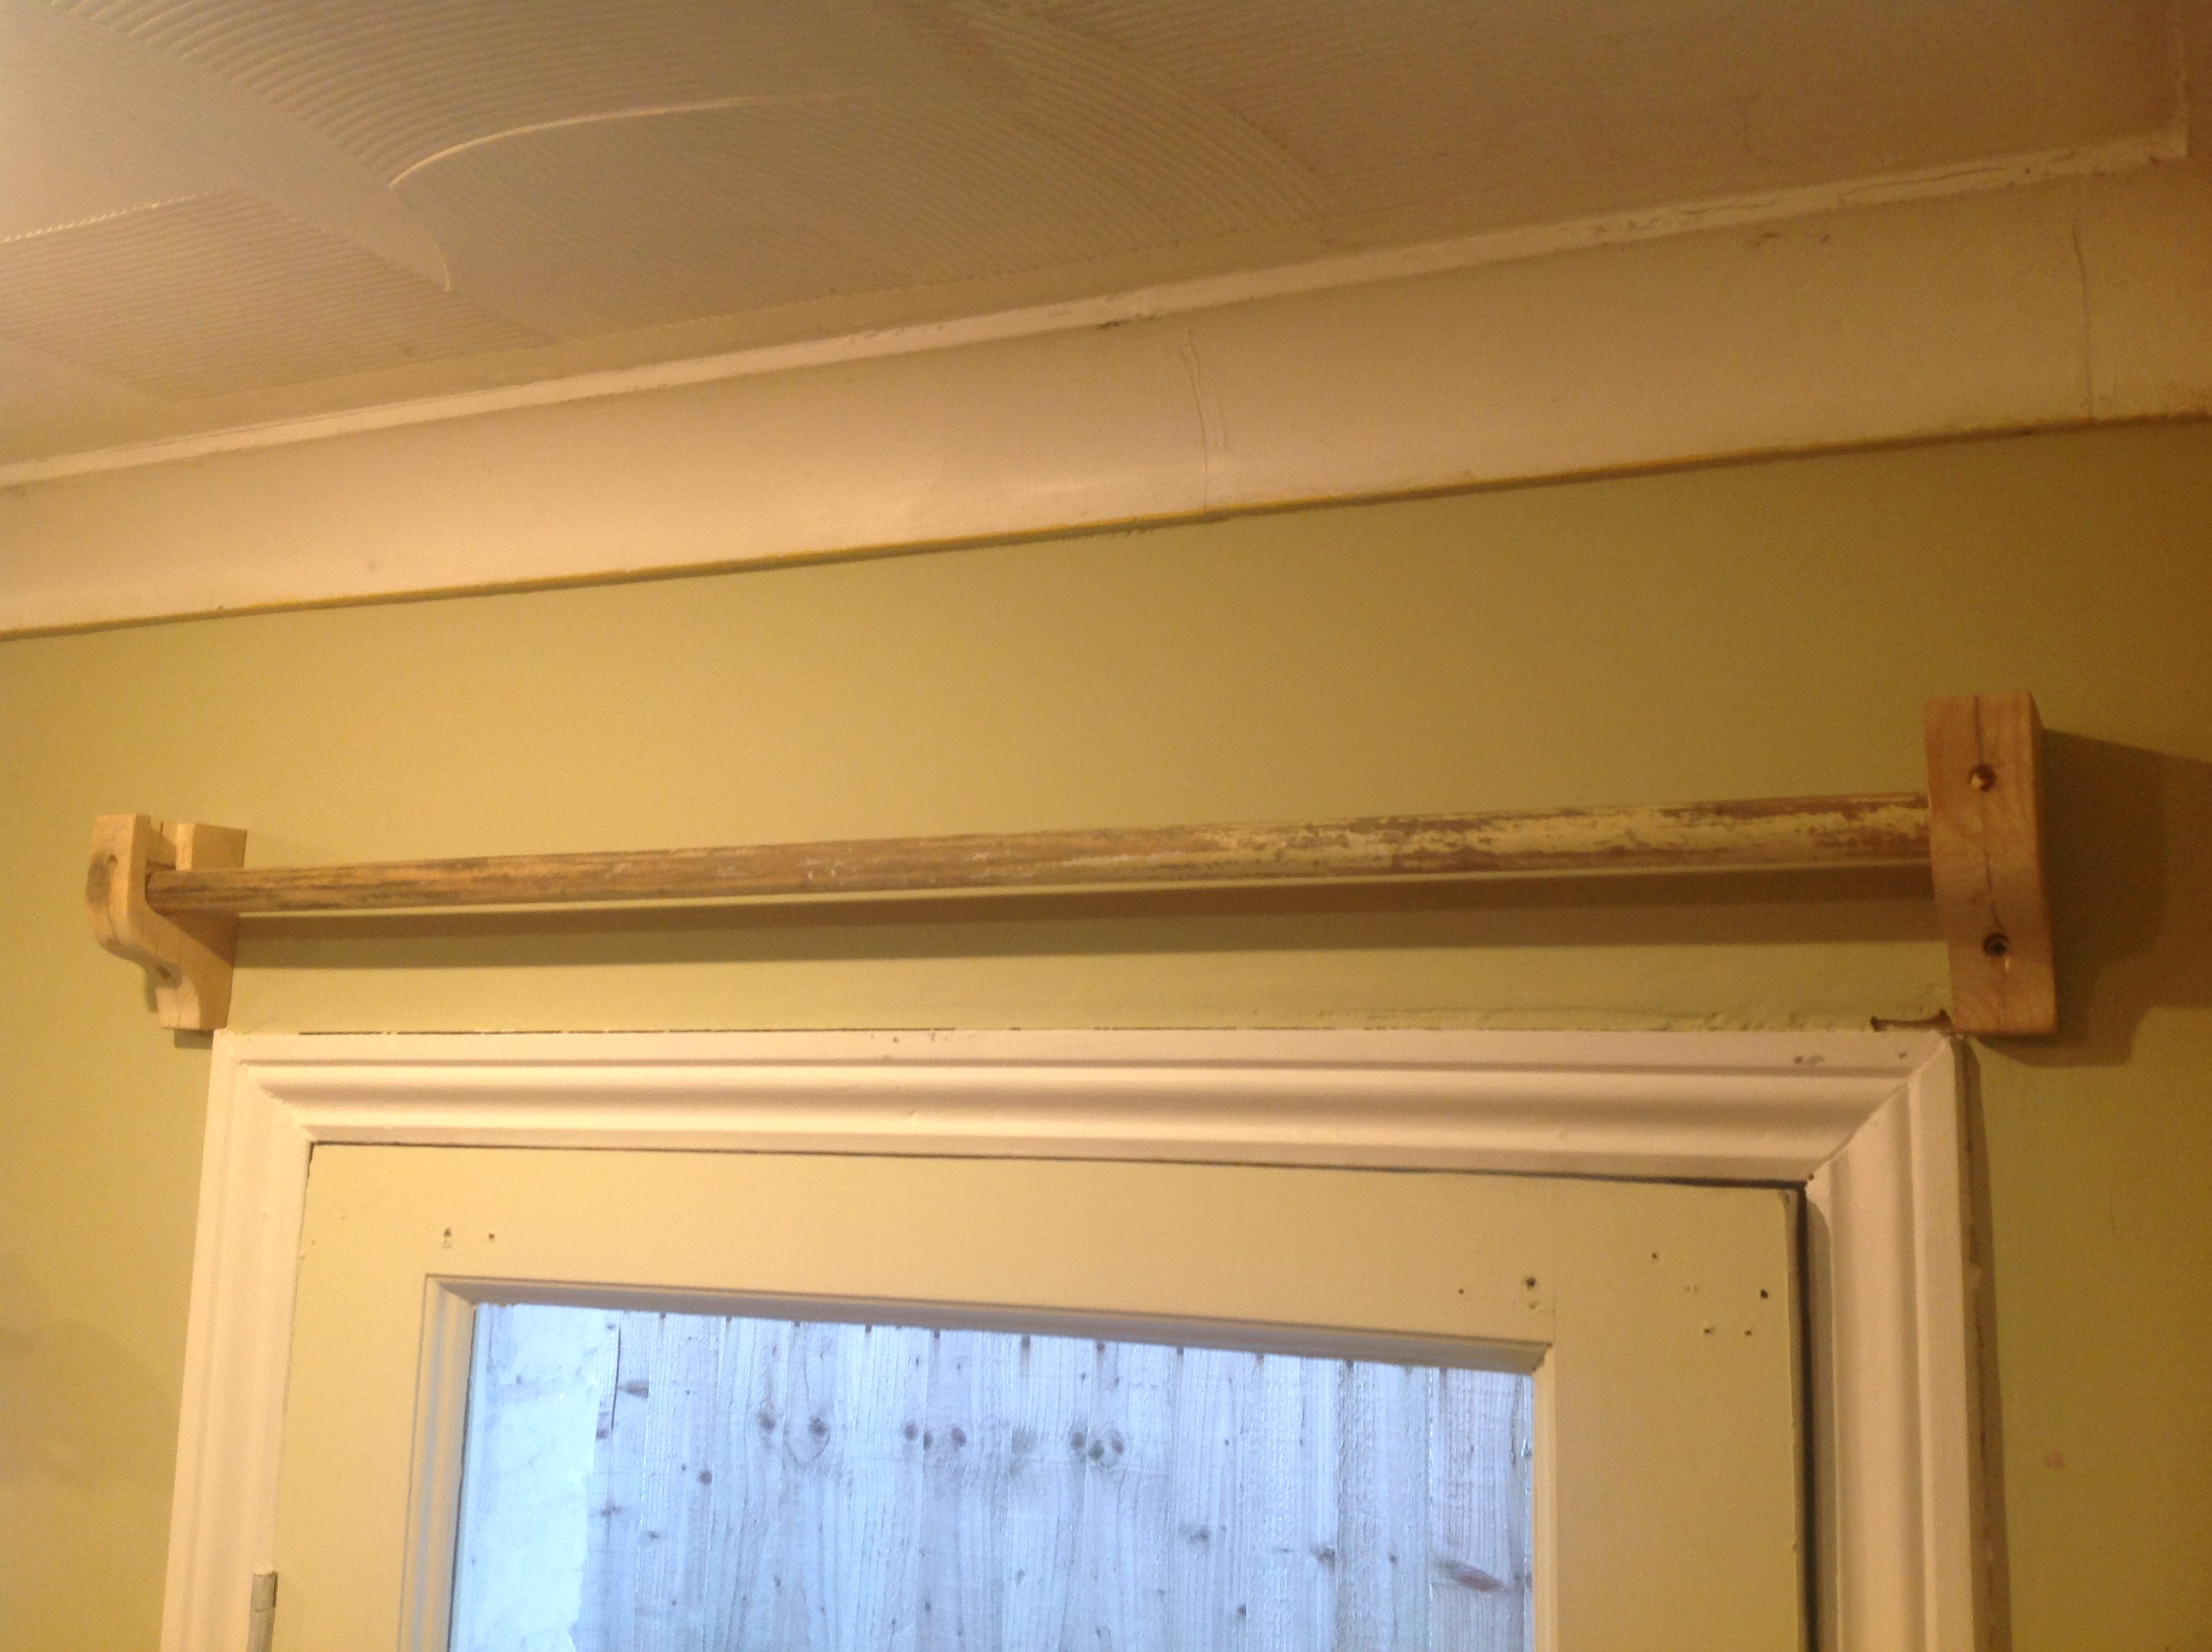 Another angle.
Not having a narrow high tooth count blade on my Kity as yet, suitable for cutting tight curves, I had to break out the little old 10″ (chortle) bandsaw. That does have such a blade currently installed, allowing me to cut the curves on that. It struggled. But I cut near to the pencil line, and then used rasps and sandpaper to get a nicer smoother finish. I’m happy with the result.
I was considering a little bit of router-work ornamentation on the brackets. That’d give me a chance to try out my new router, which I’ve not actually used yet. But for some reason I’m a bit wary of doing so. Hmm!?
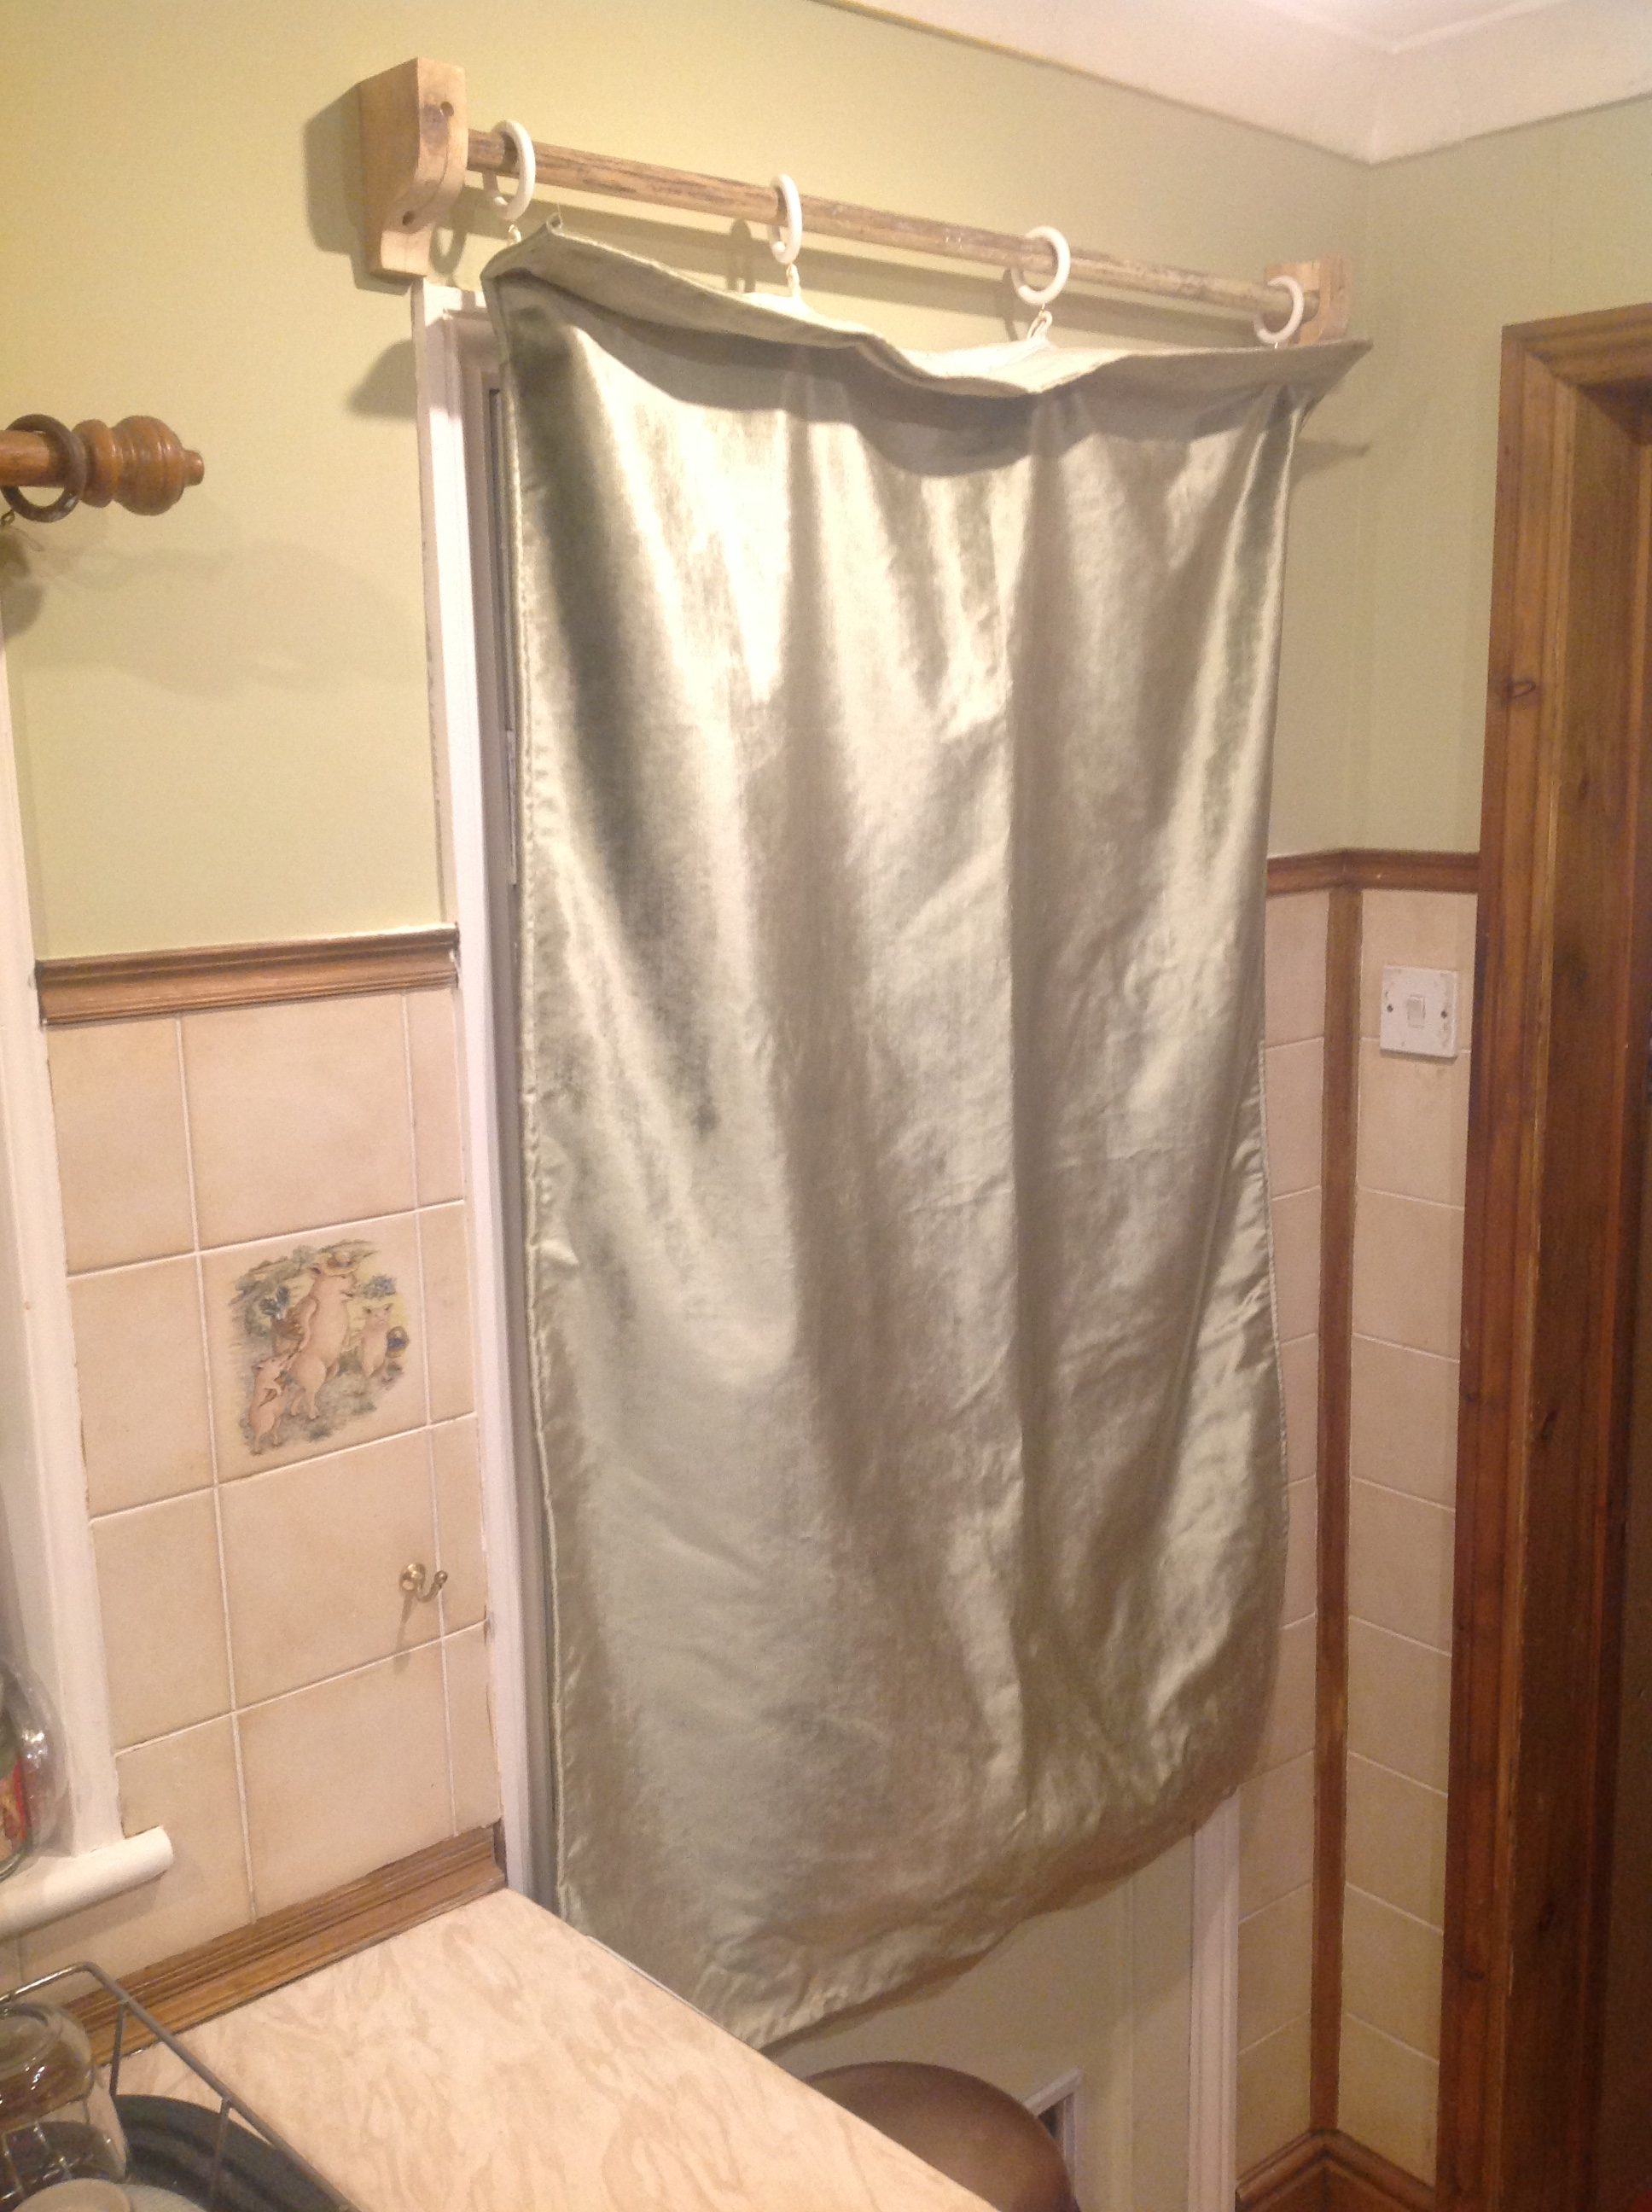 With the curtain in place.
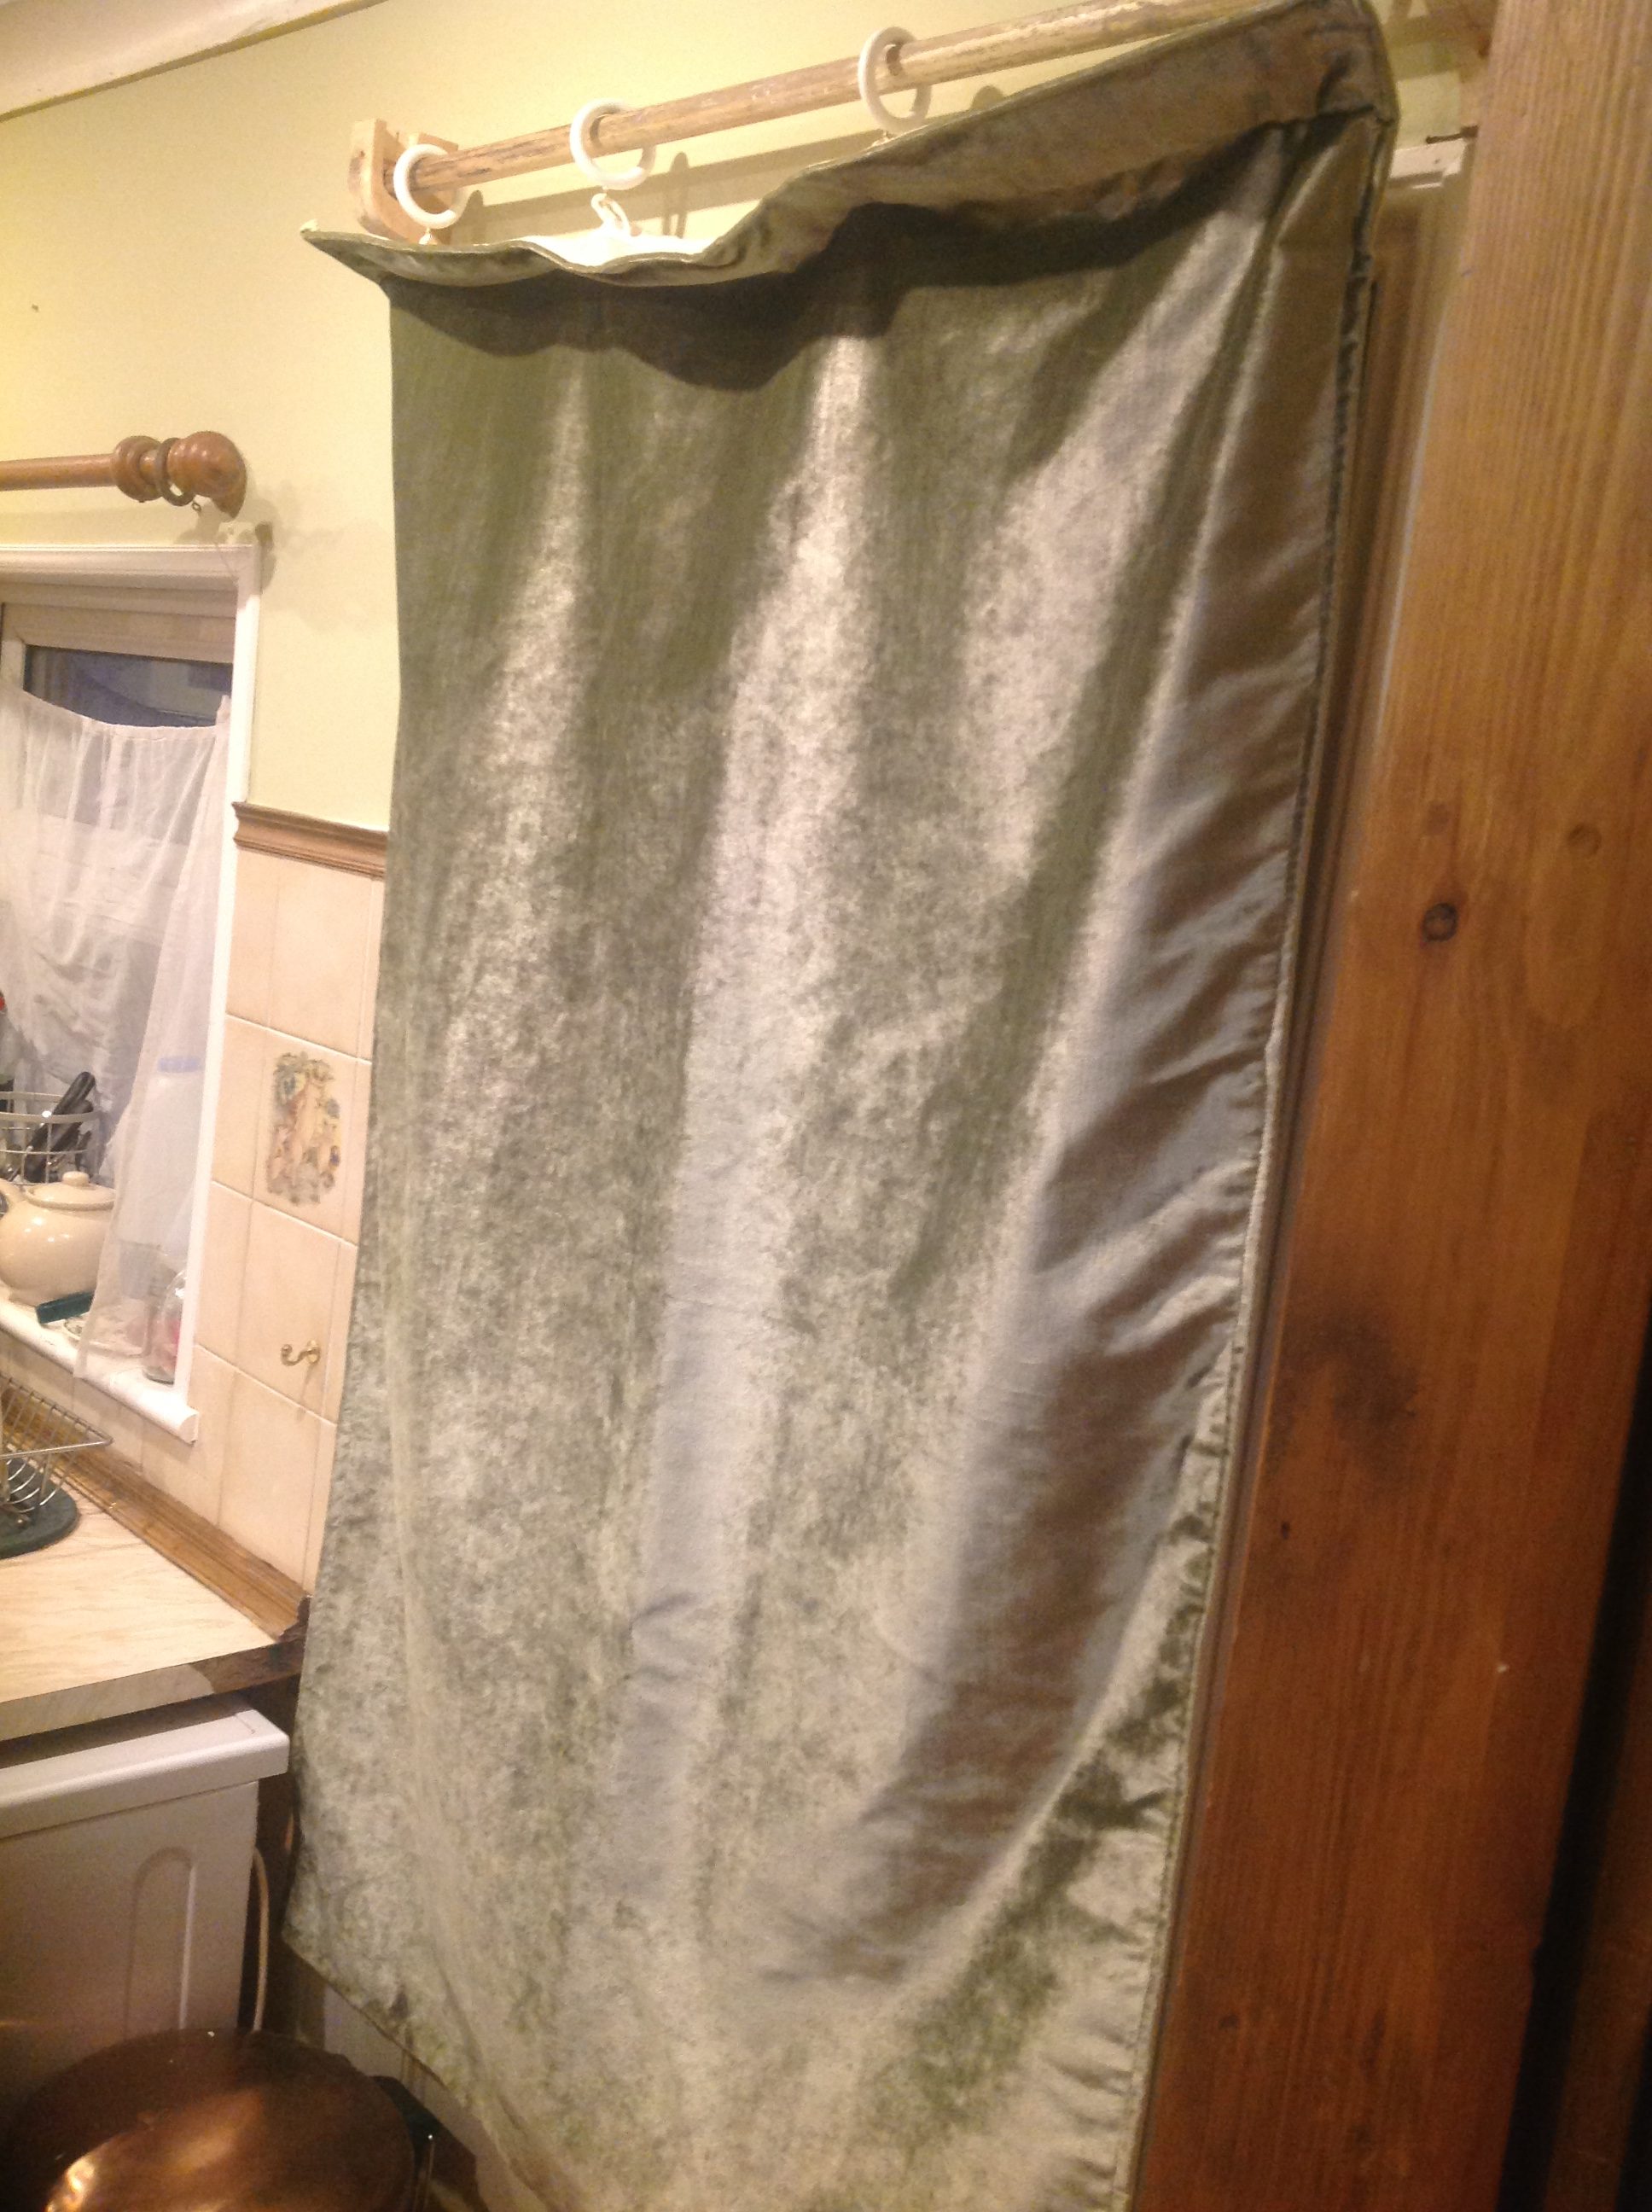 From the lounge.
After another break I finally got it all in place, and the curtain up. I have to confess I was a little bit disappointed. I think that’s partly ’cause it should be painted gloss white. I might also plug the screw holes. I’m not going to bother routing any ornamentation on them, however. I might do so at some future point, or next time I make something similar.
Another thing is that Teresa hadn’t quite got the hang of consistent curtain manufacture yet. Sometimes the curtains are wide enough, i.e. contain enough material to have the right amount of ‘gather’, and look right. This curtain’s not really got quite enough material, width-wise.
The other more noticeable issue, with Teresa’s coitans: floppy tops! She’s taken to adding a strips of reinforcing material along the top edge, which is meant to stop this happening. And she’s done so here. But it’s still as limp as a drunken monk. I think she may need to locate the strip that the curtain hooks go through a bit higher as well?
So, there’s more to be done. I need to paint the brackets and the pole. And Teresa needs to do something about her floppy top.
Oh, and then there’s the small matter of inheriting a kitchen not to our tastes. I don’t like the style of it at all. I’ve already repainted the walls and some of the woodwork. I intend to gut the room entirely and rebuild all the cabinets, install a butler sink (which we already have), and so on… when time, funds and materials allow.
But for now, small modest changes.