
Well, here’s a post on my first ever electric guitar effects pedal board, which I’ve built over the last week or so.
There’s some irony, perhaps, in the fact that after years and years of playing guitar, often as much and sometimes more than drums, my primary instrument, I’m hardly playing at all right now. I built this in the fond and fervent hope I will resume at some future point.
I did get back into playing a bit when I bought the Ditto Looper. And this pedal board project is part of an attempt to make sure that when I do want to pick up an axe, the sounds I want will be readily available to me.
The Build
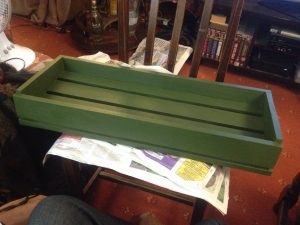
I used some scrap wood I got off Freecycle, type and origin unknown. I planed and sanded the very rough and heavily treated lumber down, to get it ship-shape. Far from perfect – rustic, I’d say – it was nevertheless a great improvement, and it revealed the wood to be, most likely, standard modern pine.
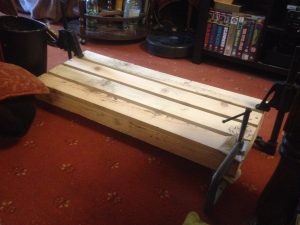
I actually went with the length, which on the pedal board has become width, the wood already was, and simply cut two lengths in twain, on the Triton table-saw, giving me the top four slats. The sides came from the same stock, but a differently dimensioned piece; this had to give two pedals worth of depth, and have sufficient height to give the board a slight rake or pitch, for a comfortable foot operation angle.
The front face is whole, whilst the back face is both raised off the floor, and has a gap ‘twixt it and the slat directly above it. Like the gaps between the slats, these two voids allow for the passage of leads. In this instance, chiefly for the power supply. The latter is a vexed subject I’ll need to return to and improve, as currently (boom-boom!) I only have a cheap-ish daisy-chain wall-wart.
Having prepped the wood and dimensioned it, I assembled the base elements using hand cut dove-tails. Laid out by eye, and cut with my Japanese pull-saw, these were to my usual poor ill-fitting standard. But with home-made sawdust and glue filler packing out any irregularities, they did the job. The slats were fixed, belt and braces style, with both glue and screws.
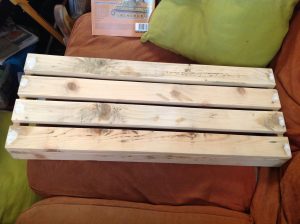
I used my Stanley Handyman smoothing plane to get the faces of the slats nearest the base of the board flat and true, which was very satisfying. And then, having thought about a natural wood finish, decided against it in favour of paint, on account of how rough the lumber is. So I filled in the countersink holes and bigger blemishes with wood filler.
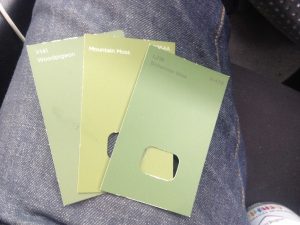
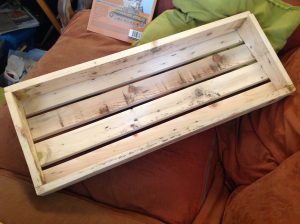
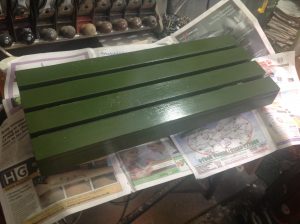
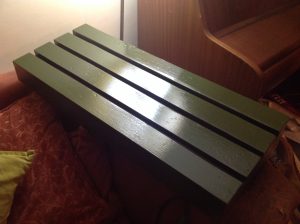
On our way home from a day out with the Mrs I bought a few Valspar sample pots from B&Q, all green. I opted for Bohemian Bliss, a name and a colour I love! This is in fact much darker than the sample swatches in my photo suggest. Four coats of this, and then four coats of gloss varnish, with a little sanding. A nice old-fashioned look for me.
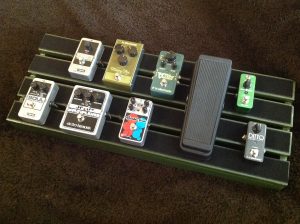
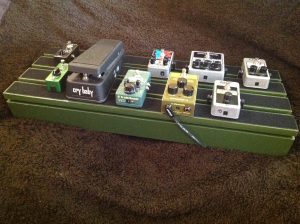
Then it came time to put the Velcro on. With that on, soft-side/loops on the board, hooks on’t pedals, some of the pedals themselves needed a little attention. I had to remove a number of rubber feet, clean up with isopropyl alcohol, and make a base-plate for my wah-pedal. What a lot of work! I’ll have to plug a guitar and an amp in, and get playing!
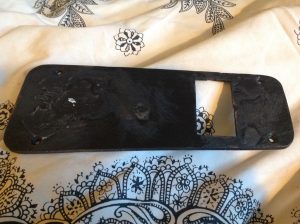
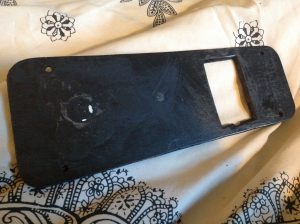
Okay, so having made and painted the base-plate for the wah (necessitated by the removal of the rubber feet and the need to stop the screw-heads and battery cover from preventing Velcro adhesion), I tried connecting all the pedals. I discovered that laid out as I have them – bottom row running right to left, from the Wah, top row running left to right from LPB1 right to the Ditto – the patch cables I have aren’t going to allow me to finish. I need a bunch of longer ones.

I could change the pedal layout. And I may well do so once I start playing with it. But I’d rather buy in some more longer cables – I’ll go with the flat profile type, I like ’em! – for now. I’ve also discovered that my top slat-gaps are just big enough for all the adaptor heads, so long as they point directly downward. So far I’m working round this by positioning the pedals pretty precisely. This low tolerance may cause issues… we shall see!?
The top gap at the back, however, is way too narrow for the cable ends to pass through. So I’ll need to either notch it in places, or widen the whole thing. Or I could ‘hard’ wire some leads in situ? In fact I have a number of ideas on how to solve this. Wiring the pedals also makes me want to install some stuff under the board to hold the wire-spaghetti neatly in place, and prevent it snagging on stuff.
All told, I’m pretty chuffed. I wound up making this board bigger than I’d thought I might. I drew two cardboard mock-ups, a larger (or rather wider) one, and a smaller one (probably medium, in truth). In the end this one is actually a tad larger than the bigger of my two draft designs. So there’s room for my pedal collection to change and grow.

The footnote to this project, with which, I must confess, I’m very pleased, is the power-supply. I’d like to upgrade to a proper solution; fully isolated, with every pedal getting its proper allocation of power, and probably with a built in female kettle-lead type plug outlet, for the whole board. But that’s for the future…