CARS: MX5 Engine Failure

Parked up on the drive.

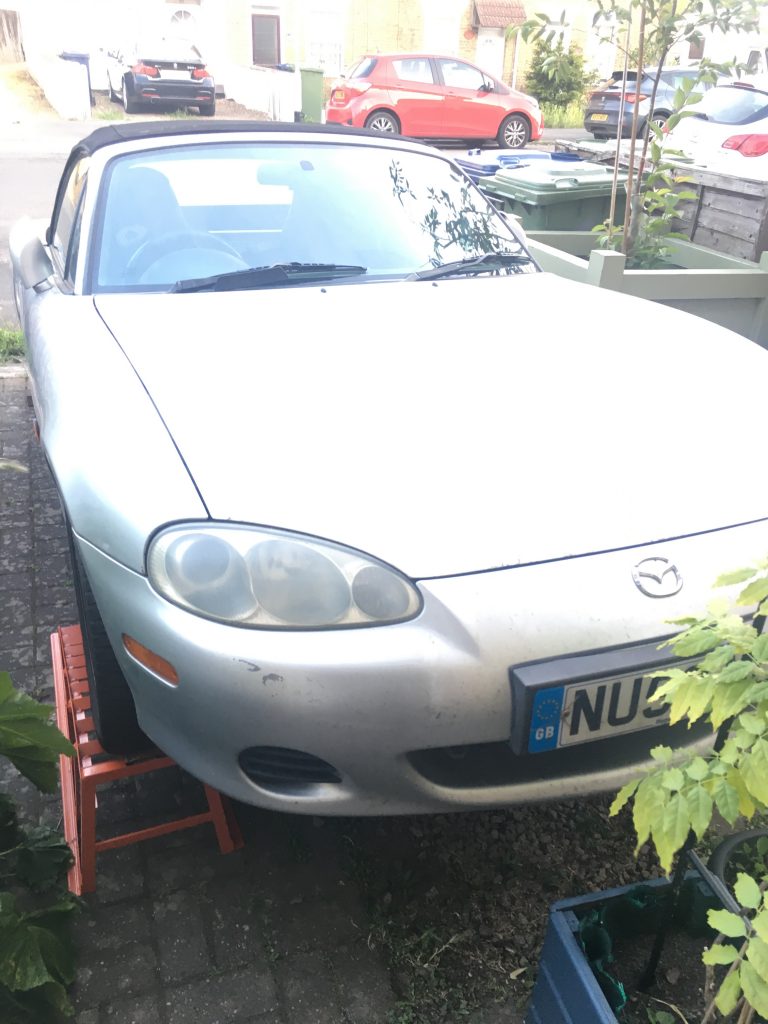
After our car died last Thursday, the AA got us home. At a not inconsiderable cost. So… with no money for repairs, what to do? I decided to get her up somehow, for inspection. I tried using a trolley jack I have, and some ordinary jacks. But no dice.

Bought these ramps from Halfords.

It was time to buy some ramps. Halfords in March did’nae have any. But the Wisbech branch had some, for £45 a pair. But without wheels, how was I to get ‘em? Fortunately our pal Ken was kind enough to give me a lift to Wisbech, so I could collect them. Cheers, buddy!

These ramps do the job nicely.

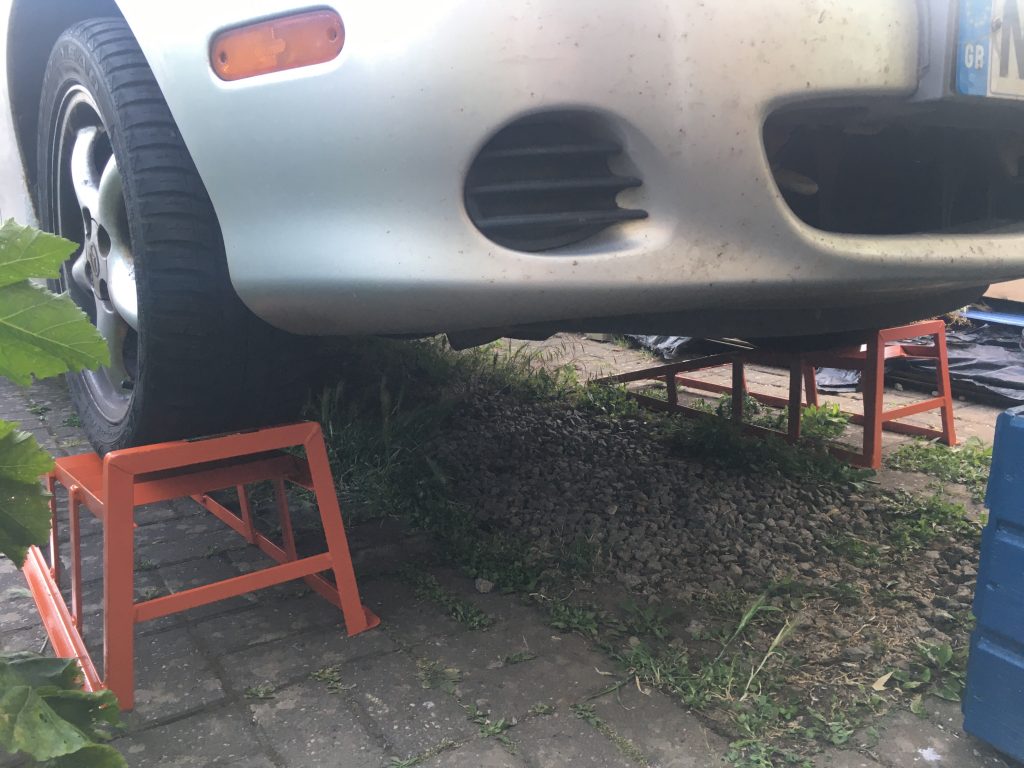
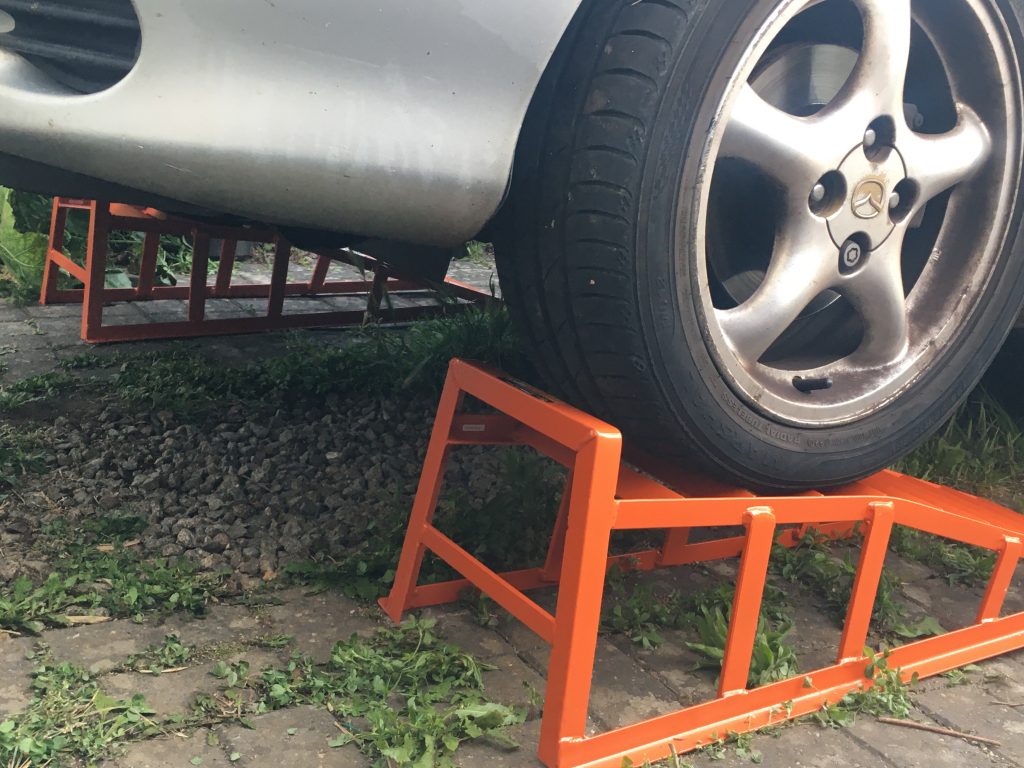
The ramps will be very useful if I need to access the underside of the vehicle/engine bay. And I imagine I will need to. But I didn’t need to today. Thanks are also due to our neighbour, Sean, for helping me get the car up on the ramps.

Step one in getting the rocker cover off.

I decided to photograph each step. And, starting with the picture above, that’s what this series of photos depict. All I was doing today was removing the ‘rocker cover’. So I could see if the cam-belt was indeed, as the AA engineer believed, broken.

Disconnecting wiring..

The first thing I discovered on starting this job is that YouTubers routinely make things look very easy. Usually they’ll be doing stuff they’ve done many times before. But if you’re not used to whatever it is? As an example, disconnecting some of the wiring junctions proved much harder than expected. It’s amazing how discouraging that can be!

… gradually got easier.

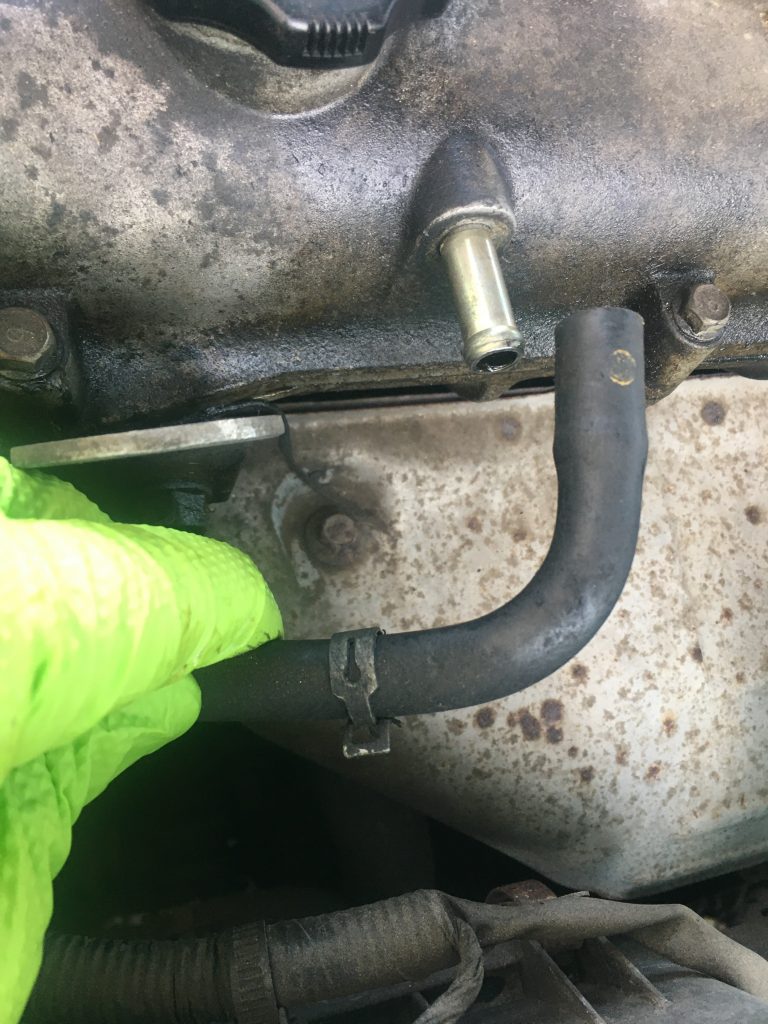
Gradually things got easier. Which was encouraging. The hoses all came off very nicely and cleanly. This was a relief, as old tubing can be brittle and perish, etc.

Each of these was easier than the last!
And this was the easiest of them all!
Front end of the spark plug wiring loom.
Back of the spark plug wiring loom.
There were a couple of points like this.

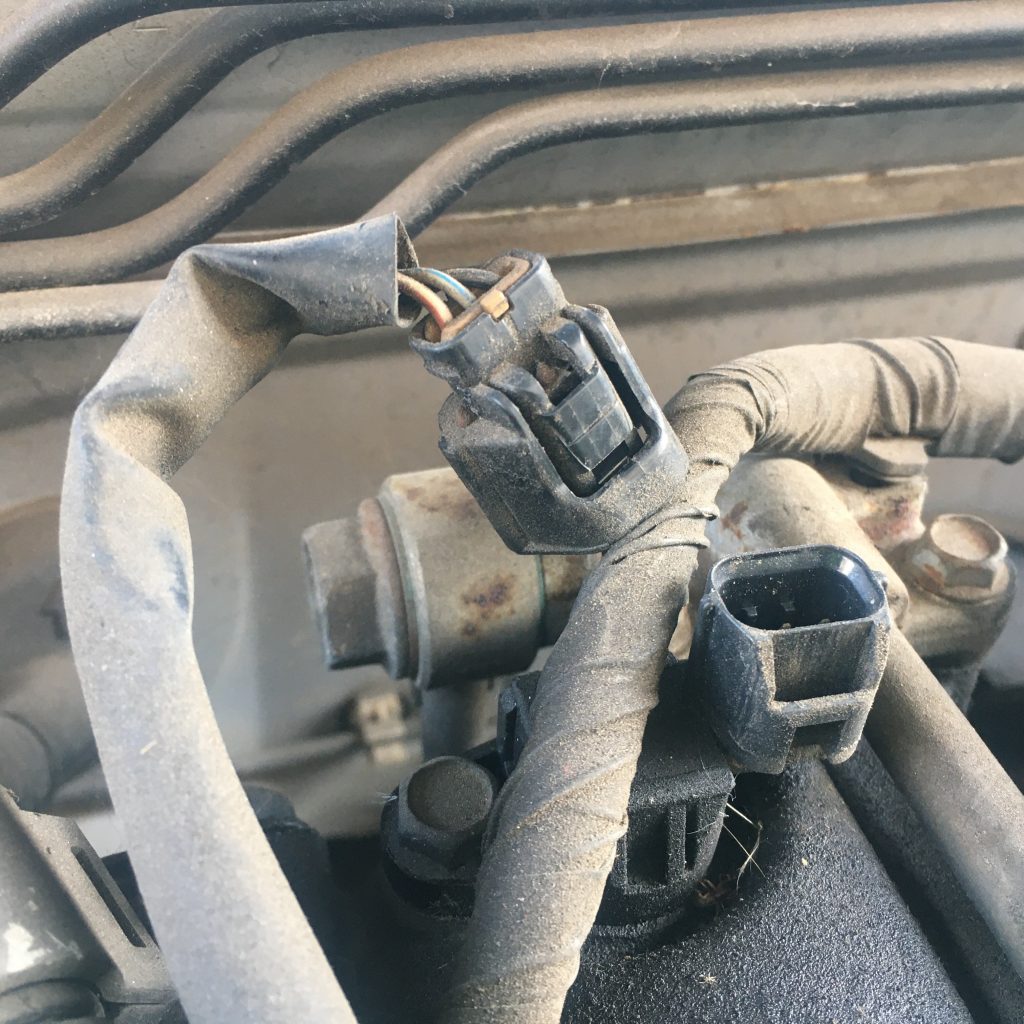
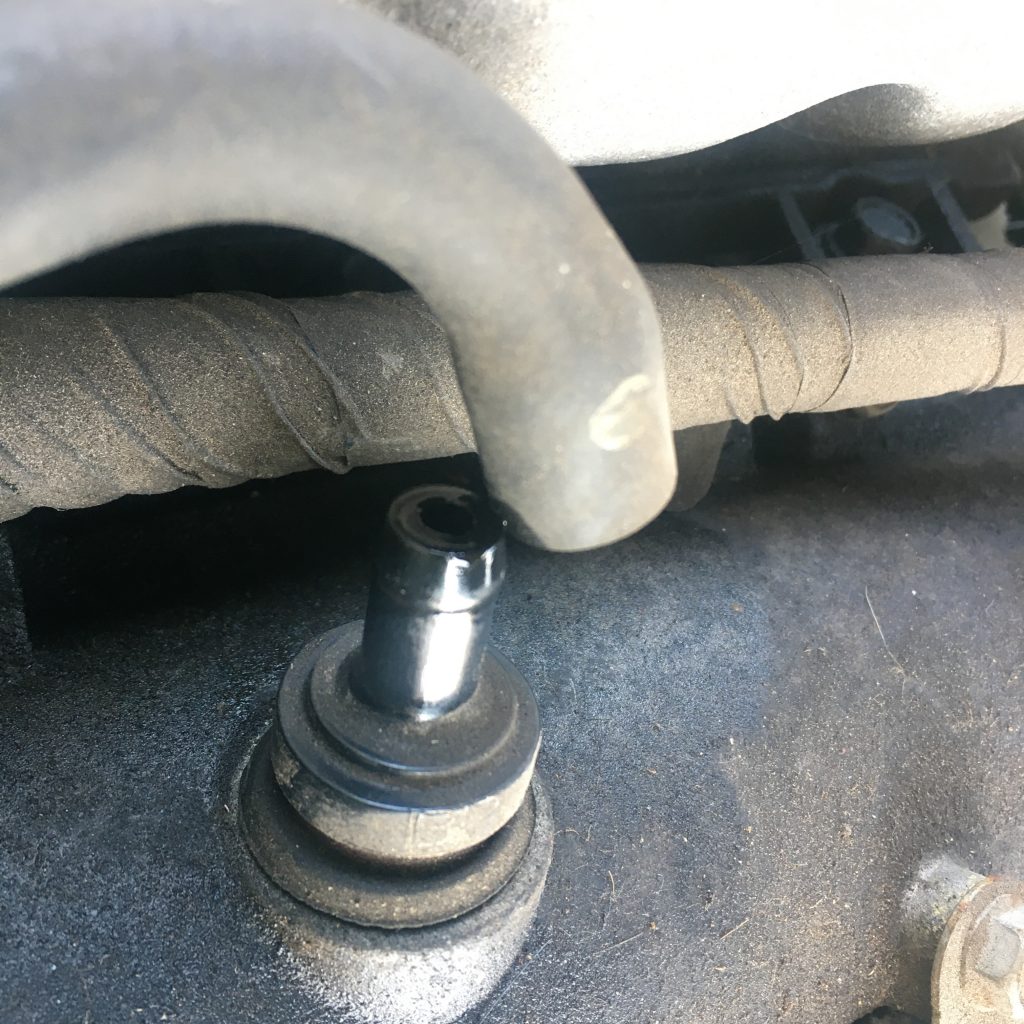
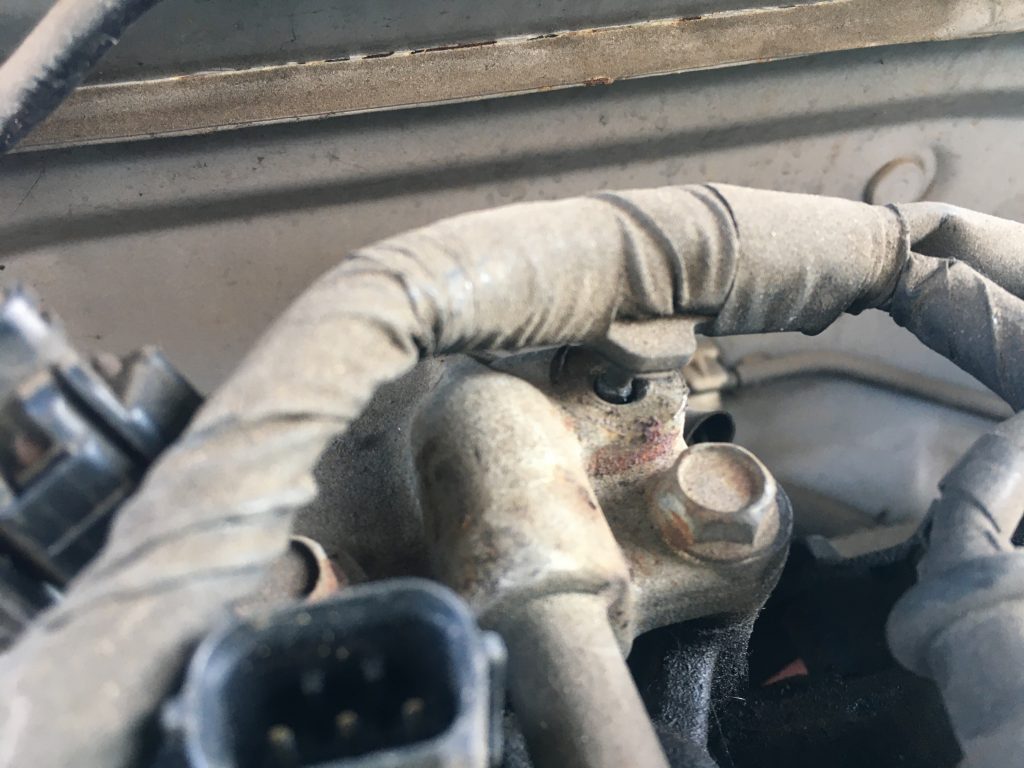
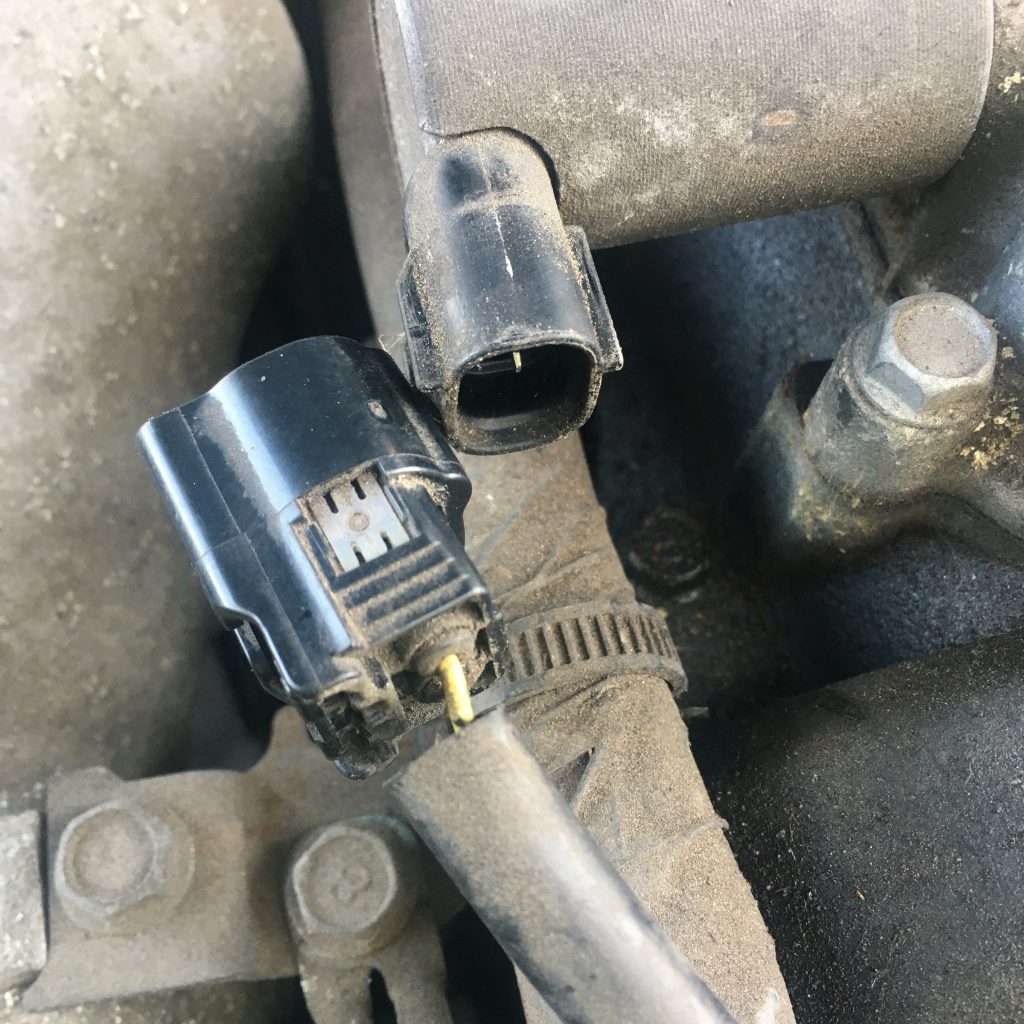
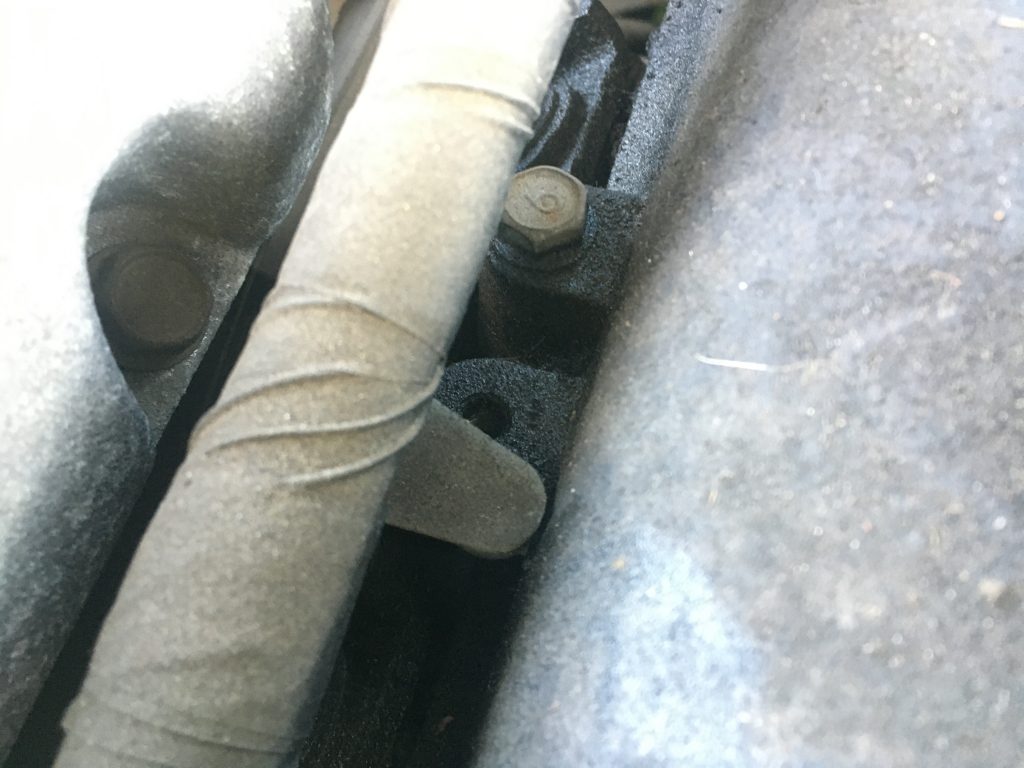
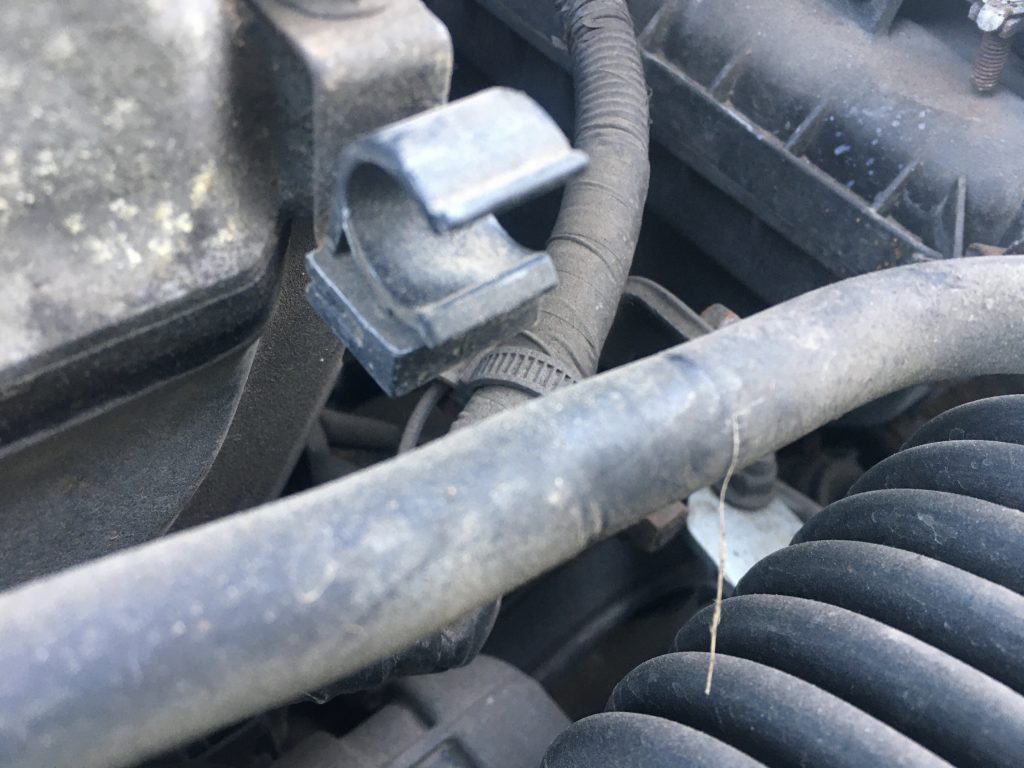
The above photo shows a point where a male peg goes into a female hole. But it wasn’t actually connected. This one was at the back. There was another, pictured below, on the left side of the engine.

Another unattached point.

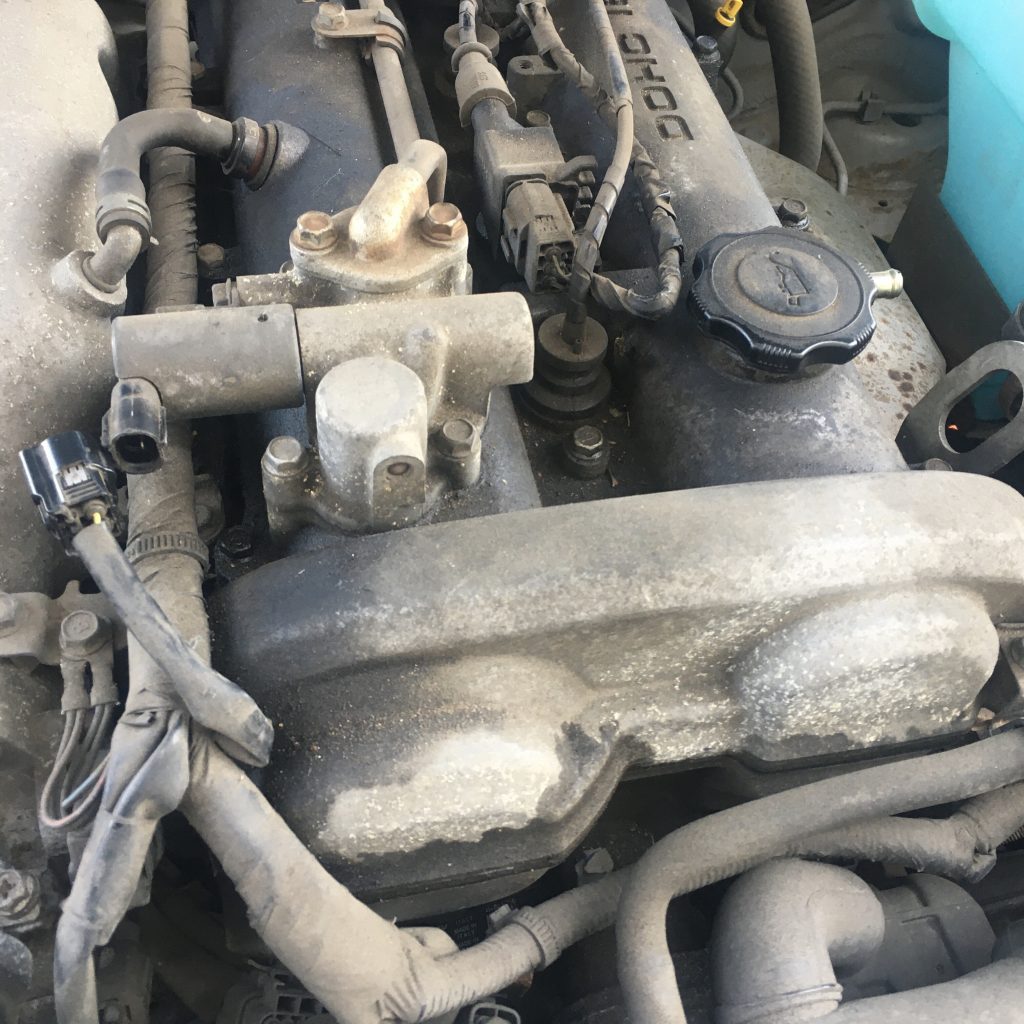
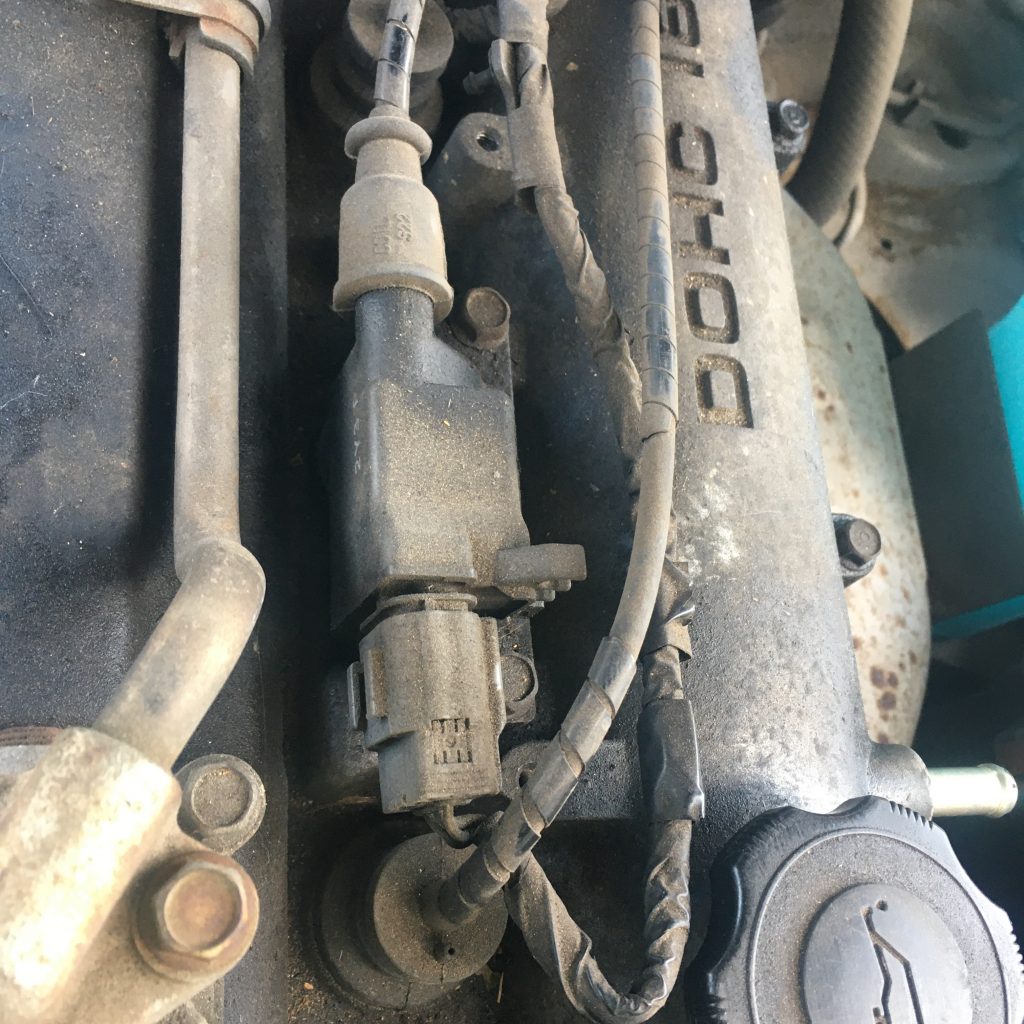
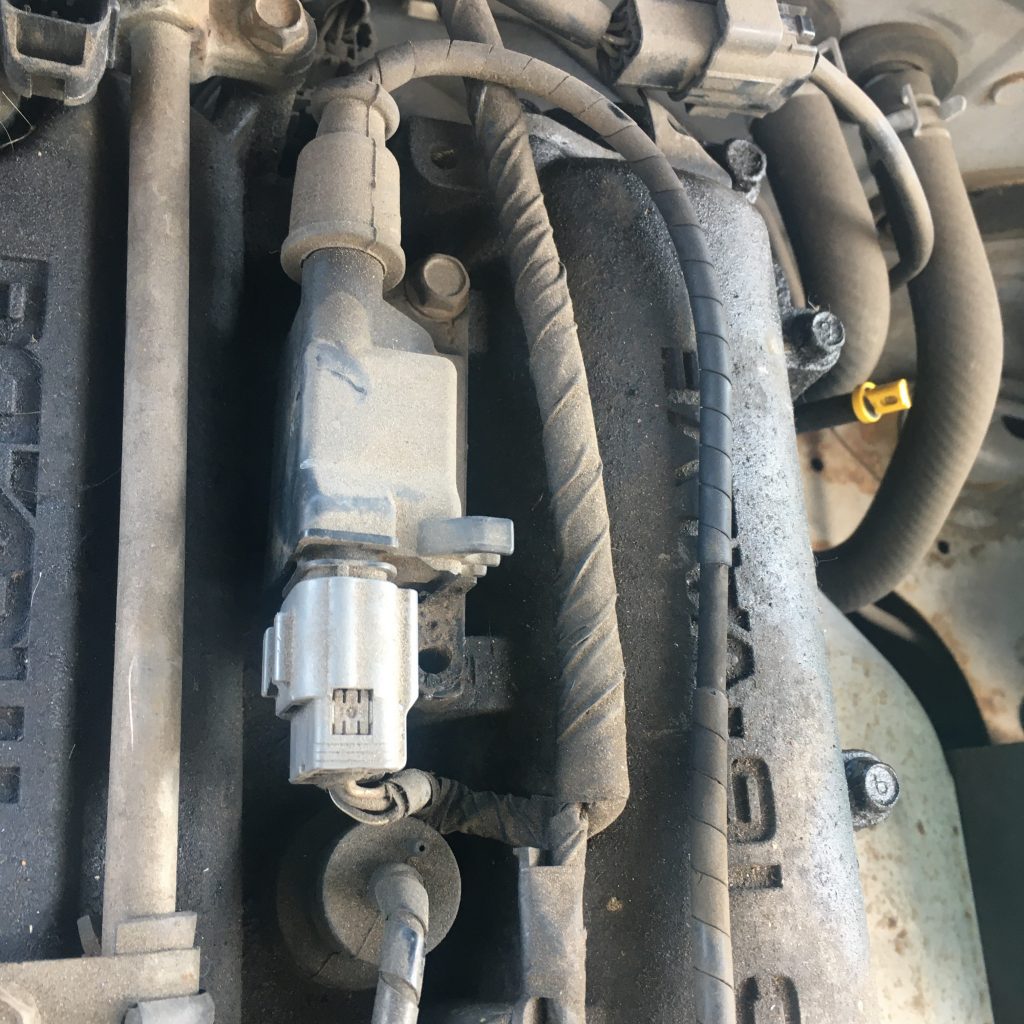
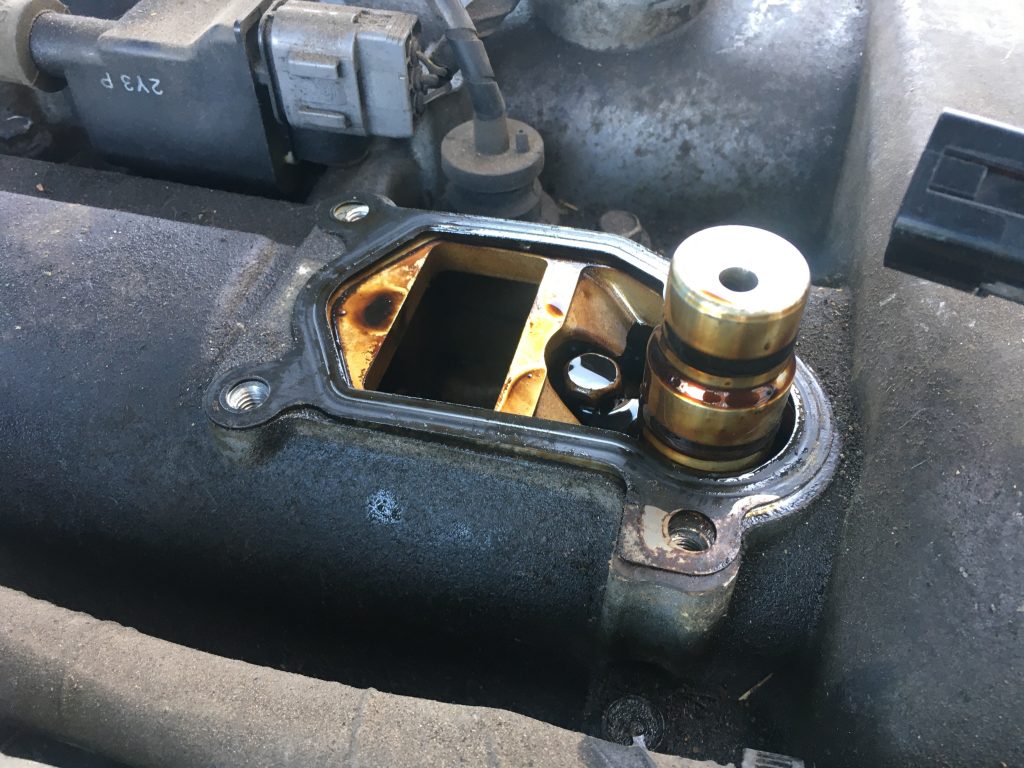
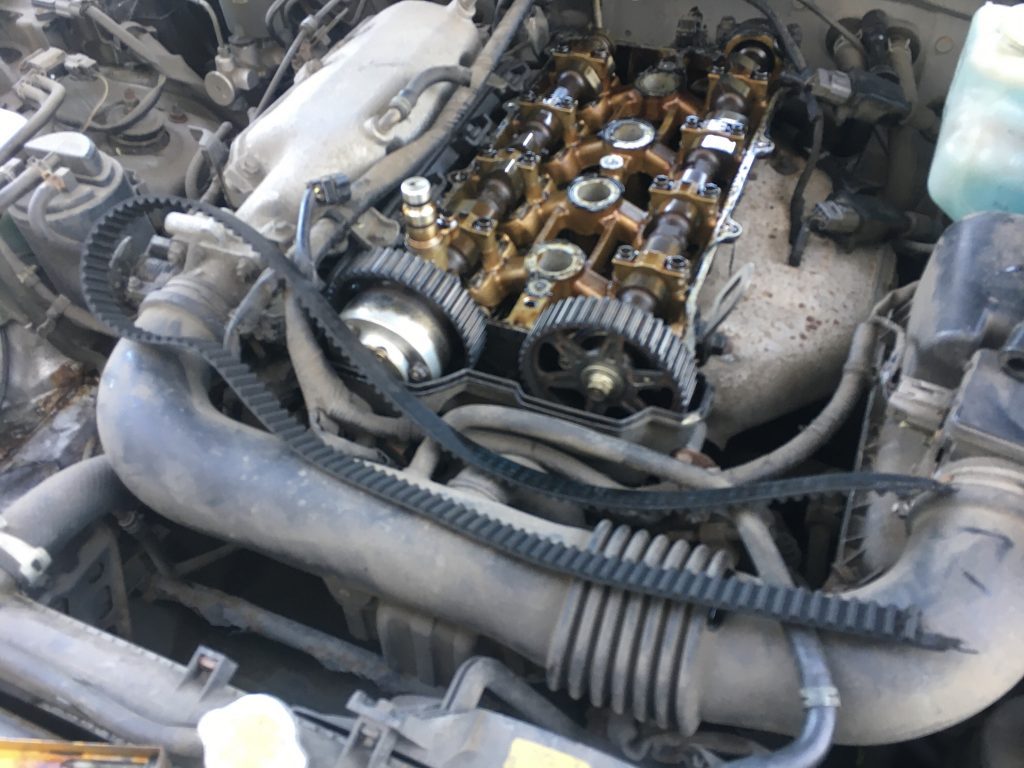
One thing that really spooked me was the long doodad in the image below, below the spark plug wiring. None of the YouTube videos I watched had any such parts, so I was stumped. Nor could I find any diagrams online that explained this mysterious appendage.

A complete overview of the spark plug wiring.

Luckily I stumbled across a video by an American dude that clarified the matter. Turns out it’s a thing called a VVT, or Variable Valve Timing mechanism. Guess I might need to look into that?

Jerry-rigged the variable timing mechanism.

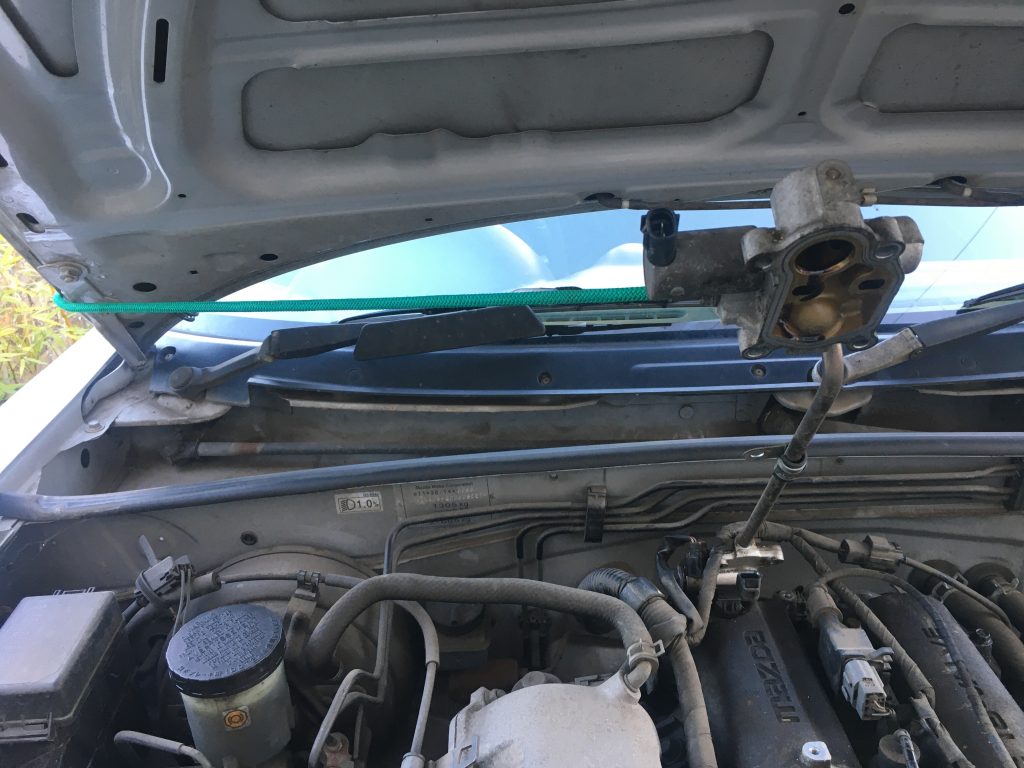
One thing I didn’t photograph, and should’ve, was a 19mm nut at the rear of the engine cover, that was a real mother to loosen. I had to use a mallet to get that loosened off! Once I’d done that I was able to lift the whole thing up and secure it with a bungee cord.

Front end of variable timing thing, note gasket.

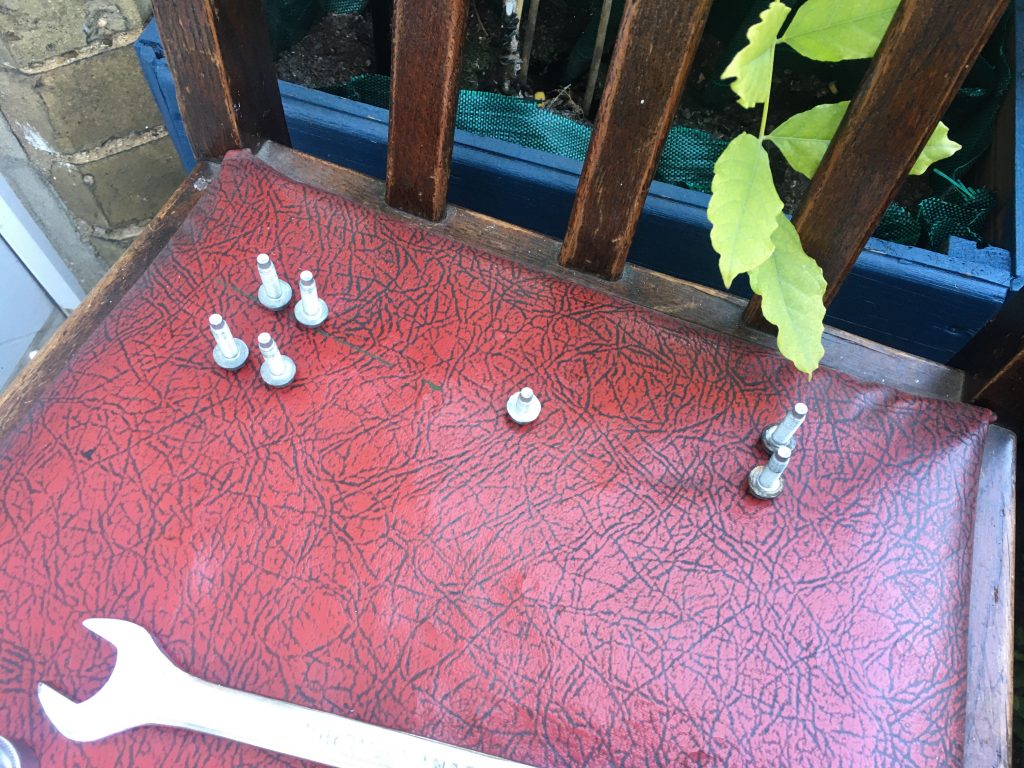
As the photo below shows, I tried to arrange my nuts n bolts in such way that they’d be easy to replace in their proper order.

I tried to keep my nuts in order.

As can be seen below, I got the spark plugs out okay, these were, once again, rather different to anything I’d seenYouTubers dealing with. Fortunately if anything my set up is easier.

This tube clips into the bracket.

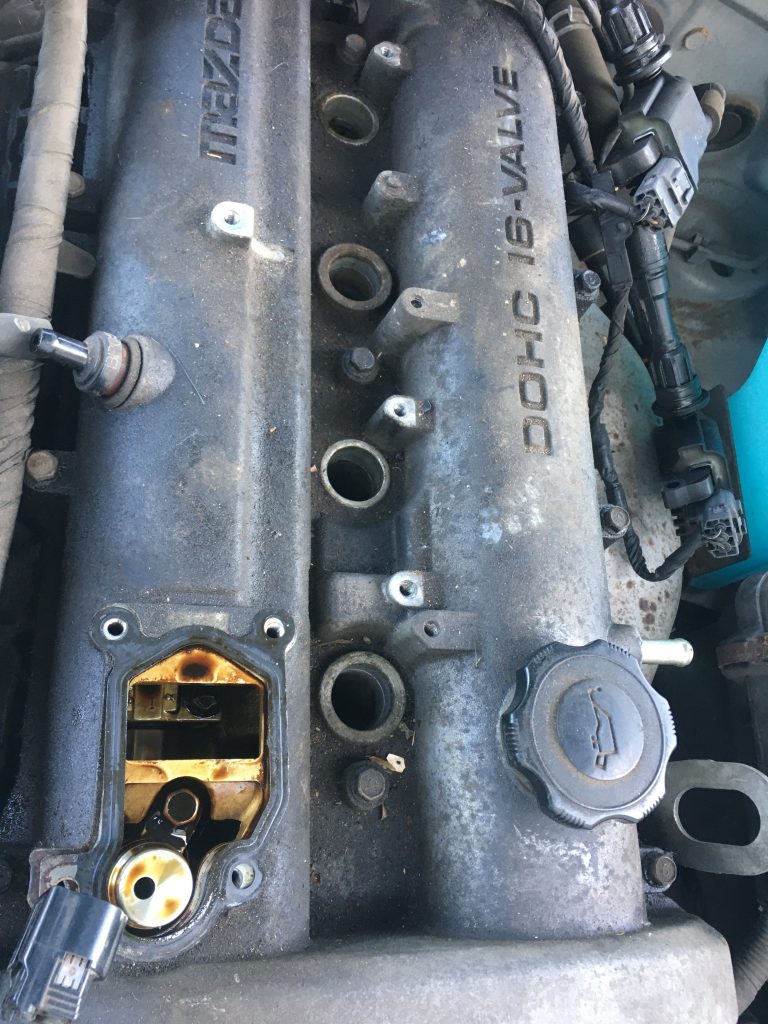
And then it was the moment of truth; removing all the bolts holding the rocker cover in place, which I did in a cross-cross fashion, a la drum head tuning, to keep the release of tension/pressure even.

And lo and behold, a busted cam belt!

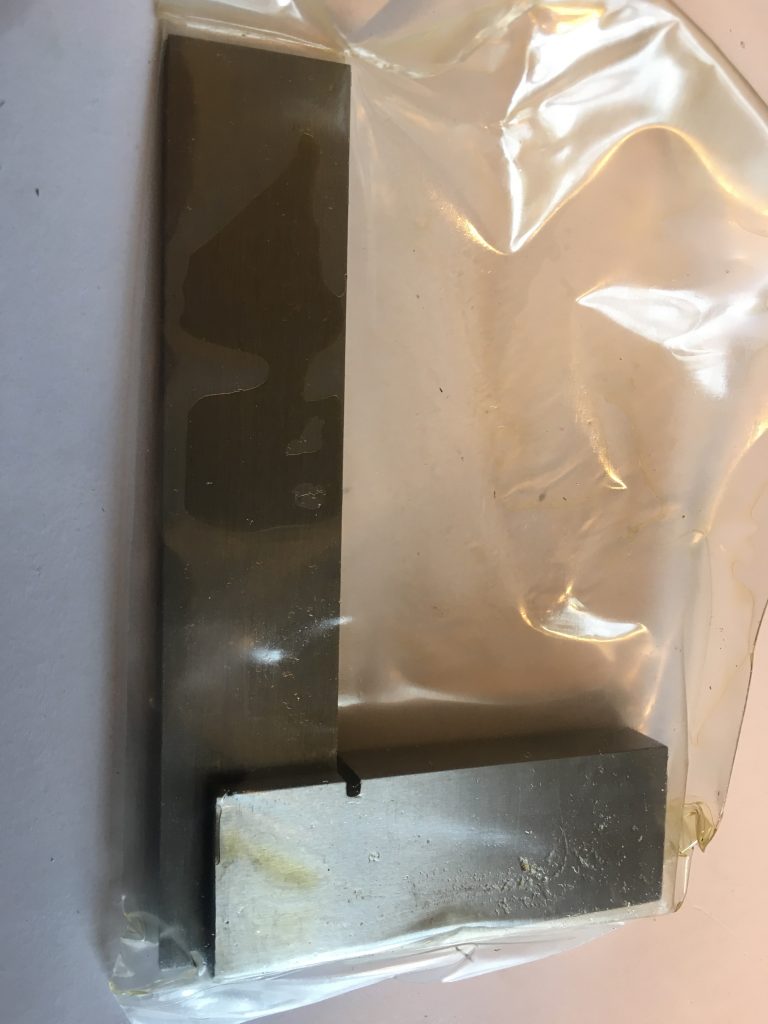
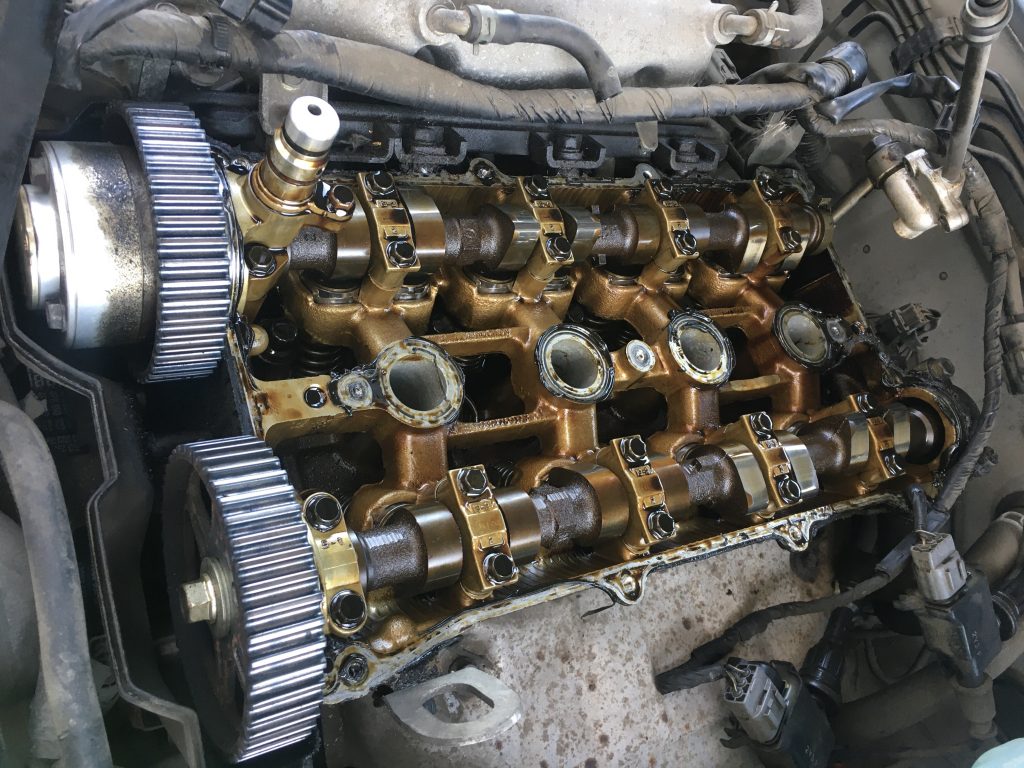
And so it was that, finally, I was able to get the cover off and see… And yea, verily, the cam belt was busted. The AA engineer spook sooth! I was able to gently work it out. And it’s lying there, rather tragically, in the above pic. But is the engine itself okay? I can’t tell, to be honest.

The engine, in all its glory.

So, I managed to get the engine apart, and find the source of the problem. And the AA guy was right. Busted cam belt. Now what do I do? I guess I have a crack at replacing the timing belt? But that’s an even more complex and challenging job.

HOME/DiY: The New/Old Shed Arrives!

The blue building is my current/old shed. The pile of stuff on the ground is the new one!

Yesterday old school friend Trevor very kindly helped me move Ken’s old shed from his new place on Norwood Road to our home. Cheers, Trev’!

It doesn’t look too impressive (pictured above). But then you can’t actually see it, as it’s all under the roofing materials. The wooden crap on top is only there to stop stuff blowing away!

Ken, on a recent visit.

Thanks also to Ken, for the shed itself, and for very patiently storing it in his garden for a good long while! And also to Ruben, our neighbour, who helped us unload when he saw us shifting the panels.

Moving the ‘new’ shed highlighted the dodgy wiring to the current shed, which is overhead, and got in the way a bit! And access to the garden via the communal back passage-way (snigger) was always going to be hard work.

Next up I need to do the concrete base. And then it’ll be time to start restoring and re-assembling the shed itself.

Trevor, on his smallholding, just outside March.

Anyway, we’ve been very lucky. A free shed, and a free move of said shed. That’s really something. And Teresa and I are very grateful. We were also lucky with the weather. Amidst frequent rain showers, some very heavy, we enjoyed a sunny spell for the actual move. The heavens just opening as we finished. Result!

I wish I’d got some photos of the process of actually picking up and moving the shed. I should’ve had Teresa ride shotgun, with some form of camera, recording the happy event! But the activity of doing it all was quite demanding, and chased all thought of documenting it from my mind.

The garden, looking very ‘green and pleasant land’-ish.

The weather has been very changeable, and drowsily muggy, of late. When it’s not cloudy and raining, it’s warm and sunny. And the two states have been alternating rapidly. Just now we got back from a little lunch break in the sunshine, and boom, the rains cameth down.

HOME/DiY: Wisteria planters

The planters, wisterias and frame in situ.

Teresa’s been on at me for a good while to make two planters for our two wisteria, and the front door arch she recently got for us.

I’ve been putting it off on account of not having the right timber to hand. We’ve been looking out for free pallets. But failing to find any. So I just went ahead anyway with what was at hand.

The building stage .

I used reclaimed Victorian floorboards we got free (Freecycle!) many years back, for the base. And the sides are made from cladding from one of our pal Ken’s outbuildings. I didn’t really want to use the latter wood. But needs must!

The cross-members over the top of the front planter, in the photo above, help keep things square whilst I add side panelling to the corner braces.

Painting the planters.

They’ve been given a double coat of outdoor paint, had drainage holes drilled (and painted, to hopefully stop or slow ingress of water!), and are lined with weed suppressing fabric, with a bit of gravel for drainage/ballast at the bottom.

We’re hoping the fabric will extend the life of the planters whilst allowing water to flow fairly freely. We’re also hoping that moving the wisteria from their pots into these planters won’t traumatise them. They appear to be growing very well!

Part way through the job of ‘installing’ stuff.

HOME/DiY: New Letterbox Flaps

Ta-dah! As I find myself saying these days…

Amazon Vine have provided us with a free letterbox set. Which is great, as our old one broke years ago. And I haven’t, until now, felt like replacing it.

The indoor before.

The old one was ‘brass effect’. This new one is a silvery aluminium type colour. It’s also bigger than the one it replaces. So I had to drill and cut out a slightly wider aperture, to accommodate it.

The outdoor before, sans flap!

I was able to reuse the self-tapping screws – 10 in all – from the previous installation. it was a learning experience. As I e never done ‘owt like this before. And though I loathe it, as a material – aesthetically, primarily – the UPVC was, thankfully, easy to work with.

New one is bigger than old one…
Necessitating drillage and cuttage…
UPVC, hideous perhaps, but very workable.

The door itself is, to my mind/eyes, hideous. And it’s old and tatty. But at least it’s a little less tatty looking now! I guess I should give it a quick wash. Later, perhaps?

How she’s looking from inside now…
… and a closer outside view.

Well, I’m happy enough with this little job. Teresa’s been off this week, but is in Cambridge today doing a half day of training at her workplace. Bummer! But it does mean I can do one or two things like the letter-flaps.

Time for a well earned cup of tea now, and a few more pages or chapters of Cowboy Song, the really rather excellent Phil Lynott biog’ I’m currently reading.

MiSC: Lunch! Oh, and more digging, etc.

Today’s home-cooked lunch.

I was talking to a long term pal I haven’t seen in way too long last night – hi Tim! – who mentioned that his son was getting into fine dining. I’ve seen some of Sam’s posts on FB, on foodie stuff. And the food, indeed, the whole experience, looks great!

Mmm… that was tasty!

Tragically, as things currently stand, we have neither the funds nor the connections – for starters March, where we live, is not known for its epicurean eateries – to mange in that manner. At least not at present.

A darn thick root!

But I have been indulging in eating out more than my wallet can really stretch to, as a reward to myself for the labouring work I’ve been doing in house and garden. Or is it just out of laziness!?

Excavated and hacked out wi’ an axe.

Plans for the current Easter break include putting in the form-work for the concrete shed base (aka drum bunker ceiling/roof). And that in turn entailed finishing the excavation I’d already mostly got done out in the ‘back yard’, as our former colonial cousins have it.

Dismembered and earth filled back in.

At this stage that mostly involves removing a large thick tree root, and levelling the earth as best I can. I did both today. Hacking the root out with a tiny ace was hard work! I had a larger axe. But leaving that out in all weathers has proven unwise; the head came orff recently, in an alarming manner.

Raked, sifted for stones/roots, and levelled.

With the big root gone, I used a large spirit levels to see how flat the whole thing is. To my great surprise and happiness, it’s a lot better than I thought it’d be. It’s definitely not calm lagoon flat. But it’s probably not too far off workable.

But back to matters edible… I was tempted to go to the local pub for an all day breakfast, or – as Count Arthur would be pleased to hear – what they’ve taken to calling all day brunch. But I resisted this beckoning, and instead cooked up what you see at the top of this post.

My lunch time companion.

I’m pretty sure supermarket bacon suppliers put water in their bacon. Which I find really irksome. it changes how it cooks. Anyway, butter was employed liberally, and everything cooked together – introduced at timely moments, natch’ – and came out proper tasty.

So, please feel free to rate my plate. Washed down with a coffee, I was mighty pleased with myself!

HOME/DiY: Gates, finis?

Ta-dah! I must admit I’m very pleased.

Only a week or two back we had nothing on the drive to ‘fence us in’. It now feels much more homely and private. Mostly psychological, I suppose. But just coming home to this and seeing it there makes us smile.

The complete view: bricks, iron and wood.

Things are going to look even better when the planting gets more mature. We have the bamboo by the window, several pots – lavender, etc. – two wisteria, to climb over the doorway arch, and we’ll be planting a cherry in the big green planter.

The willow, or whatever it is that’s in the green planter at the mo’, is alive. But it has never really flourished. So we’ve cut it back, and will re-home it somewhere else.

We can still park on the drive, if so desired.

We’ve wanted to do this for ages. So it’s great to finally have it done. And doubly so to do it myself. Much cheaper, and giving a greater sense of accomplishment and satisfaction.

A man happy in his work.

I love painting! be it art, or home improvements/DIY. It’s pure unalloyed pleasure. I have one or two areas to touch up, snigger. And I might put some weather-proofing strips in places; atop the bricks, maybe across the top of the gate?

But it’s 95% done. And it looks and feels fab!

DAYS iN/DiY: Home & Garden – Shed footing cont.

A semi-pano’…

So, the ‘big dig’ solo gig continues. As of this evening I’m within one foot of completing the basic slab first scoop.

And another semi-pano’.

Using my iPhone to snap pics, even using the ‘pano’ option, isn’t great. I might get a fisheye lens, or wide-angle? Or a set with both, perhaps?

Tomorrow Chester is supposed to be neutered. But I suspect that may not happen, on account of his ‘impaired digestion’. We shall see, I guess.

I wonder how many tons of waste I’ve removed from our garden? Even just during this latest episode, it’s been a fair amount. I should’ve tried to keep track and work it out.

I suppose I can still weigh – how, I wonder? – a bucket full of earth, another full of stone, and one with weeds/plant matter. Then I could at least guesstimate.

HOME/DiY: Greenhouse Work, Cont.

Added panels to the open end spaces.

Today Teresa and I worked on sealing off some of the still open spaces on the greenhouse. The two largest are, or rather were, the front and rear panels in the ‘gable ends’.

The rear, seen from inside.
And the rear viewed from outside.

The next largest gaps were a series of six, three per side, between the frame that forms the tops of the walls and the glass roof. These were all different. Plus they had to be notched, to accommodate the smaller roof framing parts. These took a lot of work!

Sealing the gaps in the ‘eaves’ of the glass roof.

There’s still a deal of work to be done. Rather annoyingly the door frame is well out of square. I recall making Herculean efforts to ensure this didn’t happen, when I built the greenhouse framing. So, whether things have shifted, or I just got it wrong from the start… I don’t know???

Well that’s all immaterial, frankly. I just need to fix it somehow. I certainly made sure all the upper body opening windows fitted. I remembered using the electric plane to do so. But these too now refuse, like the door, to close. So they all need sorting as well!

There are little gaps each side of these latter windows; a pair each per window. And with four such windows that’s eight little leaks! Once those are done, all that will remain will be the little metal pegs and latches, so the windows can be kept open as and when needed.

HOME/DiY: Workshop – Groundhog Days, or Tidying Up … (Again!)

I’m typing this at 3.22am, having woken in the night, about an hour ago. And not gotten back to sleep. Insomnia is a recurring issue these days, or, I should say, these nights.

Another recurring issue is clutter. Everywhere. In every room of our home, and in all the outdoor spaces. And, most likely, in my (our?) minds!

I’m determined to address this pressing problem, even if it’s slowly and gradually. That’s the only realistic way. I think. Over this half-term the primary focus, as well as the lounge area downstairs, for me, is my workshop.

Our pal Ken recently pointedly described my workshop as a storage area, as opposed to an actual workshop. The bleedin’ cheek! But in some respects he’s right. In order to work in there at all, never mind safely, I simply must get the place in to some semblance of order!

Things I’ve done recently to this end include building a tool caddy, and repeatedly going over everything trying to find places to store stuff, vacuuming regularly, and putting up various shelves and hooks, etc. Oh, and daily tidying up sessions.

Several further steps I ought to take include: creating efficient storage for abrasives, esp’ sandpaper; organising my wood supplies more efficiently (indoors and out); either making or putting into storage currently unattended music projects (drums and guitars!).

If I can do all these things this week, I shall be very pleased!

HOME/DiY: Workshop – Machinist’s Square Set

Oh yes!

It’s interesting, what causes great happiness, and how that might evolve over the years. Today I was overjoyed that the post man delivered a set of four machinist’s squares! I ordered them about a month or so ago, on Amazon UK’s website, but they shipped from the US.

Well packaged for shipping!

I ordered the same brand, Woodstock, as Patrick Sullivan mentions he has, gleaning this info via his excellent ’instant access‘ tool caddy video. They arrived very well/nicely packaged, in a colourful card box, inside of which each square is individually boxed, and, in a third layer, in a sealed plastic bag!

Can you see the oil residue?

In fact there’s actually a fourth protective layer… of oil! I brushed some of the oil off with tissues. Very impressively packaged! And they look and feel beautiful. Can’t wait to get these into my caddy and into use, in the workshop!

Mmm… lovely!

Also arrived in the post today, a book on US WWII tanks and tank destroyers.