
NB: This is the first in what will be a pretty large series of archival entries, covering stuff I’ve done in the last year or two, prior to starting this blog.
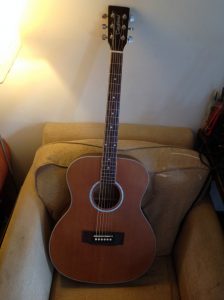
Some while back I got a pretty nice Tanglewood acoustic guitar, complete with soft-case, off Freecycle (I absolutely love Freecycle, and use it loads!).
The owner was giving it away on account of the bridge failing. Thanks to a less than ideal manufacturing process, whereby the bridge is plonked on to the body with areas of the raised veneer overlapping its footprint, it’s bound to be a potential weak spot.
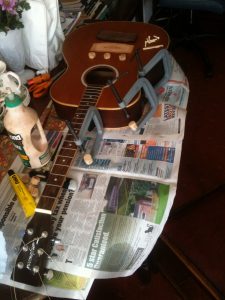
This bridge had pulled off and away from the body, thanks to the heavy load of tension the tuned strings generate. It was still attached, but flapped around like a barn door. And made tuning up properly impossible.
I was a bit stupid about removing it, and omitted a step that would’ve made the whole job better: I should’ve scored around the old bridge with a sharp knife, or scalpel, before removing it. As it was, when I prized it off, it took some fibres with it that were outside its footprint.
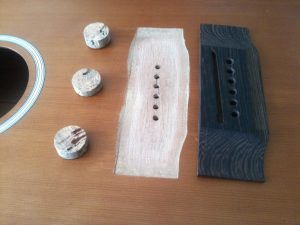
A new bridge was then made from some suitable looking dark wood I’d been given by a local carpenter. It’s quite a bit larger than the original bridge (you can see a ‘ghost’ of the latter in the pics), and I kept the shape simple, with a full rectangle giving more area, for better adhesion to the body.
The bridge itself is another jazz jobbie, in as much as I didn’t really design it so much as wing it. I did of course transfer the alignment of the holes to receive the strings from the original bridge. And I tried also to get a good height, for a nice low action. But with the latter it was more luck than planning.
I really like how it turned out, design wise, as I love how it looks. And the new action is really nice. It actually took two attempts to successfully glue my new bridge to the body, my first attempt resulting in the bridge pulling off again, in a repeat of the original debacle.
However, not one to be too easily discouraged, I tried again. The secret of success proved to be really going to town on the soundboard prep. I scored around the footprint of the new bridge, and then diligently sanded and lightly chiselled, etc, until I’d achieved a decent flat uniform surface, with a rough texture, ideal for maximum adhesion.
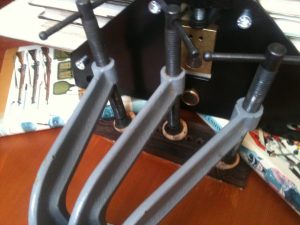
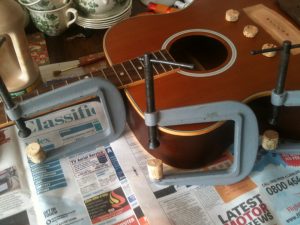
Gluing up bridges is tricky, because of the limited and awkward to reach access. I had to buy three dedicated long-reach G-clamps, with the added length being in the depth of mouth, i.e. horizontal, rather than vertical, so as to reach from the sound hole back to the bridge. Acoustic guitars also have numerous internal ribs or struts, which one needs to avoid damaging.
So, this was a tricky job, and took two goes. But, as I intend to one day build my own (predominantly classical) guitars, this was a good way to get my hand in, as a proto-luthier. After all, if I couldn’t simply replace a bridge, what chance have I of building a whole instrument?
Anyroad, I’m really chuffed. This is now a decent playable acoustic, and sounds and feels much nicer than my old Hohner, being closer to being on a par with my lovely Yamaha classical.
Guitarist friends have been very positive about it as well. One guy, Rob, even saying that he didn’t normally like Tanglewood, but thanks to my improved bridge, really liked this one.