MUSiC/DiY: Workshop – Bodhran/Frame Drum, #2 (Part the 1st)

Having cut the body from a 13” tom, sanding the cut edge.

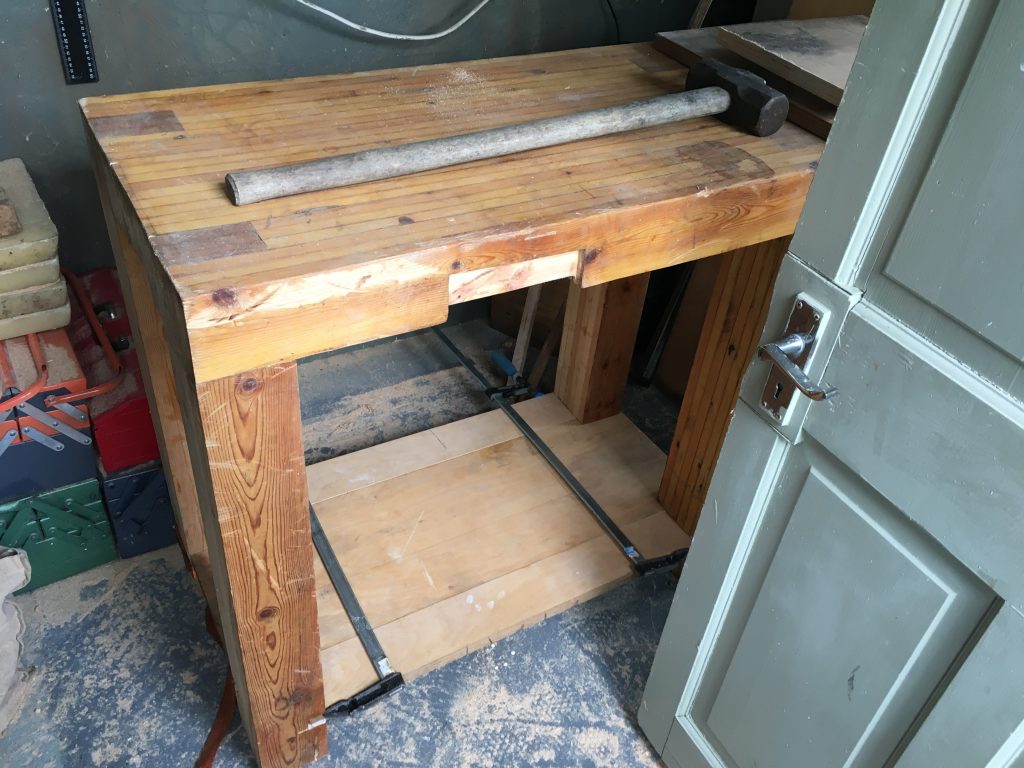
The workshop is fairly clean and tidy now, at last. I decided to make a start on frame drum #2. I’m not really a fan of Irish folk music, hence it not being a ‘bodhran’, as far as I’m concerned! The last frame drum I made was for a person Teresa works with, who is a fan of Oirish folk. So, that was a bodhran!

I routed a new bearing edge on the cut side.
It has a more symmetrical and softer profile than the donor tom has.

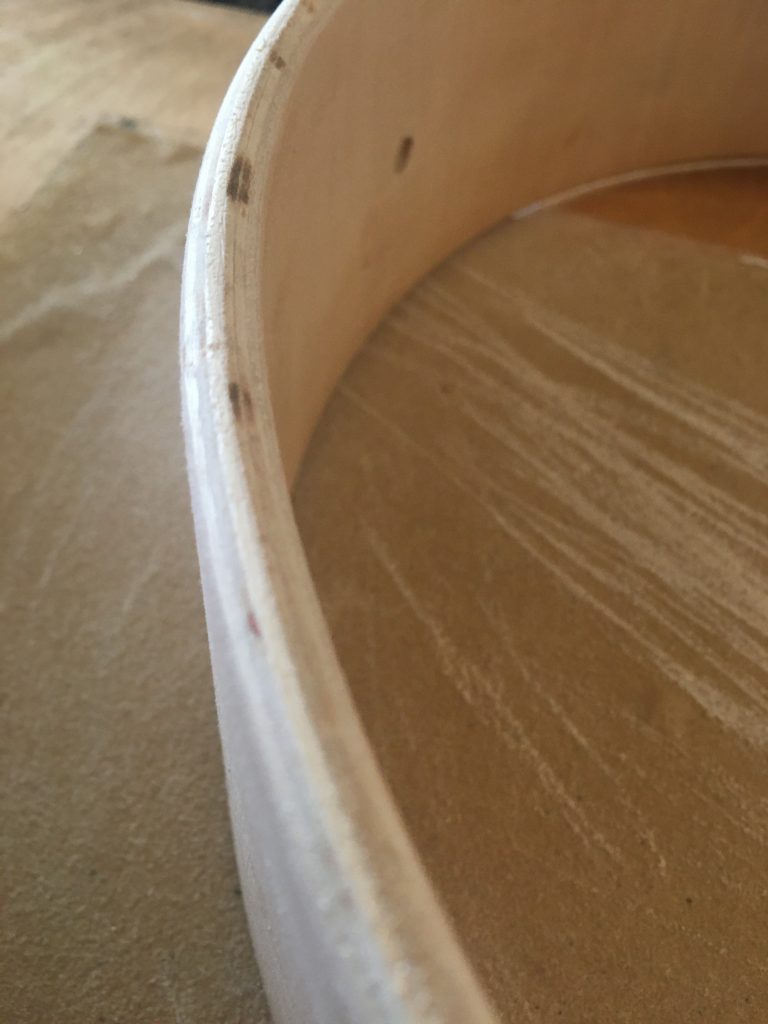
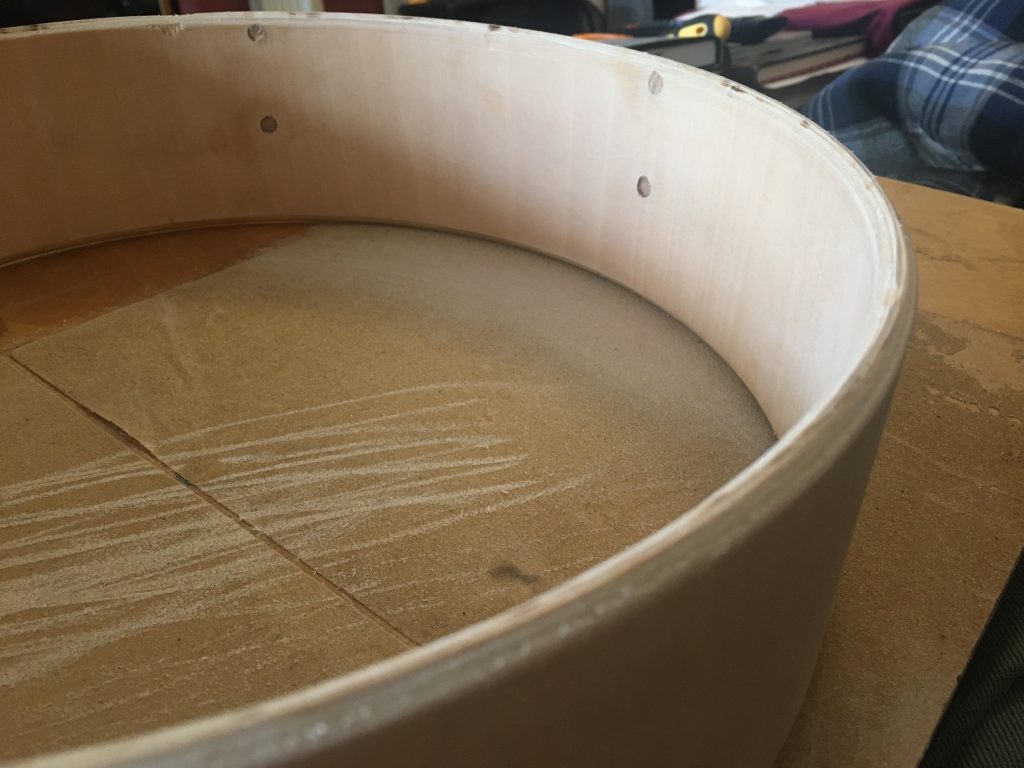
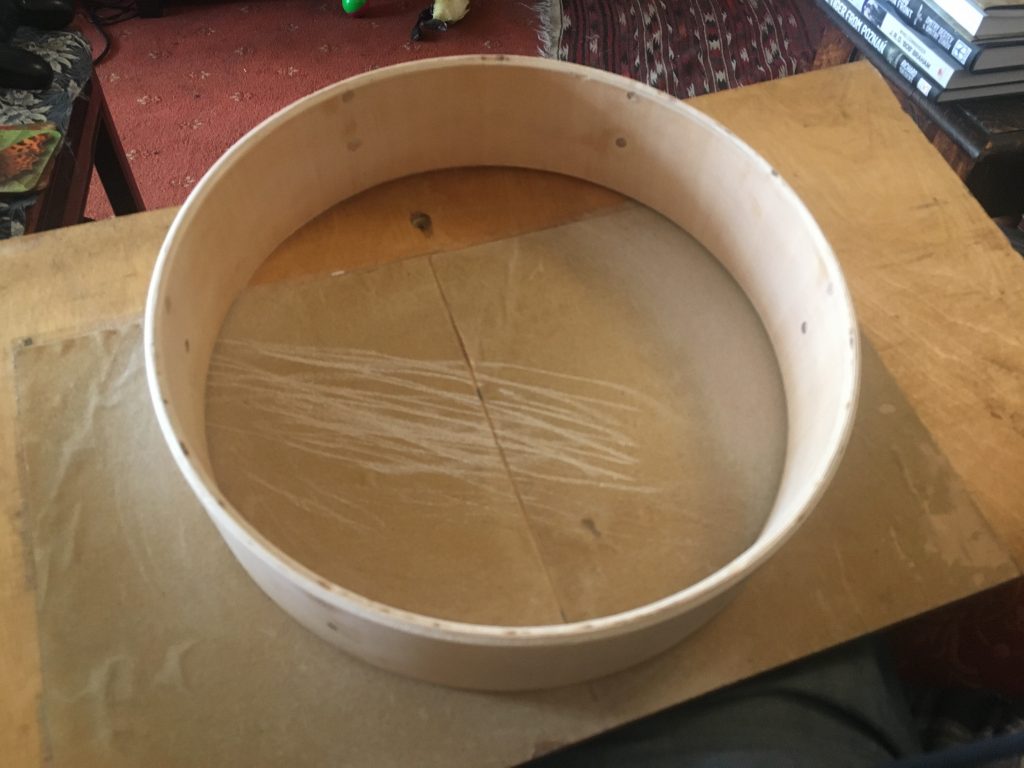
Like this first, I’m making it from an old 13” rack tom. First I cut around the diameter, judging the depth by eye/feel, as opposed to measuring to a set depth. Then I fill a loa of the holes where formerly tuning lugs were mounted, using dowel.

The last one I made was sprayed black. This is lacquered for a natural wood look.

I’ve knocked off for the night, having done that much. I also sanded the cut side. The dowels need to dry overnight, and then it’ll be time to sand then flat, and fill any gaps. if I can I’ll also rout bearing edges around the cut side.

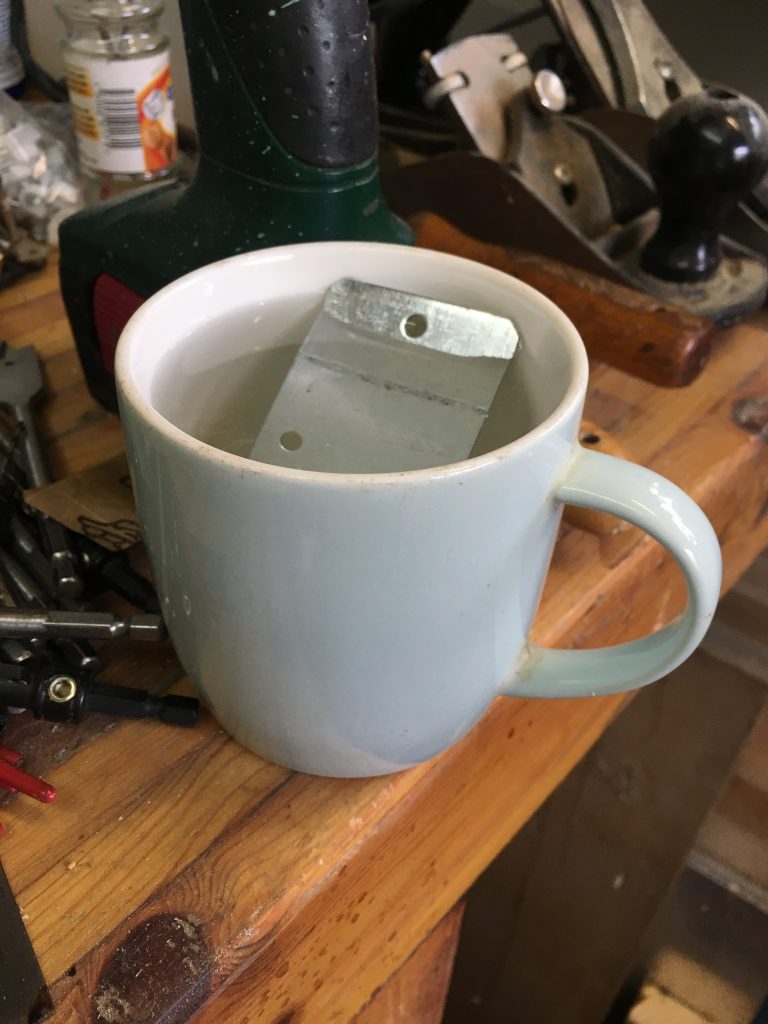
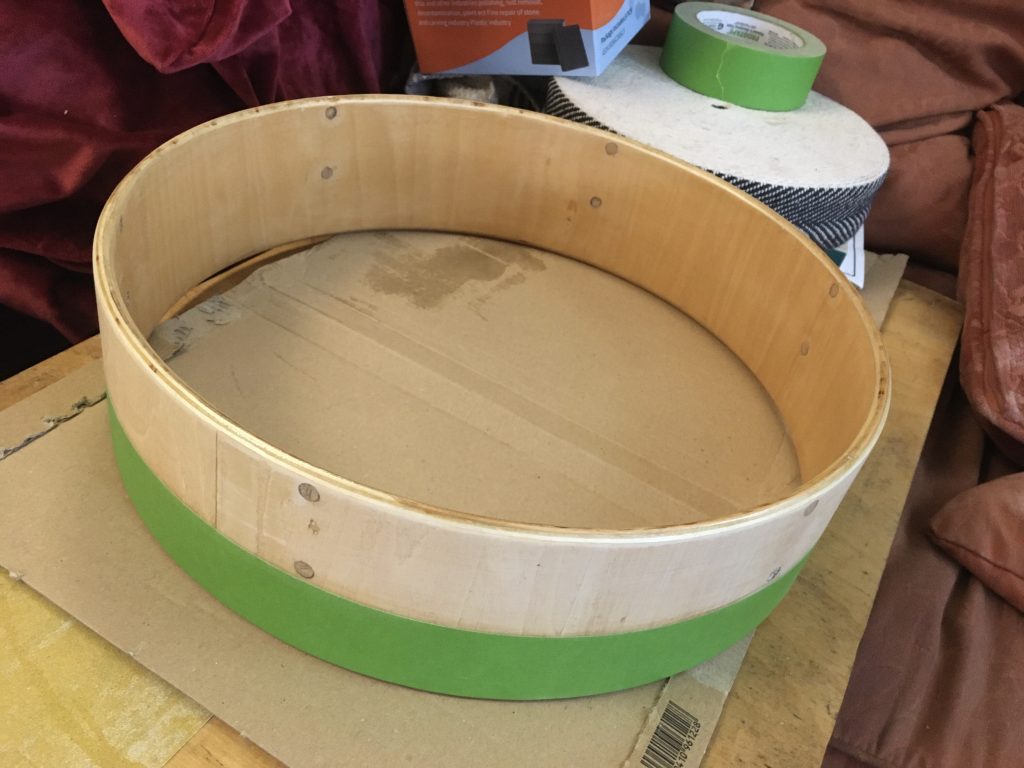
Today, Sunday,31st Nov – Hallowe’en! – I taped off the drum shell, and sanded the exposed area, ready to take the goatskin head, which had been soaking overnight.

I taped off the area of wood that will be visible once the skin is attached.

I forgot about the details of this process, and has to re-learn them on the fly: stretch still wet skin; fix using wood glue, clamps, and finally elastic, wound round several times; clamp elastic; re-stretch skin, re-clamp, and leave to dry/tighten.

This didn’t go as smoothly as last time. And Chester, our beloved moggy, savaged the goatskin, which was very poorly packaged, whilst I was out at work. When I got home, I found he’d left tooth and claw holes in it.

Goat skin glued on, clamped and ‘elastic’d’!

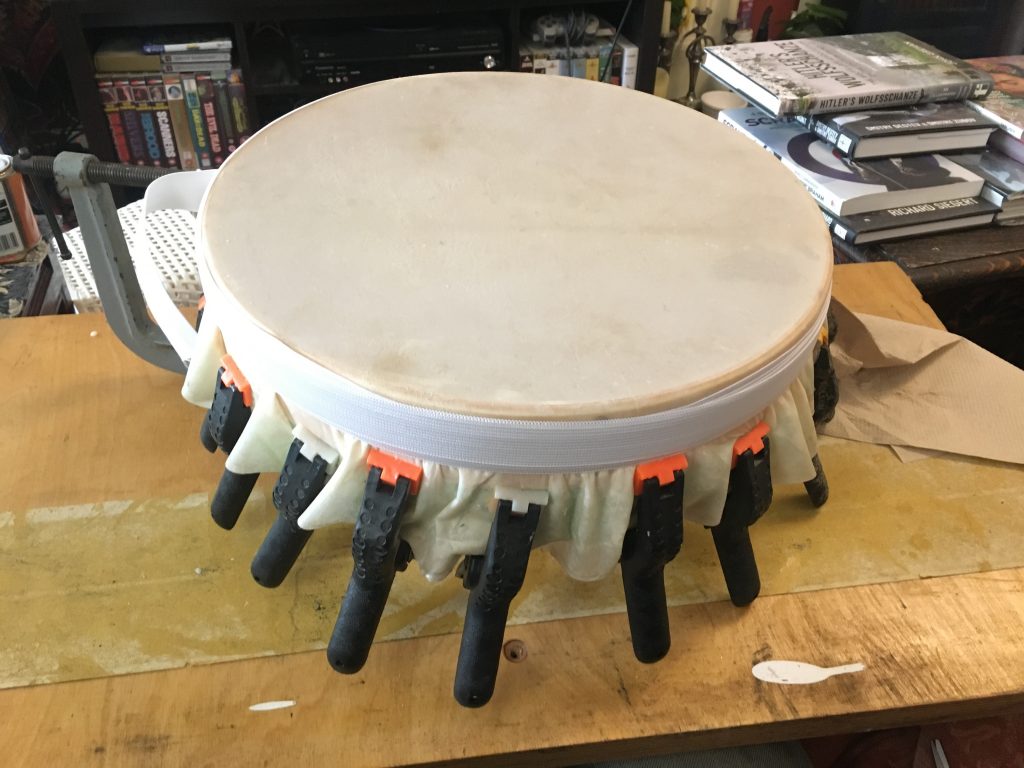
This meant I couldn’t place the skin equidistant from all edges. Instead it was quite a way off centre. This meant that when securing it to the drum, some areas had excessive amounts of skin to grip on/stretch, whilst others had barely enough to grip, or gain any purchase when stretching the head.

I’m just hoping that when it dries out it’ll be tight enough to sound ok. My first attempt, perfectly undamaged, and therefore well centred, came out very nicely. Perhaps too tight. So I did want a lower tone in this second one. But not too loose/low/baggy… we shall see, or rather hear, once it’s dried.

HOME/DiY: Workshop – Groundhog Days, or Tidying Up … (Again!)

I’m typing this at 3.22am, having woken in the night, about an hour ago. And not gotten back to sleep. Insomnia is a recurring issue these days, or, I should say, these nights.

Another recurring issue is clutter. Everywhere. In every room of our home, and in all the outdoor spaces. And, most likely, in my (our?) minds!

I’m determined to address this pressing problem, even if it’s slowly and gradually. That’s the only realistic way. I think. Over this half-term the primary focus, as well as the lounge area downstairs, for me, is my workshop.

Our pal Ken recently pointedly described my workshop as a storage area, as opposed to an actual workshop. The bleedin’ cheek! But in some respects he’s right. In order to work in there at all, never mind safely, I simply must get the place in to some semblance of order!

Things I’ve done recently to this end include building a tool caddy, and repeatedly going over everything trying to find places to store stuff, vacuuming regularly, and putting up various shelves and hooks, etc. Oh, and daily tidying up sessions.

Several further steps I ought to take include: creating efficient storage for abrasives, esp’ sandpaper; organising my wood supplies more efficiently (indoors and out); either making or putting into storage currently unattended music projects (drums and guitars!).

If I can do all these things this week, I shall be very pleased!

HOME/DiY: Workshop – Tool Caddy, Painted & er… Finished?

(Drum roll…) Ta-dah!

Well, no, not really finished. I may want to lacquer the paint job. And I definitely want to incorporate hammer storage in there somewhere.

Plus there are one or two vacant slots for a couple more saws at the back. Will I make or buy saws for these? I do have the wherewithal to make my own, which could be both fun and edumacational?

Painting, coat #1.

Today and yesterday/last night, I painted the caddy with two coats of a rather pleasant pale blue. I let them dry overnight, and sanded/filed out some excess paint that got into the cavities this morning. I then chiselled out a recess for the tape-measure clip, at left.

Chiselling this out was kind of fun!
Flattening out a fence panel bracket.

I made a metal plate from a fence ‘clip’ (or bracket? Is that the right terminology?), by flattening it, using a vice and a bit of hammering. I then cut it to the right length or width, using my Makita angle-grinder. Next I filed the ragged edges, rounded the corners, and drilled four holes for screwing it over the recess.

Soaking off the sticker/glue in hot water.
Cut with the angle grinder, ready to file.

Presto! A place to clip a tape-measure, over the left handle. And below the right handle I have the ‘lectric pencil sharpener. Maximising the use of space… Cool beans!

The metal plate in situ’.
Tape measure attached.
A clearer view of how she clips in place.

HOME/DiY: Workshop – Machinist’s Square Set

Oh yes!

It’s interesting, what causes great happiness, and how that might evolve over the years. Today I was overjoyed that the post man delivered a set of four machinist’s squares! I ordered them about a month or so ago, on Amazon UK’s website, but they shipped from the US.

Well packaged for shipping!

I ordered the same brand, Woodstock, as Patrick Sullivan mentions he has, gleaning this info via his excellent ’instant access‘ tool caddy video. They arrived very well/nicely packaged, in a colourful card box, inside of which each square is individually boxed, and, in a third layer, in a sealed plastic bag!

Can you see the oil residue?

In fact there’s actually a fourth protective layer… of oil! I brushed some of the oil off with tissues. Very impressively packaged! And they look and feel beautiful. Can’t wait to get these into my caddy and into use, in the workshop!

Mmm… lovely!

Also arrived in the post today, a book on US WWII tanks and tank destroyers.

HOME/DiY: Workshop – Tool Caddy, Phase 1

Laying out the tools I want in the caddy.

I started making a tool caddy today, along the lines of the Patrick Sullivan one I mentioned in another recent post. I actually tried before, earlier in the week. My first attempt was a disaster!

But I learned from my mistakes, and approached the task a little differently second time around. But before I get to that, pictured above are most of the tools I’m planning to accommodate in my tool caddy, laid out, so I can think and plan things.

I set up my Kity table-saw; everything’s square!

After clearing the crap off my table saw, I checked it, to ensure both blade and fence are totally square. And they are! Cool. I also cleaned as much crud and sawdust from inside it as I could. And I dug out an old table-saw sled I made ages ago, for a different saw, which needed some adjusting to fit this more recently acquired Kity table saw.

I needed the table saw to cut the back block of wood in half, as trying to drill deep holes in the uncut block was where I went wrong before. Not having long enough drill bits, or drill press type tools that would reach deep enough, the first attempts at drilling holes for certain items went very badly.

With the back block cut in half, the wood was much more manageable, and I was able to drill the holes I wanted much more easily and neatly. Once holes were drilled – some of which had to be drilled from opposite ends – I also had to cut channels for rectangular recesses, to take certain other items.

Doing this with the table-saw sled was great. I felt like a proper YouTube type maker! Next I glued the upper and lower halves of the back block back together, having drilled some of the holes and recesses all the way through the second half of the block as well.

The tools that go in this section loaded in place.

Step two will be putting a back on this first section, for stuff like the rulers, saws, and other taller and flatter bits and bats. I’m hoping I can do that tomorrow. But for now, I’m very happy to have got stage one done successfully.

Steps three and four will be adding similar but progressively shorter blocks, in front of this back block. But that’s for later this week…

HOME/DiY: Work bench base-shelf, and other bitzenbobz…

Two shelves, plus some lighting.*

Once again I’ve been trying to create some order in my tiny workshop.

First (lower) shelf in place.

I put up two marine ply shelves (very strong!), along the left hand wall, attached in part to the shed frame itself, at one end (and in the middle), and the shelving unit at the other. I’ve put my two drill presses on the lower shelf, and all my sundry electric tools, or near enough, on the upper shelf. They’ll need proper homes in the fullness of time. But at least they’re out of the way, for now.

And loaded with gear.

Sundry other fixtures, hooks and little shelves and whatnot, have gone up as well, providing homes for various items. I’m also going to make a portable tool caddy in the style of one Patrick Sullivan shares on his YouTube channel. But that’s a project for later. (See YT Link at bottom)

Cutting channels for the base boards.
Used a ‘skill-saw’; a few minor errors!

But the major job I’ve done, yesterday and today, is to finally insert a basal shelf on my workbench. Again, I’m using some marine ply I got off a Cambridge area FreeCycler, many moons ago. Top quality lumber! Expensive stuff. Very glad I’ve got a stash of it for jobs like this.

Snapped off the remaining wood…
… and then chisel the channels flat.
The base is a three piece construction.

I cut the channels in the legs using a skill saw or plunge saw, set to an one inch depth. Making a series of cuts, the outer and innermost first, and the clearing a bit more wood with more passes. Then I snapped of the ‘fins’, leaving behind a little wood that needed chiselling away to make a nice flat base.

Having got the first piece in, with some glue, and a soft rubber-headed mallet to encourage it into place. I started with the central plank, which goes all the way through to the outer edges of the legs. After that, I had to cut two pieces to bring the width, or perhaps rather the depth, to it’s proper size.

Clamping stuff to get it aligned.

The central board reaches all the way across the bench to the outer edges of the legs. It required serious whacking with a mallet, and even a sledgehammer, to get the board fully in place. I suspect everything’s a tad off, as I generally busk this stuff. I do measure. But I’m not hyper accurate.

The final two boards span a shorter width, between the channels on the inner sides of the legs. The boards are all glued in place. Clamps and a ratchet strap are helping get everything sold and reasonably well aligned.

The third piece finishes it off.

I’m thinking that I might add another similar board nearer the top, and put in two drawers. For the time being I’ll probably use the bottom shelf as a lumber storage and/or a place for one or two oddments, equipment wise.

Note, vice removed, and… sledgehammer!?

The final pic, above, shows the whole thing, albeit a bit obscured by the open door. I removed the vice, as I wasn’t happy with how I had installed it. I’m going to re-fit it, probably at the left end of the bench. I also have another vice that I might add. But I’m not sure where? On the bench, or elsewhere in the shop?

I’m also planning to add dog/holdfast holes. Although I might install a hard-wood top to the bench. My laminated pine top is neither perfectly flat nor very resilient. It’s easily damaged.

Sundry power-tools, on the upper shelf.

The two lamps pictured above, and at the top of this post, were Amazon Vine freebies, for review. Quite nice, although not really to my tastes. But a strip light would ultimately be better (takes up less space!). Observant viewers may spot that I ran the power to the light up and out the front of the ply shelf, so as to avoid any tools damaging it.